In this section you'll learn how to add new products to your MyCashflow online store, manage the already existing ones, and perform other product-related actions.


Products in the online store
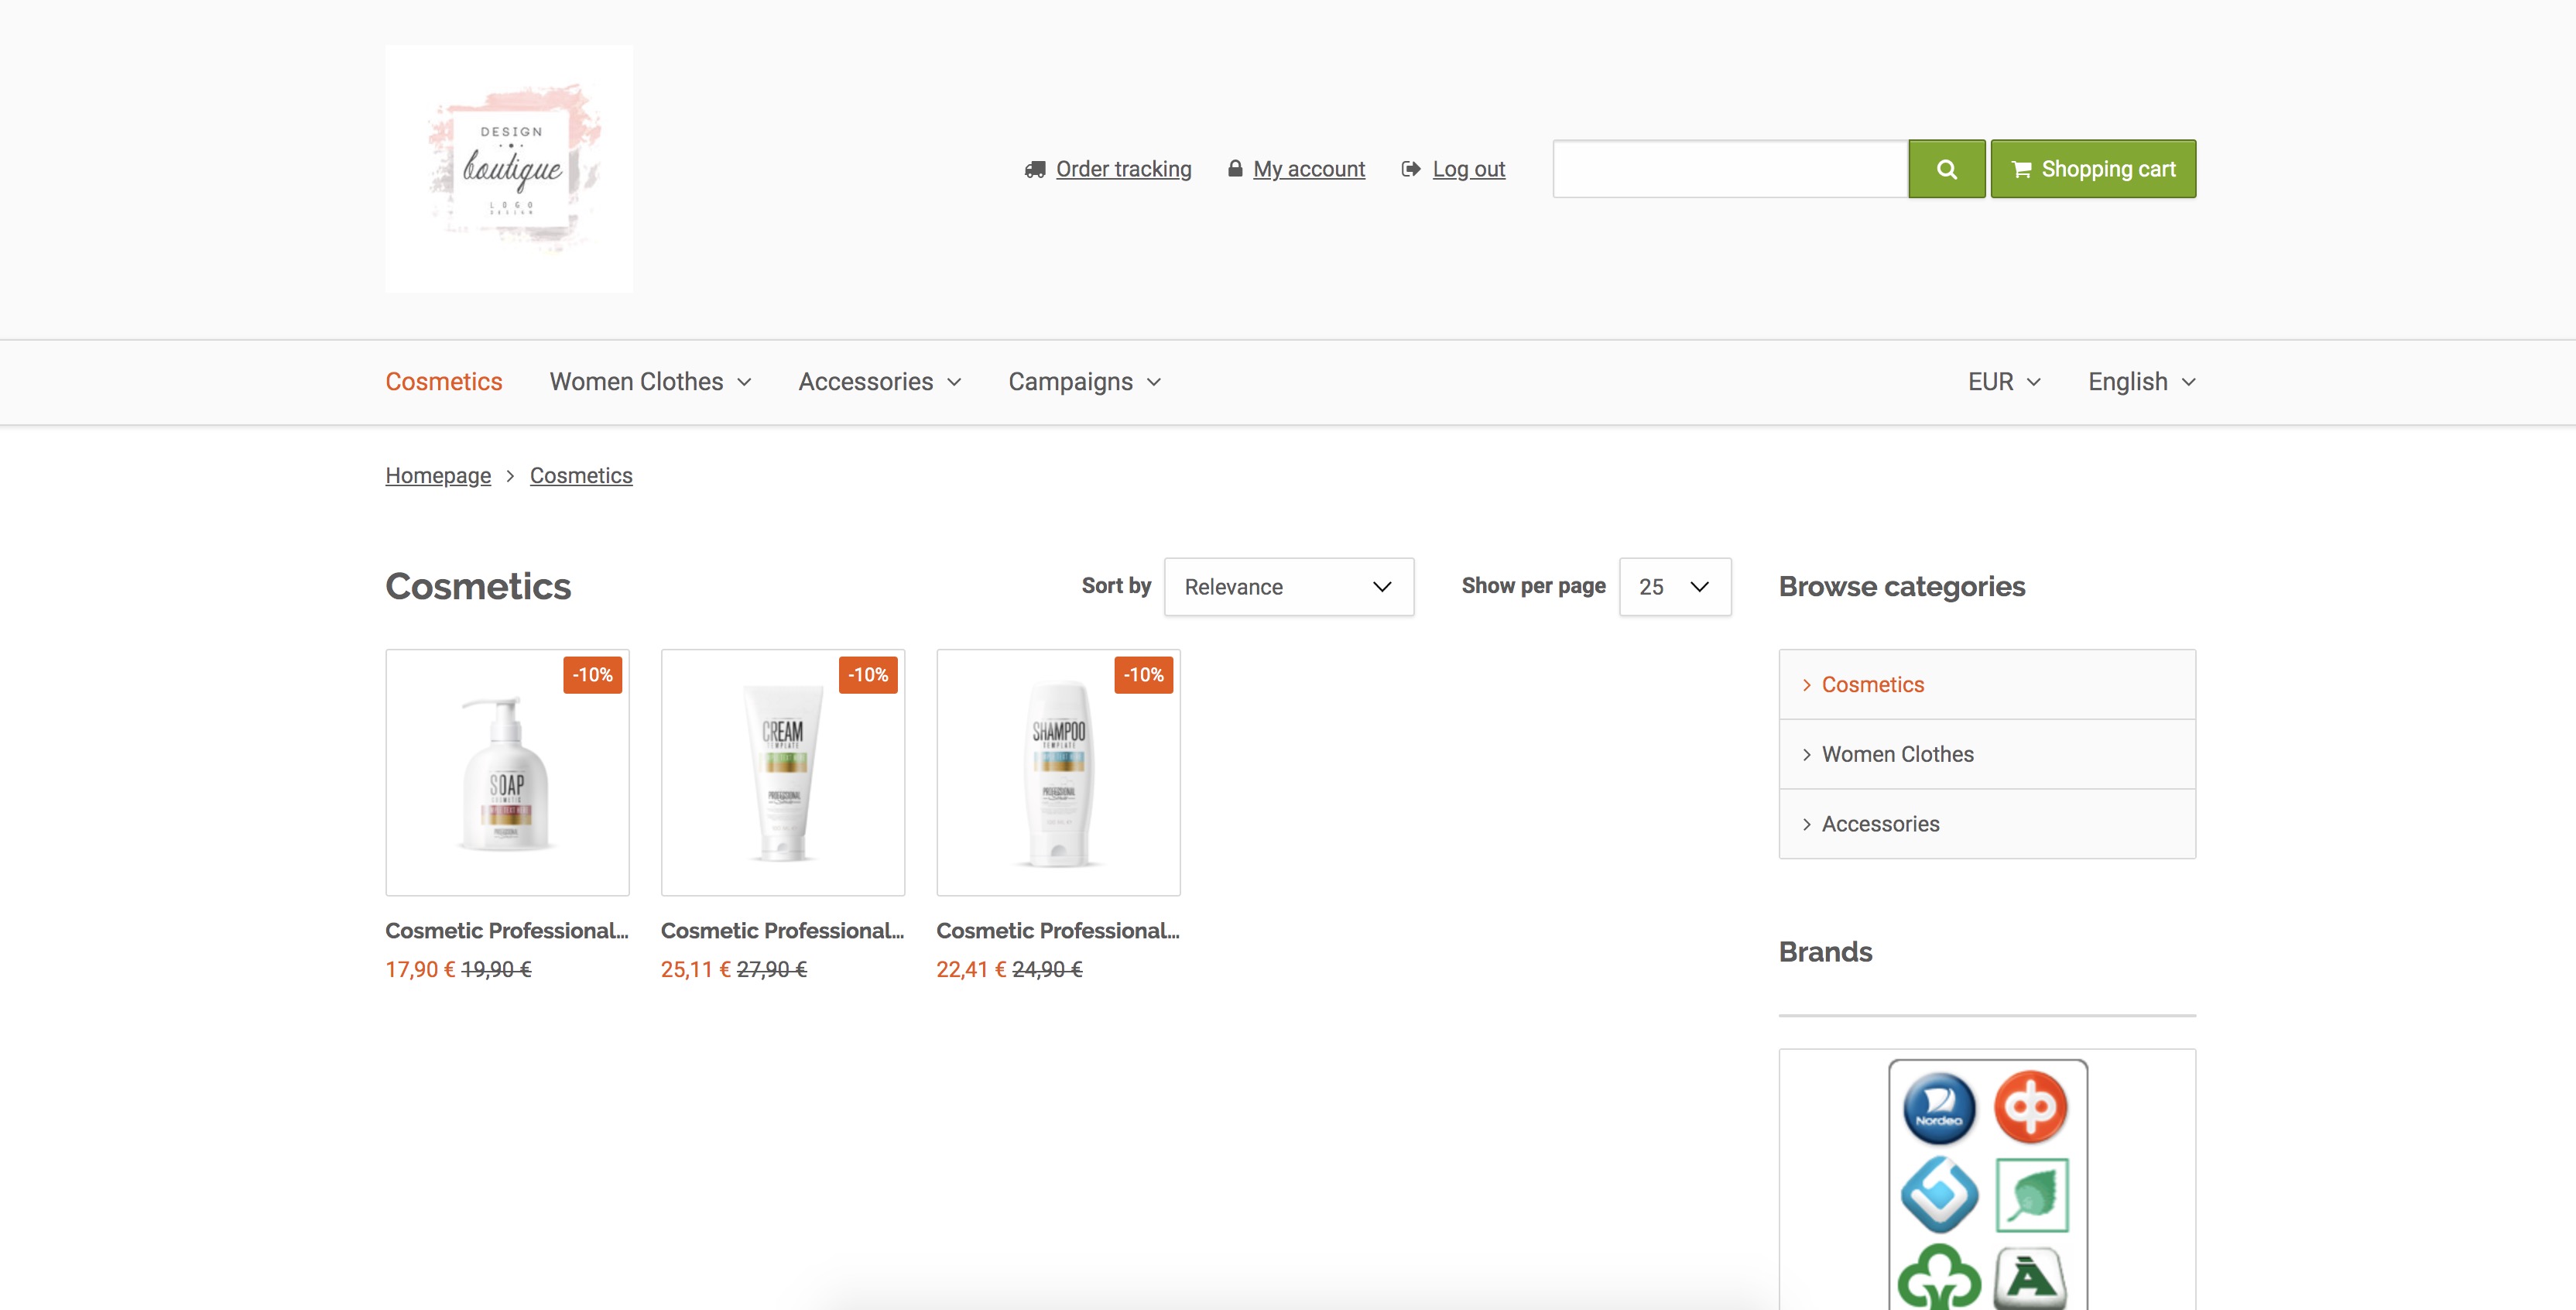

The design and properties of the product page depend on your store theme. The product page will usually contain product images and descriptions at least, as well as purchase tools for adding products to the shopping cart.
Variations, customizations, and downloads
MyCashflow enables you to create different, changeable product properties by using the following functions:
- Variations: Variations are used for creating different models of the same product (e.g. clothing sizes and colors). Use variations if you want to track the stock balance for each model separately.
- Customizations: Customizations are used to add different properties to the product, from which the customer can select the ones that suit them best. Use customizations if you do not need to track the stock balance for different properties of a product.
- Downloads: you can also add downloadable files to the product, which the customer will be able to download after paying for the order.
The Products page and the product card
In the online store's admin panel, you can manage your store's products and the related contents on the page. Here you can
- add and edit products
- classify products by using product categories and brands
- specify product discounts by using campaigns
- specify product suppliers.
The main view of the page constitutes a product list that, by default, displays your online store's products according to their last revision dates.
When you select a product category, brand or supplier from the left-side pane, the main view's list will display the products included in the specified selection.
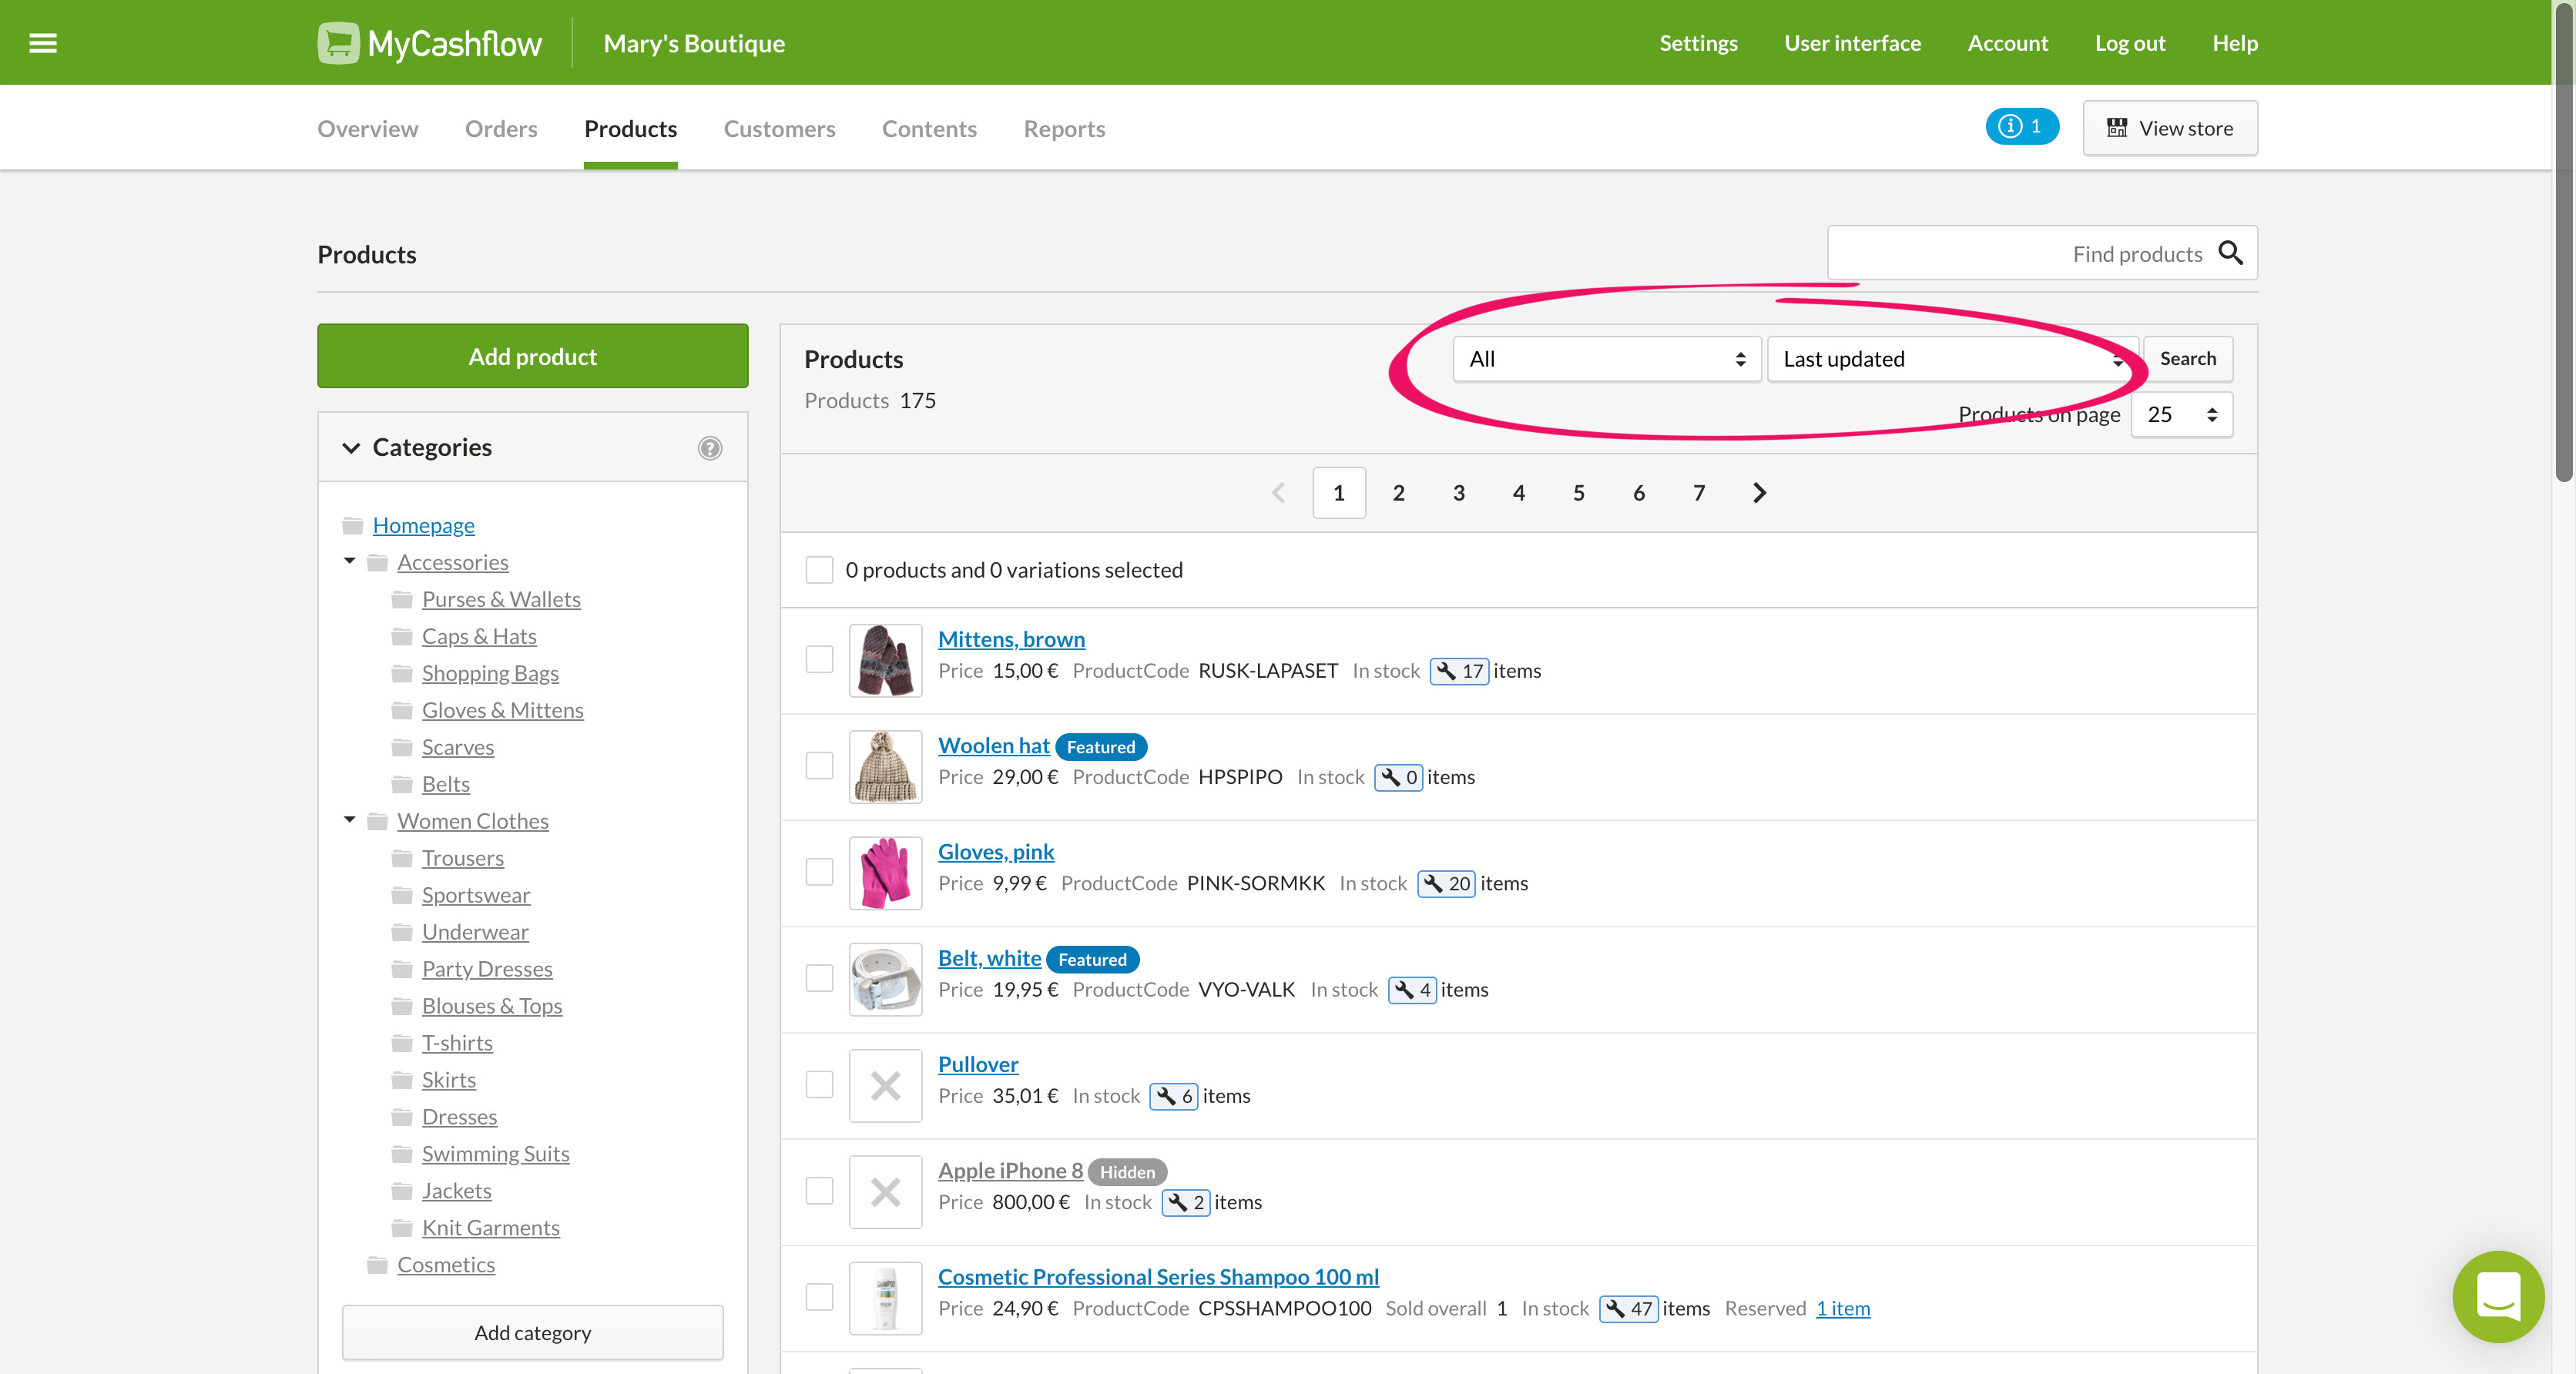
The product search in the admin panel is not the same as the search in your online store.
Product card
When you open a product on the page, you will see a product card with a summary of the product details. Here you can also manage the following information:
- the product's stock details
- product-variations
- customizations
- cross-sell products
- the product's campaigns
Adding and editing products
Before adding products to your online store, think what kind of product it is:
- Are there different models of the product (e.g., clothing sizes and colors) with separate stock balances to be followed? In the case of such products, you may want to create product variations.
- Does the product have changing properties that do not have to be accounted for in the warehouse (e.g. T-shirts with prints that the customers can select themselves)? If that is the case, you may want to use customizations.
- Is the product completely digital? Does it contain downloadable files? If the answer to any of these questions is yes, check out downloadable products.
Here is how to add a new product to your online store:
- In the upper left corner, click .

After saving the product, you'll be redirected to the admin panel's product card, which contains the product summary and certain product settings.
After creating the product, you can enable stock management for it, create variations and customizations, and also add downloadable files to it.
Product visibility in search
If you use the Free plan, the newly created product will immediately become visible in search results in the customer area.
In the paid plans, products are indexed by the search engine during the night, once every 24 hours. This means that the product may not immediately appear in the online store's search results.
The product form's fields
In this section, you'll learn about the product form's fields and the details entered into them.
Basic information
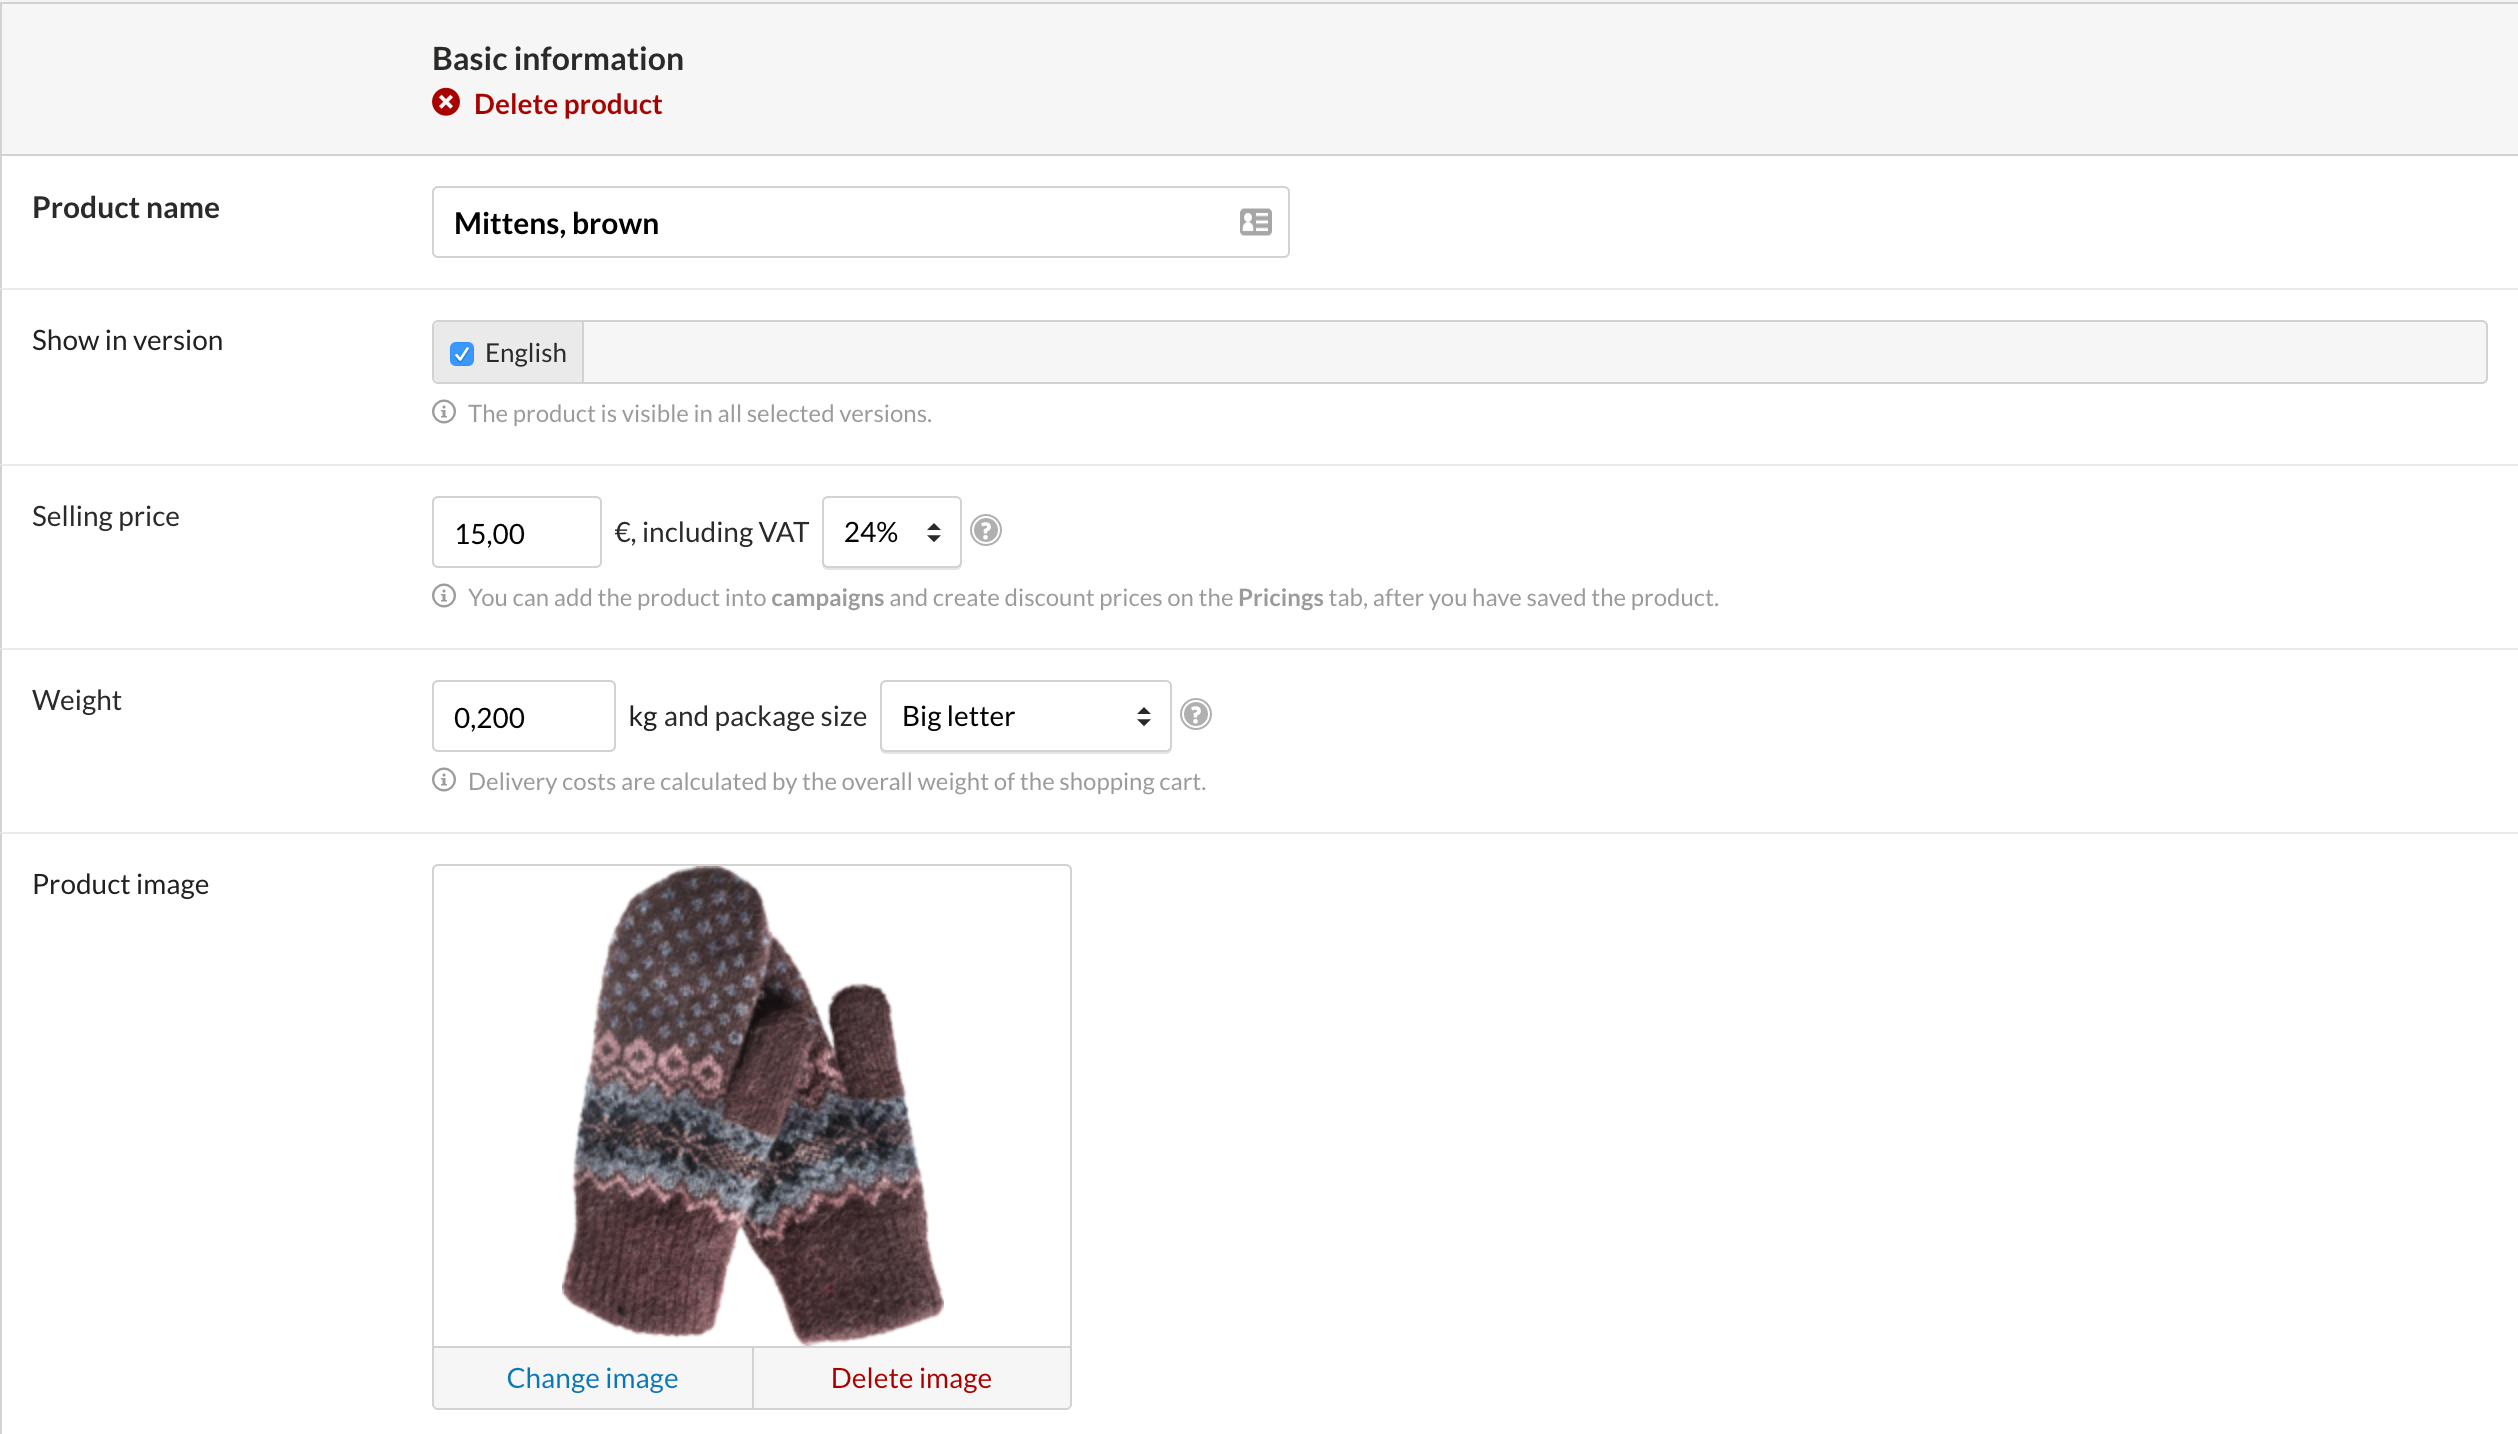
- Product name: Give the product a descriptive name. Note that the first thing visitors usually see about the product is its name and image. In the name, use the relevant keywords, bearing in mind search engine optimization, but don't let the name be too long.
Show in version: select the store and language versions in which the product should be visible.
You must select at least one version for the product to make it visible in your online store.
Make sure to write the content text in all the languages that you select at this stage.
See also the instructions on how to translate your online store ›
including VAT: Enter the product's selling price including taxes. Also select the tax rate.
The available tax rates are defined based on your online store's country of operation. You can select the country of operation on the page in your online store's settings.
If you are also registered as a taxable dealer in another EU county or in the UK, you can set the local VAT rates for customers residing in those countries in the VAT rates according to the country of destination section on the page.
Learn more about selling goods to consumers in another EU country or in the United Kingdom.
When necessary, you can edit the order product's tax rate on the order page after the customer has already ordered the product.
- Weight: enter the product's weight, and select the parcel size used to deliver the product.
Make sure that you indicate the correct weight as the order shipping costs are calculated based on the order products' weight. Find out more about shipping methods
Review your store's shipping methods and ensure that at least some of them have weight limits and package sizes compatible with the new product. Otherwise, your customers won't see any shipping methods at the checkout when purchasing the product.
Learn more about how shipping methods are selected for products.
- Product image: As an option, you can also add a product image. When creating the product, you can upload one image first and add more images later.
After uploading the file, you will see the image preview.
Pricing

You can also add the product to any of the active campaigns directly from the product form:
- Select the campaign in the Pricing section.
- Enter the product's selling price in the campaign.
To define the product's price according to the campaign's discount, review the campaign's products after saving the product.
- Click .
Description & product information
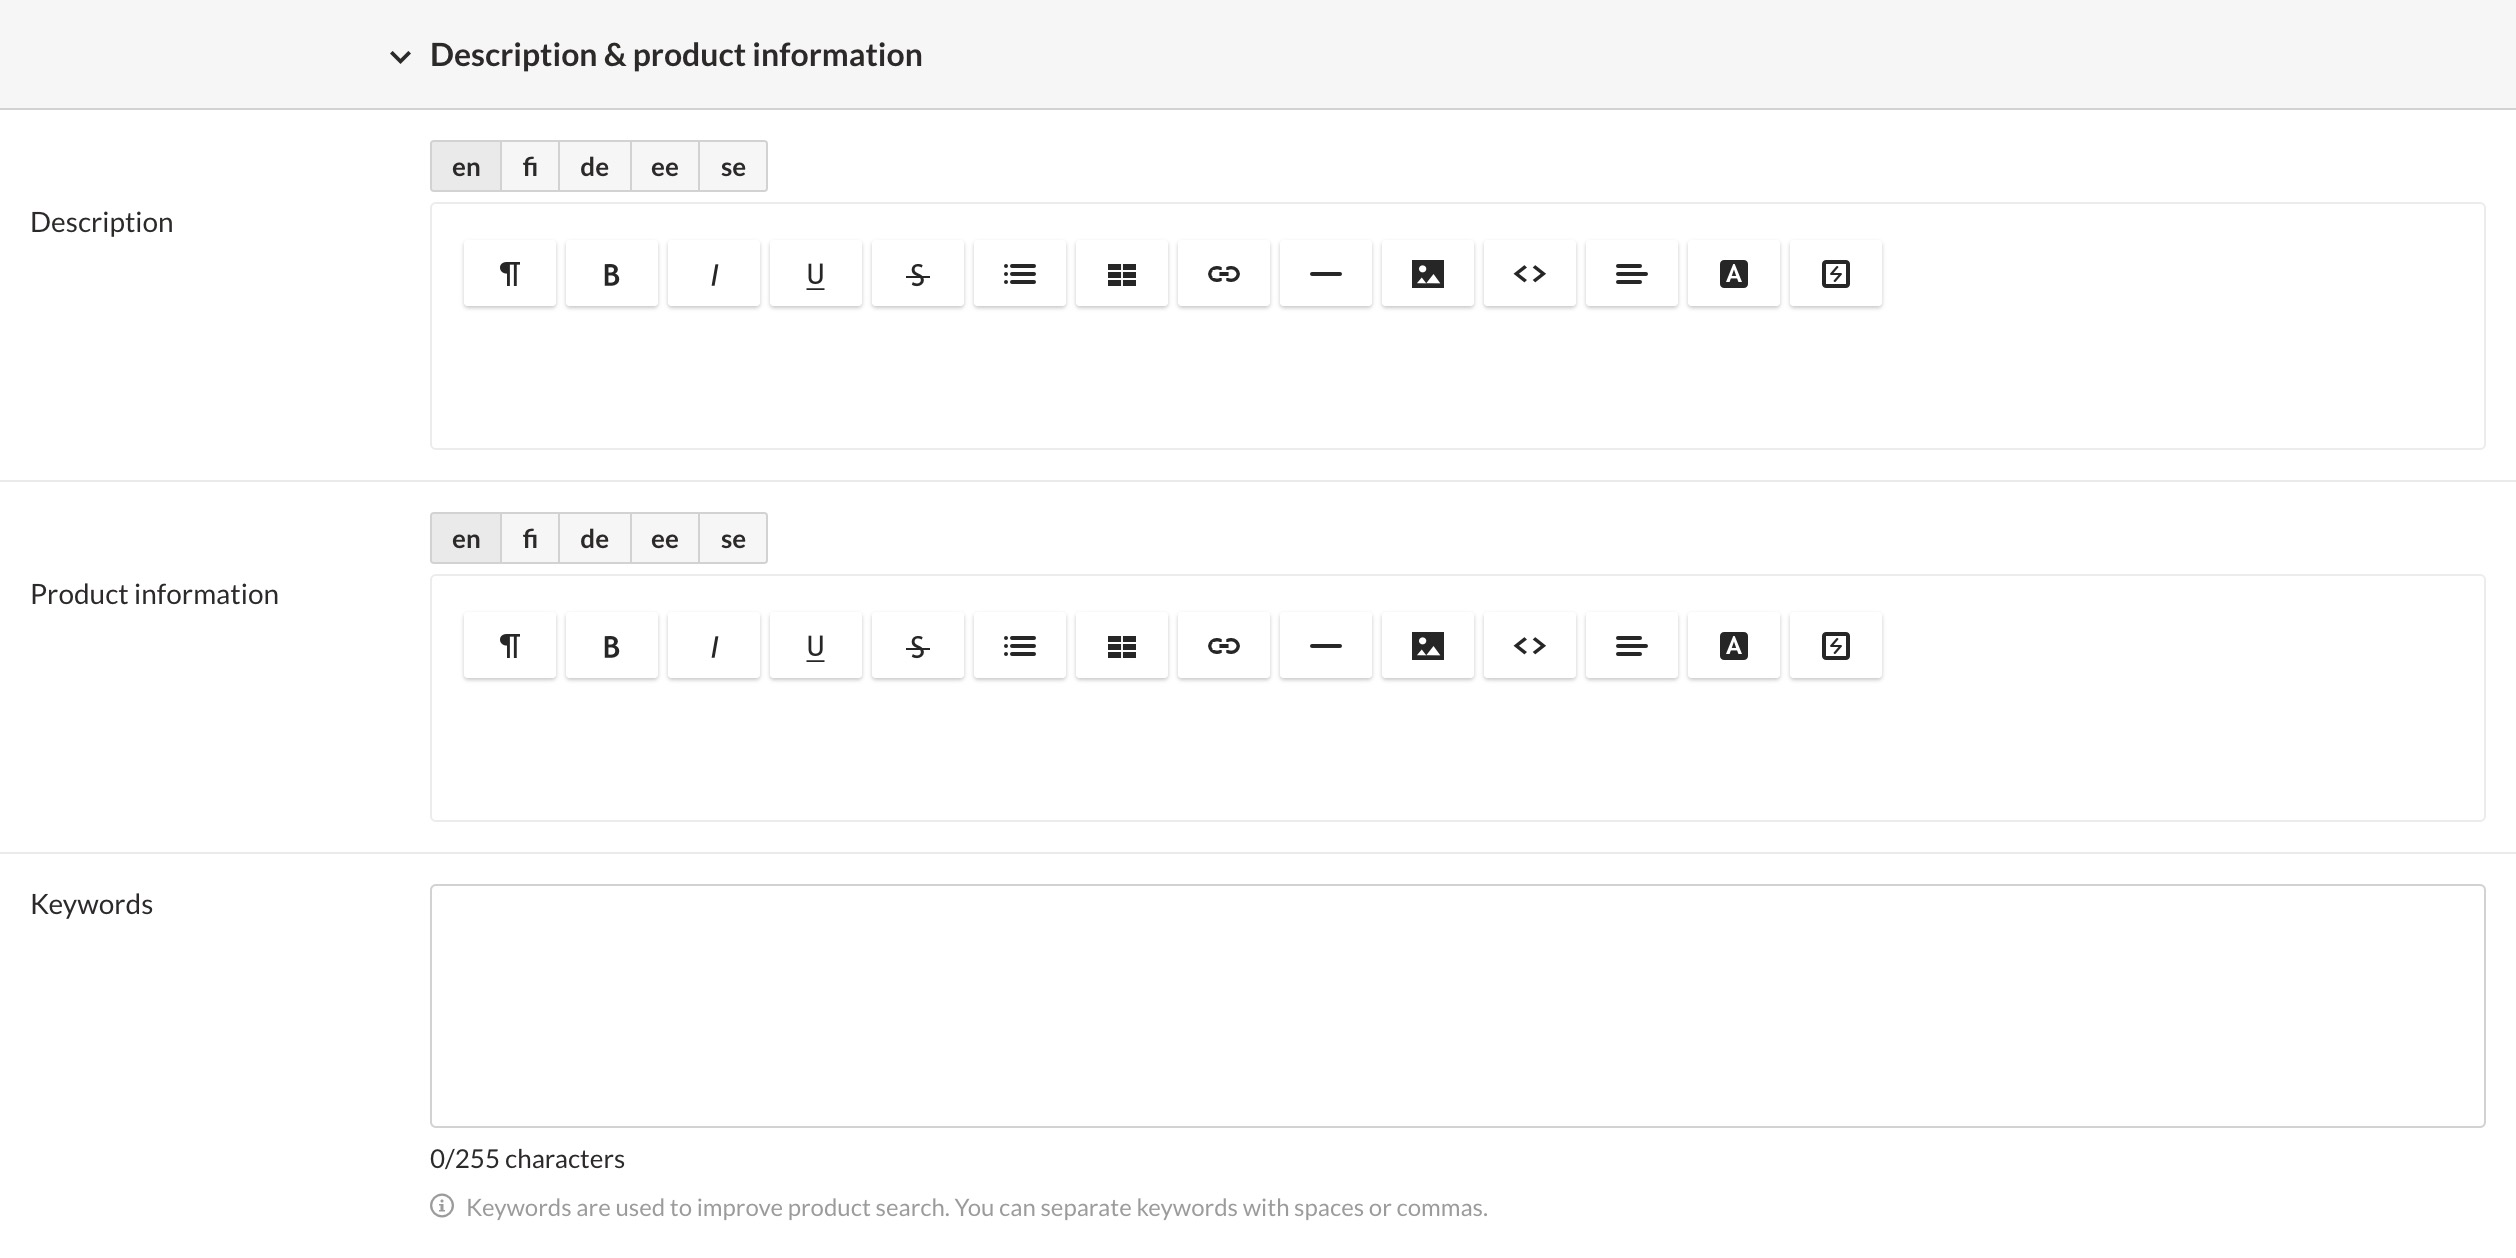
- Description: Provide a short and easy-to-read description which includes the most important information about the product.
- Product information: Provide a more in-depth description with detailed information about the product's properties and uses. Organize the text by using subheadings and other styles. Also be sure to use related keywords in order to optimize the description for search engines.
Detailed product information helps customers decide whether to purchase the product. Additionally, a well-written description helps the page to rank higher in Google search results.
- Keywords: Enter a list of keywords describing the product. Separate keywords with commas or spaces.
Define a moderate number of keywords and use them consistently for the various products in your store.
The keywords will be used in your online store's internal search engine, so think which keywords your customers are most likely to use when looking for your products. Keywords do not influence your online store's visibility in web search engines.
Visibility settings
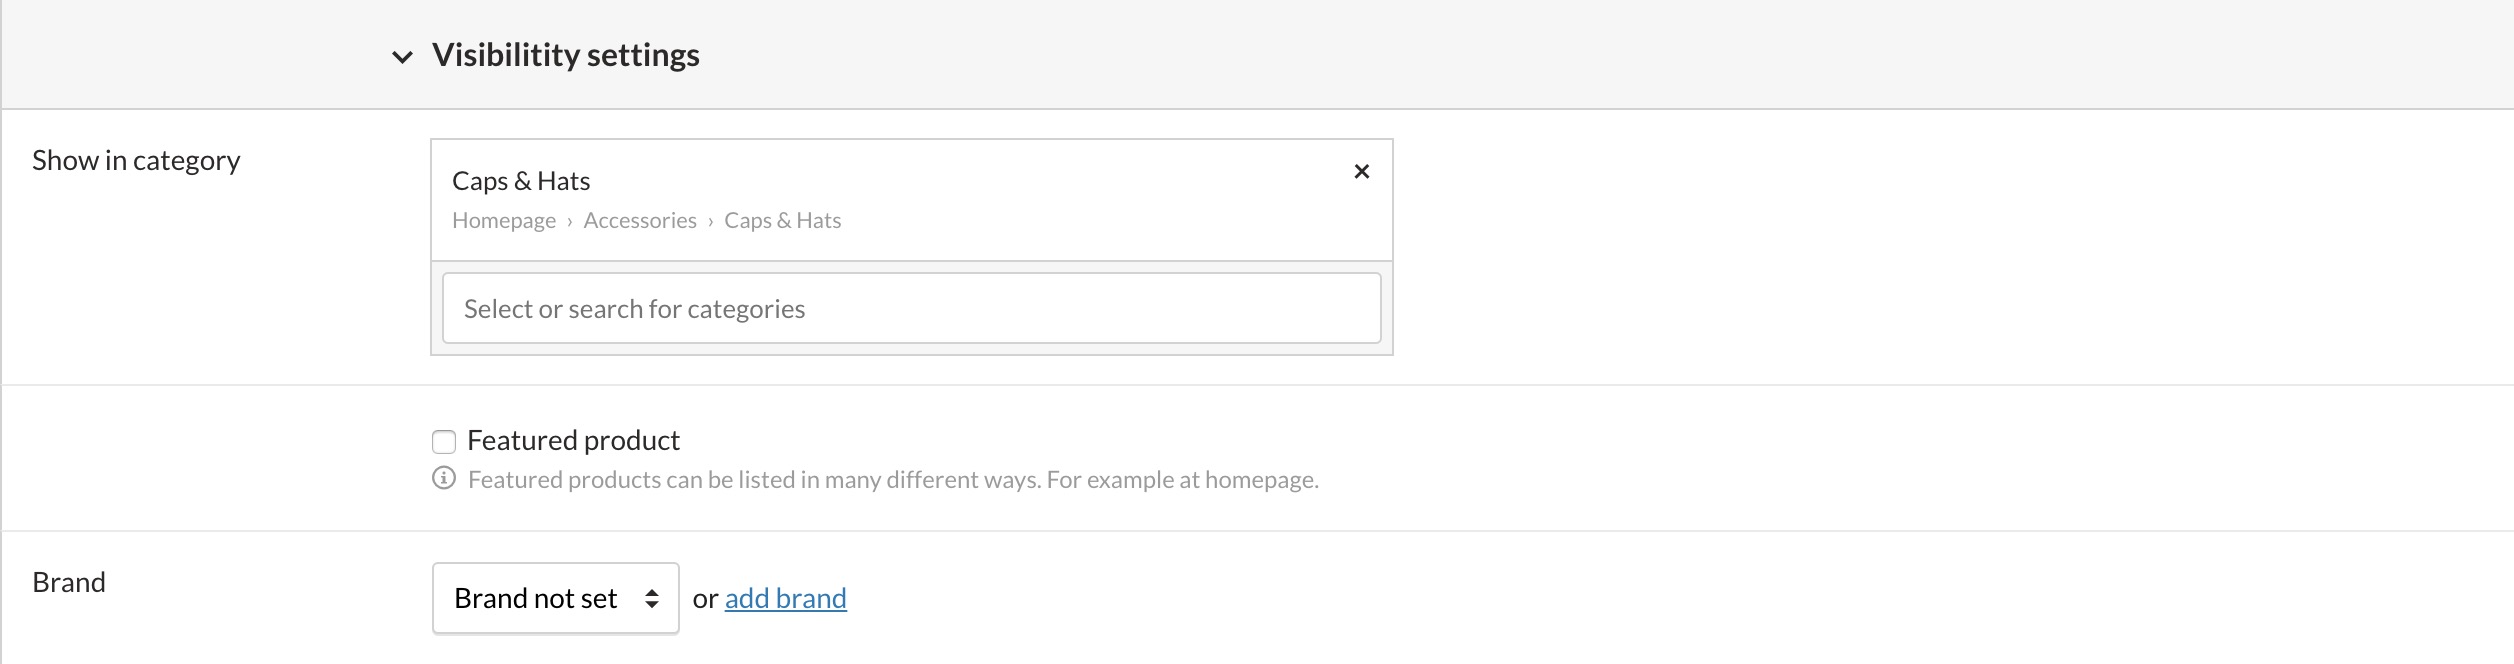
Show in category: Select a product category for the product if you've already created your online store's product categories. You can add the product to as many product categories as you wish.
If you do not select any product category, the product will not be displayed in your online store's navigation and product lists.
- Featured product: You can also mark the product as featured so that it will be displayed on the list of featured products.
In the default theme, featured products are displayed on your online store's front page as well as in the Recommended area. You can add them to a freely chosen position in the store theme.
The printing of the products to be advertised in the store theme is done using the
{HotPicks}tag.Also see the instructions on using Interface tags.
- Brand: Select the brand if it has already been added to your online store.
If it hasn't, you can add it by clicking the Add brand link. Learn more about adding and editing brands.
Purchasing price, product numbers & supplier details

- Warranty: Where relevant, indicate the product's warranty period in months.
- Limited availability: If the product is not always available, define its limited availability period.
Once the defined period ends, purchasing the product will no longer be possible.
If you'd like an unavailable product to be automatically hidden, this can be implemented by modifying the layout theme.
- Set visible from: Set the precise time at which the product should become visible (but not available for purchase) in your online store.
- Set purchasable from: Set the precise time at which the product should become available for purchase in your online store. If you've defined an end date for a Limited availability item, the product's availability will end on that day at midnight.
- Order limit: The minimum and maximum quantities that the customer must observe while placing an order.
The order limit also applies to variations. For instance, if the maximum order quantity for a product with variations is three and the customer orders three different variations of the product, the limit is reached.
The order limit does not apply to product bundle products. So a customer can order an amount that exceeds the purchase limit, if the product belongs to bundles in the same order.
- Purchase price: The supplier price that you paid when purchasing the product. Indicate the price excluding taxes. The purchase price is the basis for calculating the product's margin on reports and the overview.
- Product code: The product code is used mainly to identify the product when transferring data between MyCashflow and other software (e.g. when using extensions for financial administration software).
If you create product variations, make sure that you provide a unique product code for each variation.
Make sure that the product codes are unique
If multiple products or variations have the same product code, errors are bound to occur during data transfer between systems.
Do not use the same product codes for products and variations. Even if duplicate product codes do not result in any errors, they will make it more difficult to manage the products.
- Supplier and supplier's product code: Add a new supplier by clicking the Add supplier link and entering the supplier's name in the text field.
Search engine optimization
If you have installed the Web Designer extension, in the Search Engine Optimisation section you can specify the document and page titles and meta description that will appear in search engine results. (Find out more about optimizing your MyCashflow online store for search engines)
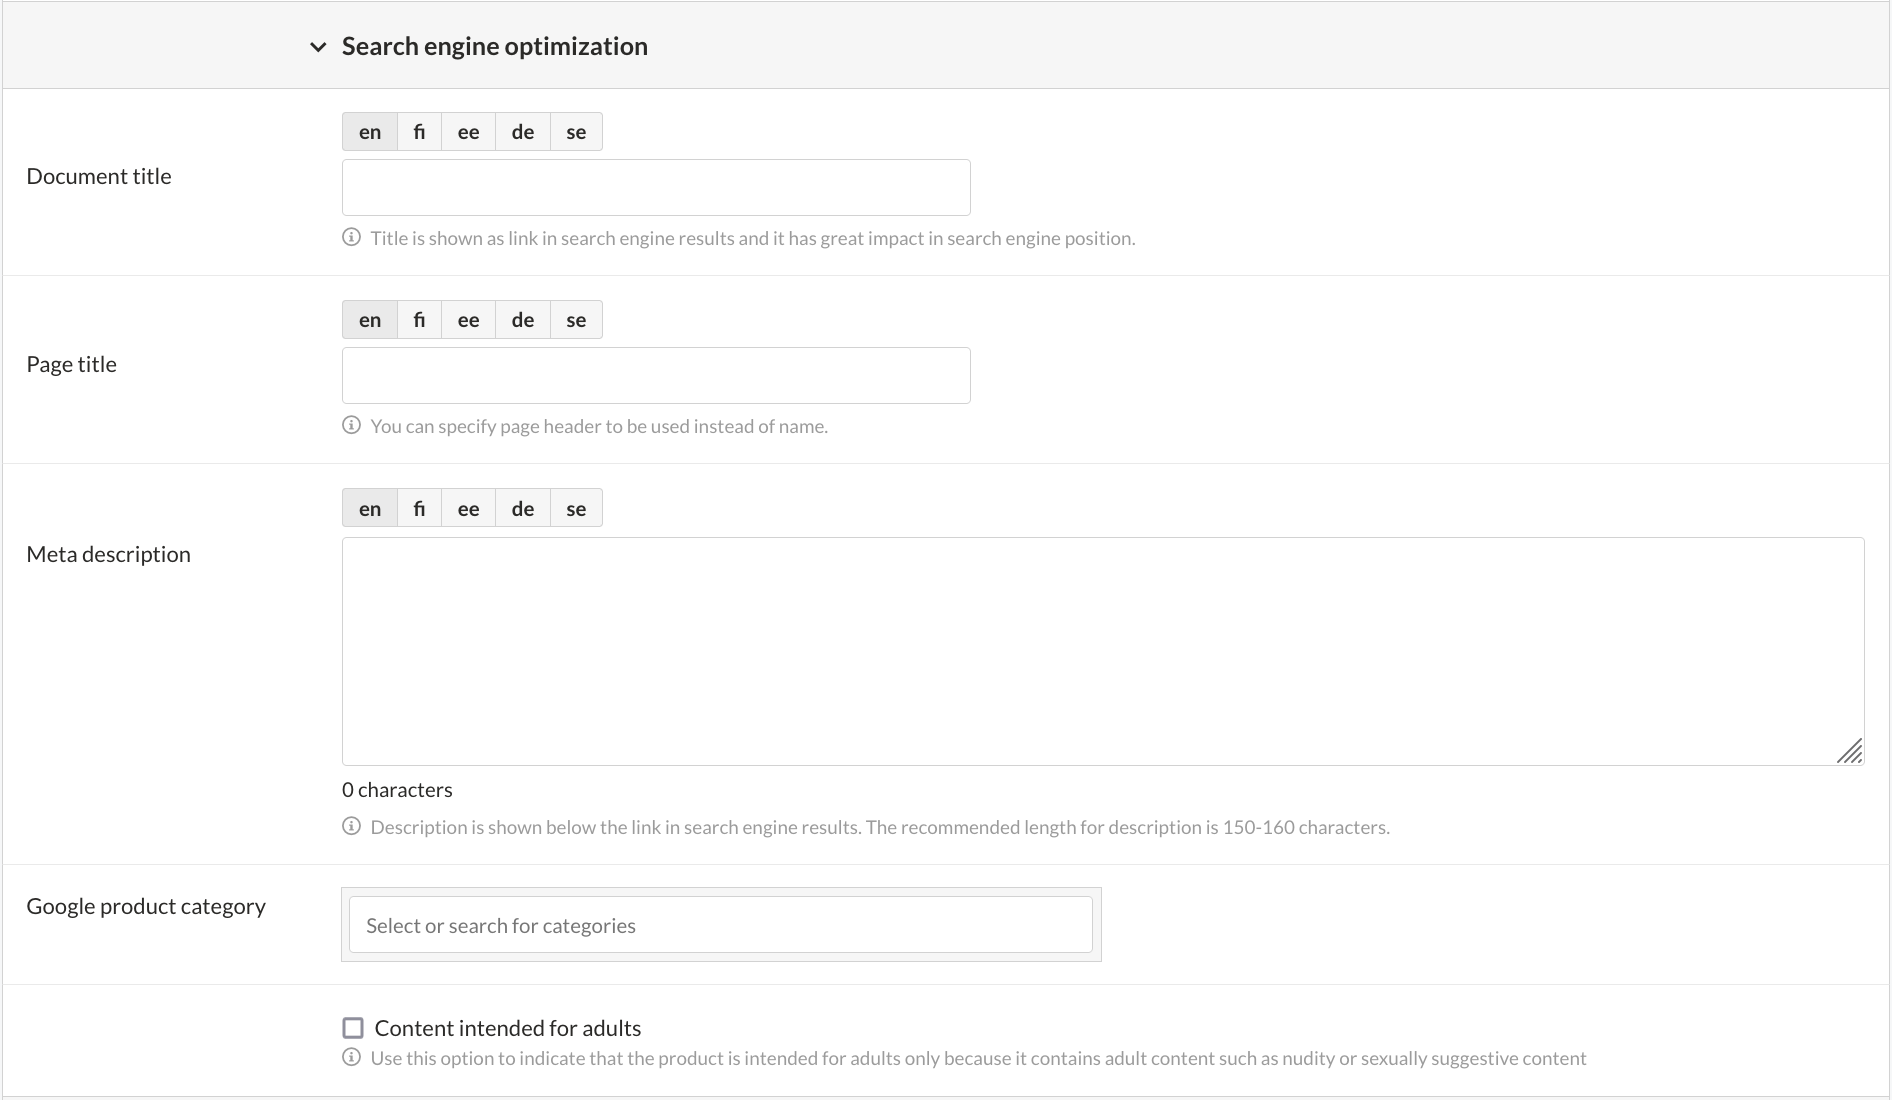
The page title serves as the content header on the online store's product page, while the document title is included in the tab label at the top of the browser window or below the address bar. If you leave the title empty, MyCashflow will use the product name as its substitute.
In addition to search engine optimisation, you can set a Google product category for product feeds or ads and, if necessary, mark the product as adult content.
Template file
If your online store has the Web Designer extension, you will also see the a Template file section on the form, where you can choose an alternative page template (if one is included in the store theme).
Learn more about creating custom templates.

Editing product details
You can open the product editing view from the admin panel's page or from the product card, which you can also access from the storefront. There are three routes to the product form:
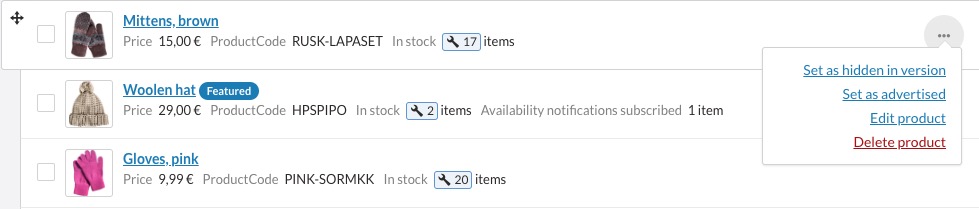
- You can open the product form from the page by selecting Edit product from the tool menu at the end of a product row.

- Alternatively, you can click the image or name of a product to open its product card. The product form opens, when you click on the product card.

- When logged in to the admin panel and viewing a product in your store, you can access the product form by using the Edit product function at the top of the page.

After making your changes to the product form, click at the bottom of the form.
Using the product quick editing
In addition to the comprehensive product form, you can use the quick editing tool, which enables you to edit the most common product details as well as notes on the product card. The quick editing tool opens in a popup and is available on the admin panel's page and in the storefront.
- To use the quick editing tool in the admin panel, go to and click Quick edit on the product row.

- When logged in to the admin panel and viewing a product in your store, Quick edit is available on the admin bar at the top.

After making your changes to the product form, click at the bottom of the popup window.
Copying products
If there are multiple similar products in your online store, copying products can speed up the process of adding new products into the store.

Copying creates a new product named in the following format: Copy of PRODUCT NAME. The copy contains all the details of the source product, including:
Product stock tracking
MyCashflow contains a stock management system that enables you to track your product stock. In this section, you'll learn how to enable and use the system.
The stock management system enables you to track the stock balances for your products and variations. Stock management is not applicable to customizations.
Enabling stock management for products
To enable stock tracking for products with no variations:
- Go to the Stock tab on the product card.

Enabling stock management for variations
If a product has variations, you won't be able to track the main product's stock balance – you'll have to enable stock tracking for each of its variations instead.
Here's how to enable stock tracking for variations:
- Fill in the variation's stock management settings.

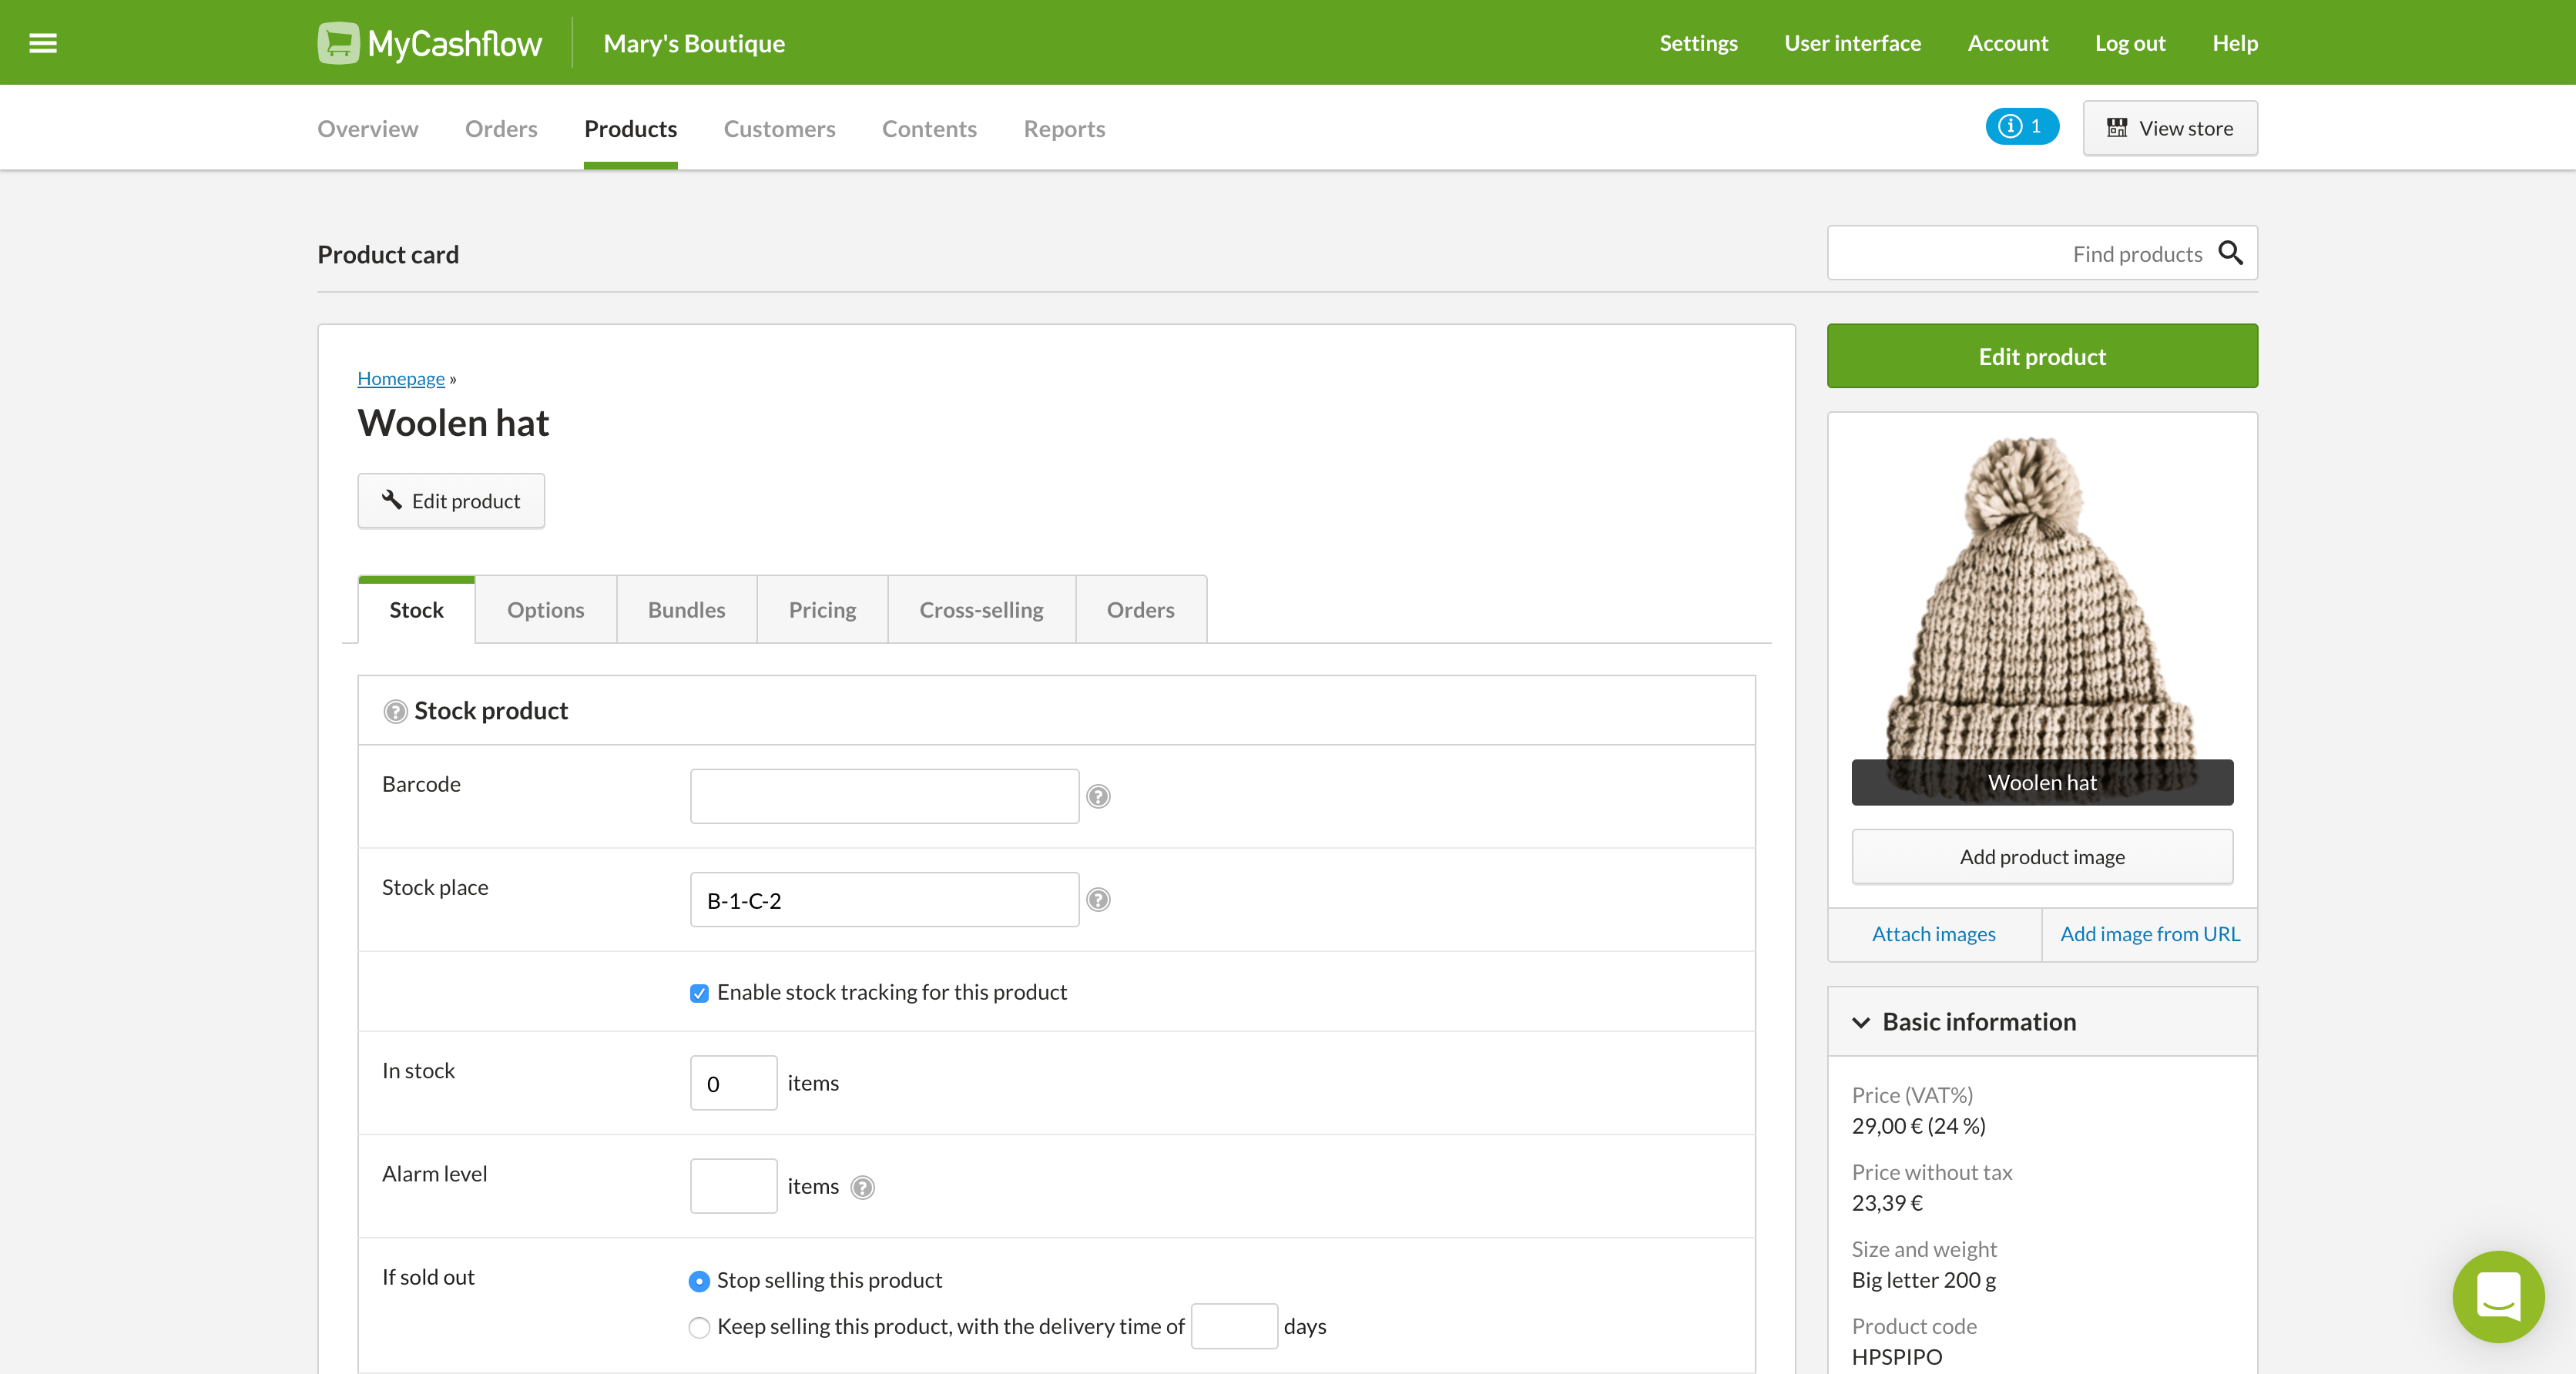
Stock management settings
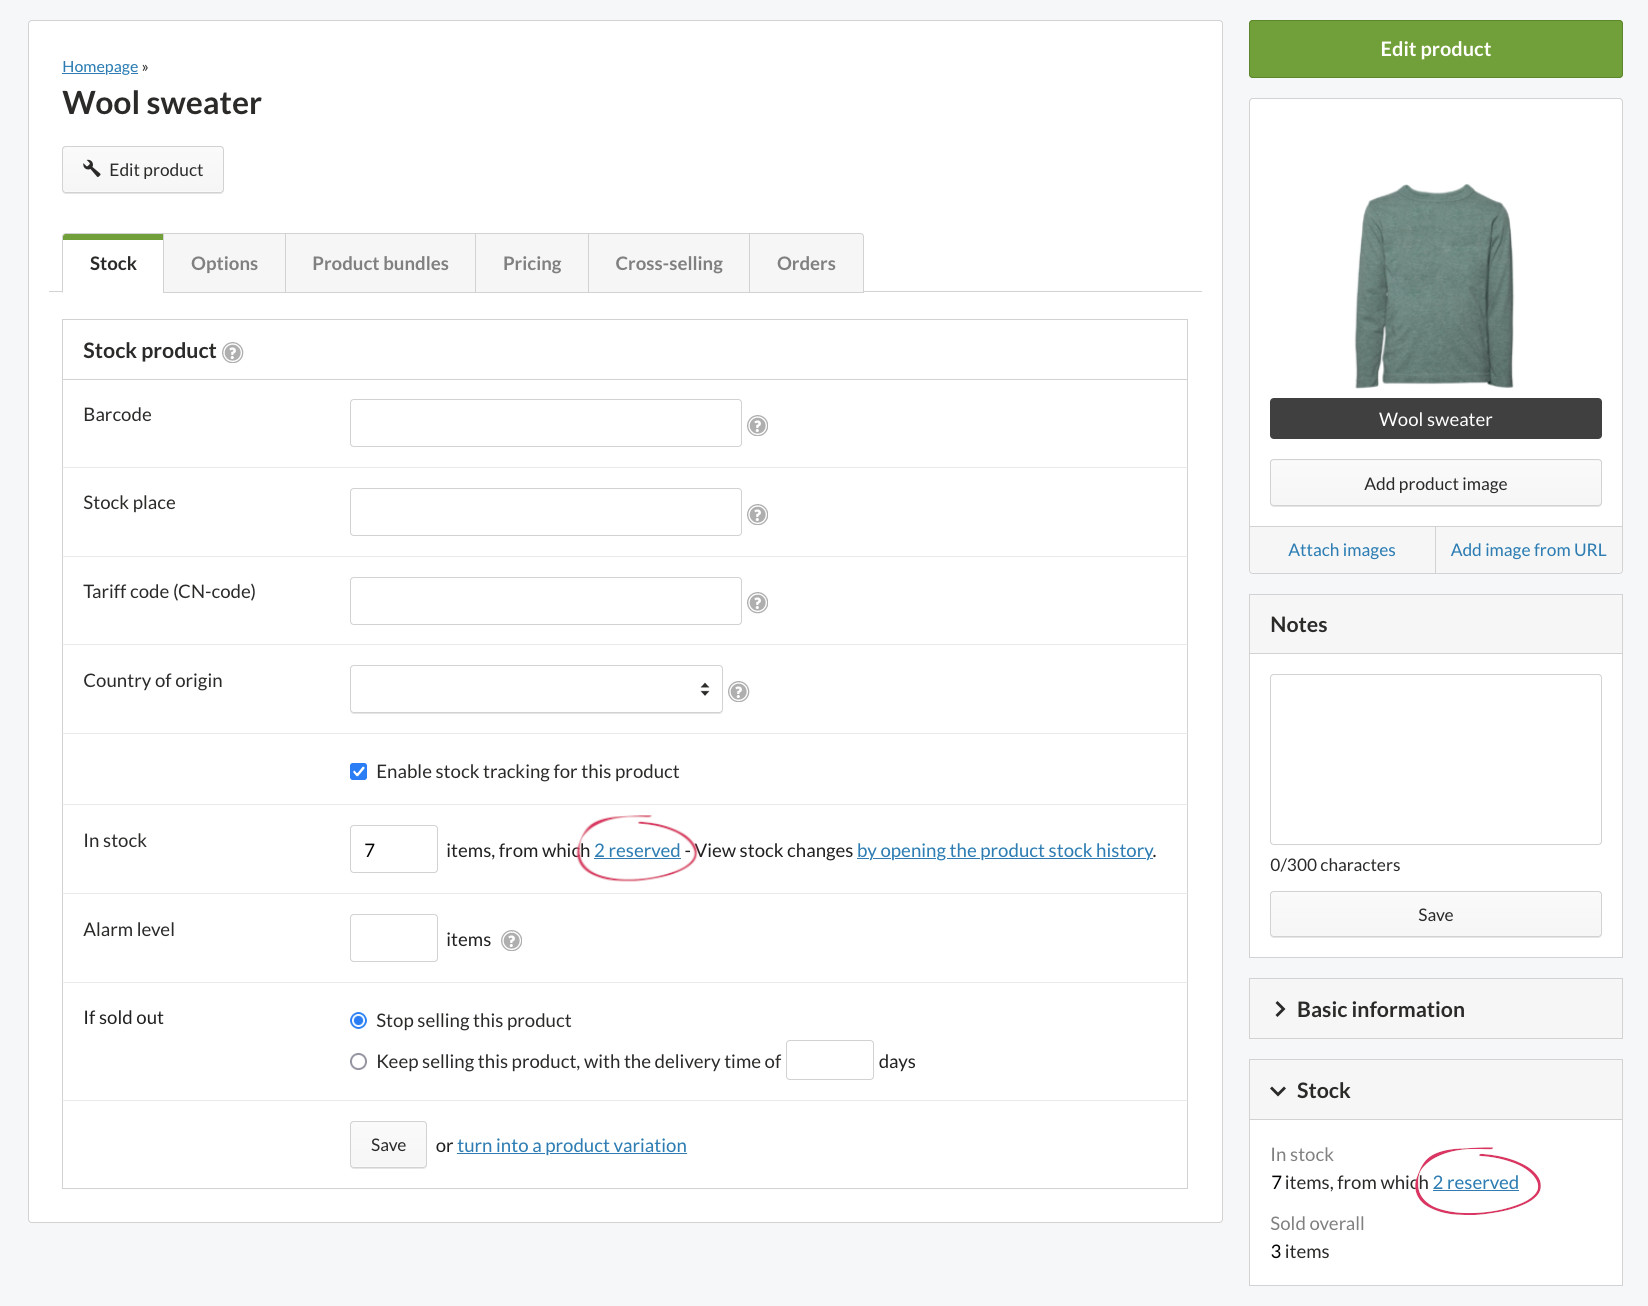
Set the product's stock management data on the Stock product form, which is available under the Stock tab on the product card. If a product has variations, the information must be entered and saved separately in the details of each variation, which can be accessed via the list under product card's Stock tab.
You can set the product's barcode, stock place and data needed for customs clearance as well as enable stock tracking.
- Barcode: Enter the product's GTIN (Global Trade Item Number). You can use any of the following types of identifiers:
- EAN: the International, or originally European Article Number (8, 13 or 14 digits).
- ISBN: the International Standard Book Number, compatible with the EAN standard (13 digits).
- JAN: the Japanese Article Number, compatible with the EAN standard (8 or 13 digits).
- UPC: the Universal Product Code, used mostly in North America (12 digits).
Apart from digits, the identifier can also include hyphens. They are not technically relevant, but make the number series easier to understand.
The right barcode helps internet search engines classify product pages and organize search results. A wrong barcode may result in the product being excluded from Google's shopping ads and product feeds.
Barcodes that aren't correct GTINs are removed from product feeds automatically by MyCashflow. If you still want to deviate from the GTIN standard, you can ask MyCashflow customer service to disable barcode validation for product feeds.
- Stock place: Enter the product's location in the warehouse.
- Tariff code: Enter the CN code used in export declarations and intra-EU trade statistical declarations (8 digits). You can find the up-to-date tariff nomenclature on the Finnish Customs website.
- Country of origin: Select the country where the product has been manufactured, assembled, or essentially finalized.
- Enable stock tracking for this product: Enable stock tracking with additional settings:
- In stock: Enter the product's stock balance, i.e. the number of product items available in your warehouse.
- Alarm level: Define the critical level for the product's stock balance, at which point the stock should be replenished.
Defining the alarm levels for your products will help you to manage your stock proactively. To avoid delivery delays, always keep in stock your online store's most popular products.
If the product is to be ordered separately, its normal stock balance is zero, but you can set the alarm level to -1, in which case the customer's order will trigger the stock alarm.
To see products for which stock levels have dropped to the alarm level, go to the page and, in the filter menu, select .
- If sold out: The options included in this setting define how sales should be continued if the product runs out of stock:
Stop selling this product: Customers can't purchase the product until it is back in stock. By default, the product is still visible in the online store's product catalog. (If you don't want the products that are out of stock to be visible to customers, ask the designer of your store theme or our customer service to modify your store theme.)
Keep selling this product: Customers can still purchase the product but have to wait longer than usual for its delivery. You can specify an estimated delivery time (e.g. 7 days) that will be displayed on the product page. You can also set a specific date for delivery (e.g. 31 August 2021).
Reservations and storage history
When you mark the product as delivered, the product's stock balance will decrease, and the reservation will be deleted.
With MyCashflow you can also enable a reserving shopping cart where the reservation is made as soon as the customer adds the product to the shopping cart. If you want enable the reserving shopping cart in your online store, please contact our customer service, for example by using the chat in the admin panel.
- Changed: the implementation time of the change (by default the most recent change is first)
- User: the modifier (the change can also be automatically implemented by the MyCashflow system)
- Source: source of change (specific order, product or variation form, CSV import, MyCashflow API or a specific integration)
- Quantity: increase or decrease of the balance and the subsequent balance.
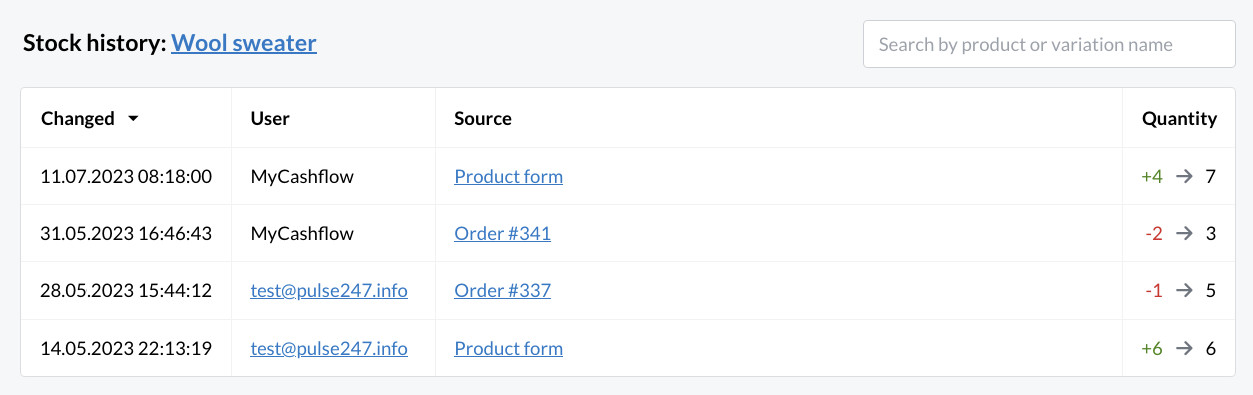
Using the stock history view's search field, you can directly view the stock history of other products or product variations as well.
Converting products into variations
If you'd like to add variations to a product for which stock tracking has been enabled, you can convert the main product's stock details into a variation's details.


Deleting products
Products can be deleted in the admin panel via the list on the page and on the product card.
After confirming, you cannot cancel product deletion. The product information will be deleted permanently.
Recovering deleted products is a paid service that can be performed only within a week after the products have been deleted. If you want to find out more about product recovery, contact MyCashflow customer service.
You can also hide a product from your online store by deselecting all store and language versions on the product form.
To delete a product, go to the admin panel's page, and click the Delete product link in the tool menu on the right side of the relevant product's row.
Confirm deletion in the dialog box that opens. The product will instantly be deleted.
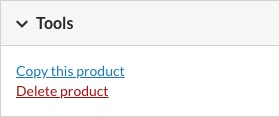
You can also delete a product on the product card by using the Delete product link in the Tools section.
When you delete a product, all of its product images and their miniatures are deleted automatically (unless the same product images are used by other products).
Bulk editing and deleting products in the admin panel
The bulk edit tool offers a convenient way of editing and deleting multiple products at a time directly via the admin panel of your online store.
Requirements:
For the bulk edit tool to work, you must have the new text editor enabled. If your online store's products still use the old editor, you'll see a prompt asking you to enable the new editor.
Bulk editing products
Here you can learn how to bulk edit products via the admin panel.
You can also bulk edit products by using the CSV import.
Here's how to bulk edit products in the admin panel:
- Select the desired products from the list on the page:
You can select individual products (by checking the box on the left side of the product row) or all products displayed on the page (by checking the box at the top of the product list).
You can also select products from different pages. The products you select will remain selected when you go to another page of the list.
- After selecting the products for editing, at the top of the list click .
You will see a bulk editing table where you can edit the products you have selected and their variations. Variations are displayed each on their own row in the table.

Details that can be bulk edited
The bulk edit tool enables you to edit the following product details:
- Visibility in versions (can be set up for all)
- Selling price
- Tax rate (can be set up for all)
- Product description
- Product information
- Keywords
- Google's product category (used only by the Shopping Ads extension, can be set up for all)
- Product categories (can be set up for all)
- Product advertising
- Brand
- Supplier
- Warranty
- Order limit (can be set up for all)
- Purchase price
- Supplier's product code
- Product code
- Barcode
- Stock place
- Stock tracking
- Stock balance
With variations, you can edit the details listed below (these details are not available for main products):
- Selling price
- Purchase price
- Product code
- Barcode
- Stock place
- Stock tracking
- Amount in stock
Bulk deleting products
Read this section to learn how to delete multiple products at a time.
After confirming, you cannot cancel product deletion. The product information will be deleted permanently.
Recovering deleted products is a paid service that can be performed only within a week after the products have been deleted. If you want to find out more about product recovery, contact MyCashflow customer service.
To delete multiple products at a time:
- Select the desired products from the list on the page:
You can select individual products (by checking the box on the left side of the product row) or all products displayed on the page (by checking the box at the top of the product list).
You can also select products from different pages. The products you select will remain selected when you go to another page of the list.
- Click .

The selected products have now been removed from the online store.
When you delete a product, all of its product images and their miniatures are deleted automatically (unless the same product images are used by other products).