You can create product attributes in your online store, which can be applied to products and variations as product features. Product features can be used for creating filter menus for product lists, and they can also be listed in connection with products.
Product features in the online store
An online store's product filters are based on the product features assigned to products and variations. In a clothes store, customers can then use product filters to search for all red or S-sized shirts, for instance.
Using product features is subject to the following, plan-based limitations:
- Basic: You can create a max. of 3 custom product attributes and display the same number in the online store.
- Advanced and above: You can create a max. of 100 custom product attributes and display, by default, a max. of 10 product filters/features (if you'd like to display more, contact our customer service).
Additionally, you can create a max. of 500 values for each product attribute.
In the MyCashflow default theme, all product lists support product filters.

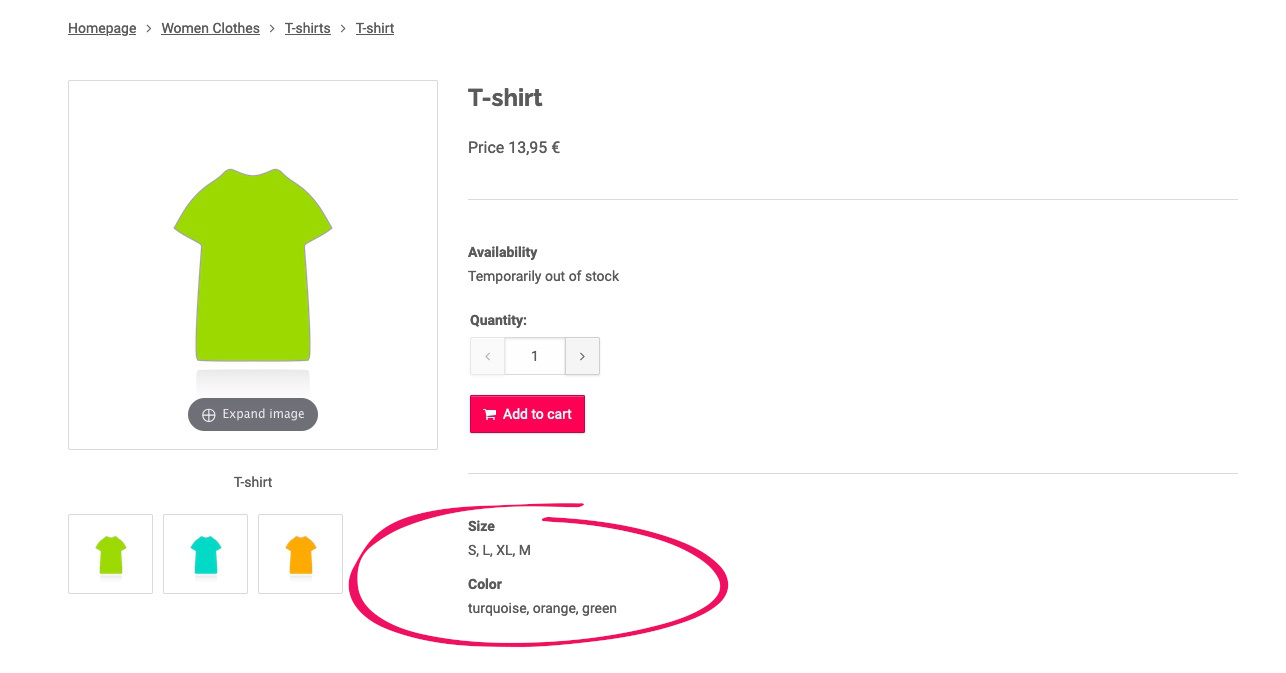
Additionally, the default theme's product page includes a list of all product features assigned to the product.
- specifying product attributes
- assigning product attributes to products and variations as product features
- when necessary, adding support for product filters to the store theme
Adding theme support
Filters must first be implemented in the store's theme, so that they can be used in the store.
MyCashflow's default theme includes product filters on all product lists. If you use the default theme that hasn't been installed in the store's file directory, product filters are going to be enabled automatically.
If you use a default theme added to your store's file directory or a customized theme, you'll have to enable product filters in your theme separately.
See the Designer's Guide for instructions on how to implement product filters.
If you don't have any experience in editing your theme's HTML/CSS/JavaScript files, contact your theme's designer or our customer service.
Default attributes
MyCashflow contains the following default product attributes:
- Product category (not enabled on campaign and brand pages)
- Brand (not enabled on product brand pages)
- Size
- Color
- Material and Pattern (enabled only in online stores with the Shopping Ads extension enabled)
- Material (with the product attribute code material)
- Pattern (with the product attribute code pattern)
Product category and brand filters are created automatically based on the store's product categories and brands.
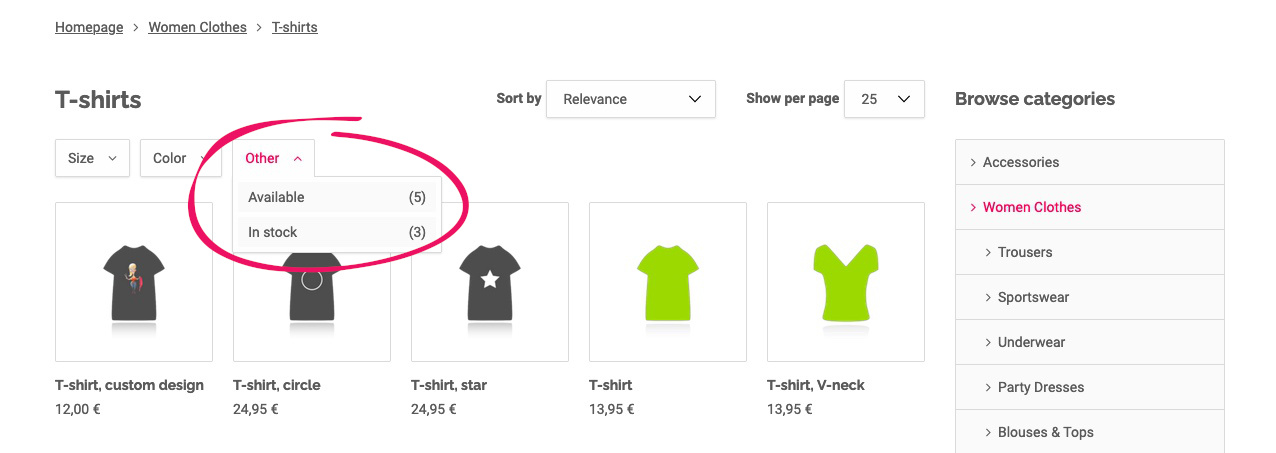
Additional product list filters
Apart from filters based on product attributes, you can also specify additional filters based on product prices and availability, which will be displayed as product list filters in a separate menu.
Additional product list filters can be managed on the admin panel's page, in the Available restrictions section.
You can define the following additional filters:
- Discounted
- Regularly priced
- Available
- In stock
- Pre-order
Managing product attributes and filters
You can define your online store's product attributes and manage product filters based on product features yourself.
You can manage product attributes and filters on the admin panel's page.
Using product features is subject to the following, plan-based limitations:
- Basic: You can create a max. of 3 custom product attributes and display the same number in the online store.
- Advanced and above: You can create a max. of 100 custom product attributes and display, by default, a max. of 10 product filters/features (if you'd like to display more, contact our customer service).
Additionally, you can create a max. of 500 values for each product attribute.
Apart from that, you can set additional product list filters based on product prices and availability on the page, in the Available restrictions section.
Adding product attributes
Here's how you add a product attribute:
- Specify the attribute's code, e.g. pattern.The code is used in things such as addresses for filtered product lists, which means that it can only contain lowercase letters, numbers, and underscores, but no Scandic characters. The code cannot be edited afterwards.

After you've created the attribute, you can specify its values on the page.
Editing product attributes
You can edit product attribute details and settings on the admin panel's page.
- Click the Edit link in the product attribute's heading row:

Sorting product attributes
Product attributes in the online store are displayed in the same order as on the admin panel's page.
Sort product attributes by grabbing the Sort link in the product attribute's heading row and dragging the product attribute to the desired position on the list.
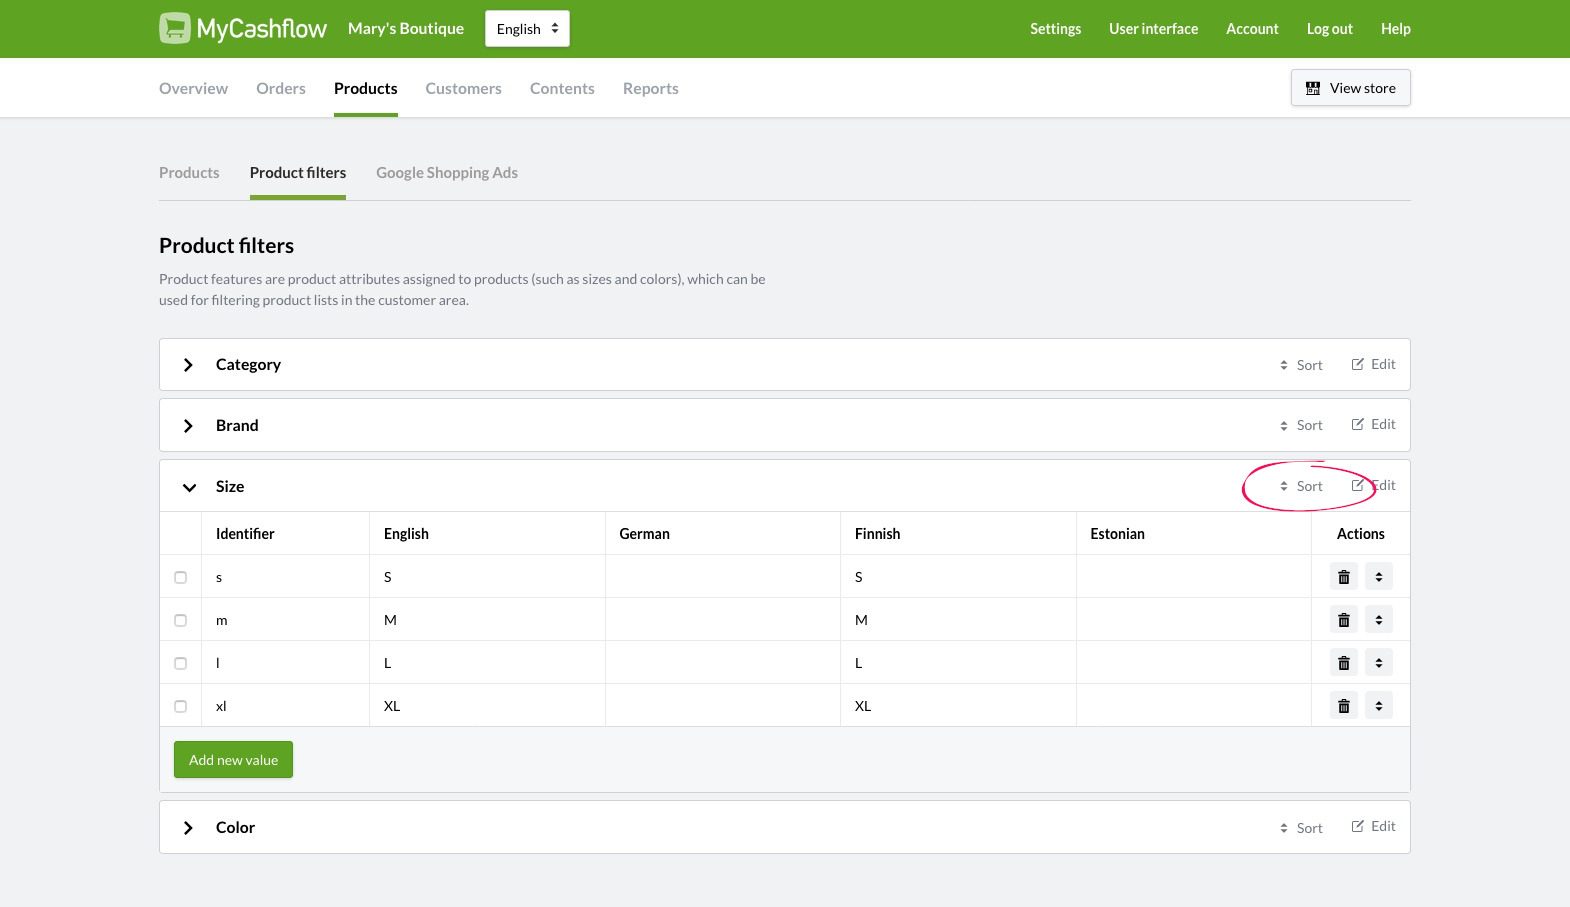
Once you have changed the order, it will be updated immediately in the online store.
Deleting product attributes
You can delete a product attribute you've created by clicking the Exclude link in the product attribute's heading row.
Default attributes cannot be deleted. However, you can hide them from all store versions by using the Display as product filter in the store and Display as product feature on product pages setting.
Hidden product filters and features won't be displayed in the store, but you will still be able to assign the values of hidden attributes to products and variations.
Adding values to product attributes
You can add values to product attributes in the table on the page:
After you've added a value, you can assign it to a product or a variation.
Editing product attribute values
To edit the desired product attribute value, click on it in the table on the page.
After you've edited a value, it will immediately be updated for all products and variations that use it as well as in all relevant filters in the customer area.
Sorting product attribute values
The order of the product attribute values displayed in the filters in the online store is the same as the order in the table on the admin panel's page.
You can sort values by grabbing the  icon on the value's right side and dragging it to the desired position in the table.

Deleting product attribute values
To delete an attribute value, click on the  icon at the right side of the row in the table on the page.
Deleting cannot be undone.
After you've deleted a value, it will immediately be deleted from all products, variations and product filters in the online store.
Assigning product features to products and variations
When you assign product attributes to products and variations, they become product features that are used as product filters in your store. In this way, customers can browse your store's products based on their features.
Assigning product features to products
Once you've added the necessary attributes to your online store, you can assign them to products as product features.
- In the product form's Product attributes section, select the desired product feature and its values.
If you don't select any value for the attribute, the feature won't be enabled for the product at all.

After you've defined the product's features, customers will be able to find the product in your online store by using filters. If a list of product features has been added to the product page, the selections will be displayed there as well.
Assigning product features to variations
You can also define product features for individual product variations.
See also an example that illustrates how to define sizes and colors with the help of variations and product features.
- In the variation form's Product attributes section, select the desired product feature and its values.

After you've added product features to a variation, your customers will be able to find the variation's main product by using the filters in your online store.
Example: Defining sizes and colors by using product features and variations
You may want to define colors and sizes by combining product features and variations (especially if every variation has a separate stock balance).
Product features become product filters in your store's customer area enabling your customers to search for all S-sized shirts, for instance. Variations, on the other hand, allow you to define separate stock settings for different sizes and colors.
- Add a separate variation for each color and size combination.
In this example, a variation splitter is used to form drop-down menus with the variation's selectable features on the product page.

As a result, a product could have the following variations:
- Size: S | Color: Red
- Size: S | Color: Blue
- Size: M | Color: Red
- Size: M | Color: Blue
- etc.