This service allows you to enable Klarna Checkout, Klarna's online bank and credit card payments as well as invoicing and installment plan options in your online store.
All MyCashflow online stores come with a built-in support for the modern checkout solution Klarna Checkout with Klarna payment services. You can easily order the checkout solution via your online store's admin panel.
How does the checkout provided by Klarna Checkout work?
At the checkout, the customer first enters the country, postal code and email, after which the available shipping methods are displayed.
If the customer has used Klarna before, and the customer's details are available in Klarna's system, they can be filled in at the checkout automatically. Customer details are also automatically filled in for logged-in customers.
After providing the address details, the customer can select the desired payment and shipping method as well as proceed to order payment. In some cases, Klarna may ask the customer for their personal identity number to ensure the customer's creditworthiness.
After the order has been confirmed, the customer is redirected to Klarna Checkout's thank you page, the address of which has the following format: /klarna-checkout/d128bd6d-804a-458a-b0d5-0a455c3871e6/thanks
The availability of external payment services in versions that use Klarna Checkout is limited. The only allowed services are MyCashflow's built-in payment services and PayPal.
Learn more about using external payment services at Klarna's checkout.
Pricing
Each payment made with Klarna Checkout is subject to a percentage and fixed commission fee charged by Klarna. Prices depend on your MyCashflow plan and the customer's country.
Installation and setup
Ordering new credentials
- In the admin panel, go to .
- Click .
- Fill in your personal and your online store's details in the order form and click .
Klarna will start processing your application and notify you within 48 hours whether it has been accepted.
During the singup process, Klarna is going to send you an email survey concerning your company's final beneficiaries aimed at preventing money laundering. You must respond to the survey in order to be able to receive settlements from Klarna.
Once your application has been accepted, you will be able to define Klarna Checkout settings on the page .
Using your old credentials
If you already have Klarna Checkout credentials, you can use them in MyCashflow by entering them in Klarna Checkout settings.
After entering your credentials, you can continue defining Klarna Checkout settings on the page .
Klarna Checkout settings
In this section, you will learn how to define settings for Klarna Checkout after you've enabled it in your online store.
Credentials
Here you can see the Klarna credentials that are used by the checkout solution.

If you'd like to change the credentials in use, contact our customer service.
Store versions
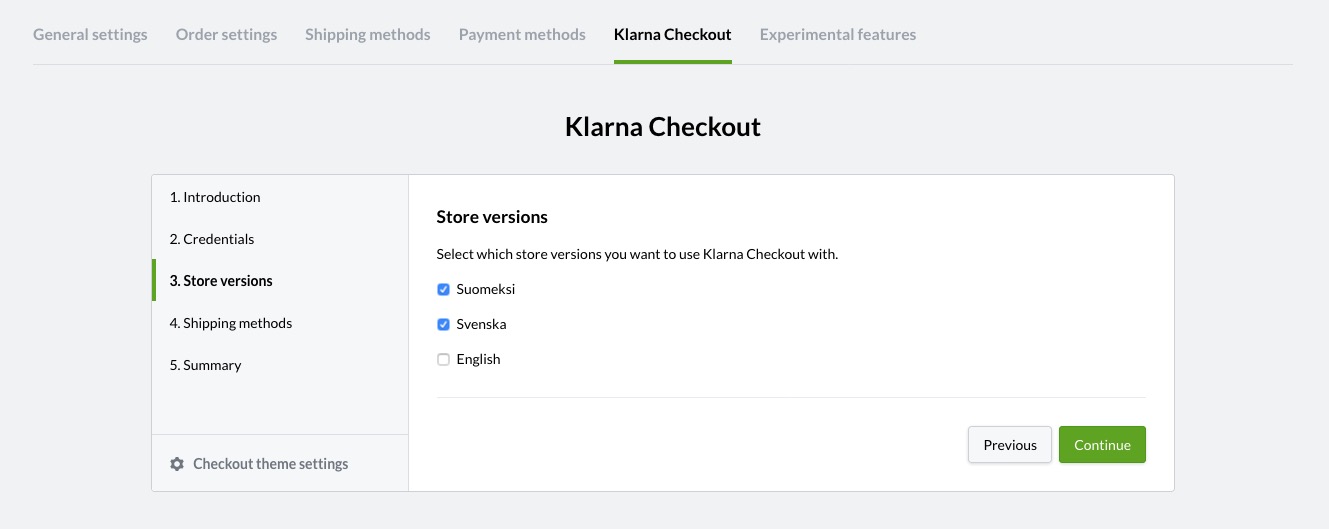
Here you can select the store versions in which Klarna Checkout should be enabled.
Versions that use Klarna Checkout must be SSL-encrypted. Otherwise your online store's checkout won't work.

Klarna Checkout replaces the default MyCashflow checkout in the selected versions.
When Klarna is enabled, all other payment methods in the version are hidden.
If you'd like to enable MyCashflow's built-in payment methods – Invoice, Advance payment and Cash-on-delivery – or PayPal at the KCO checkout, contact the MyCashflow customer service.
Shipping methods
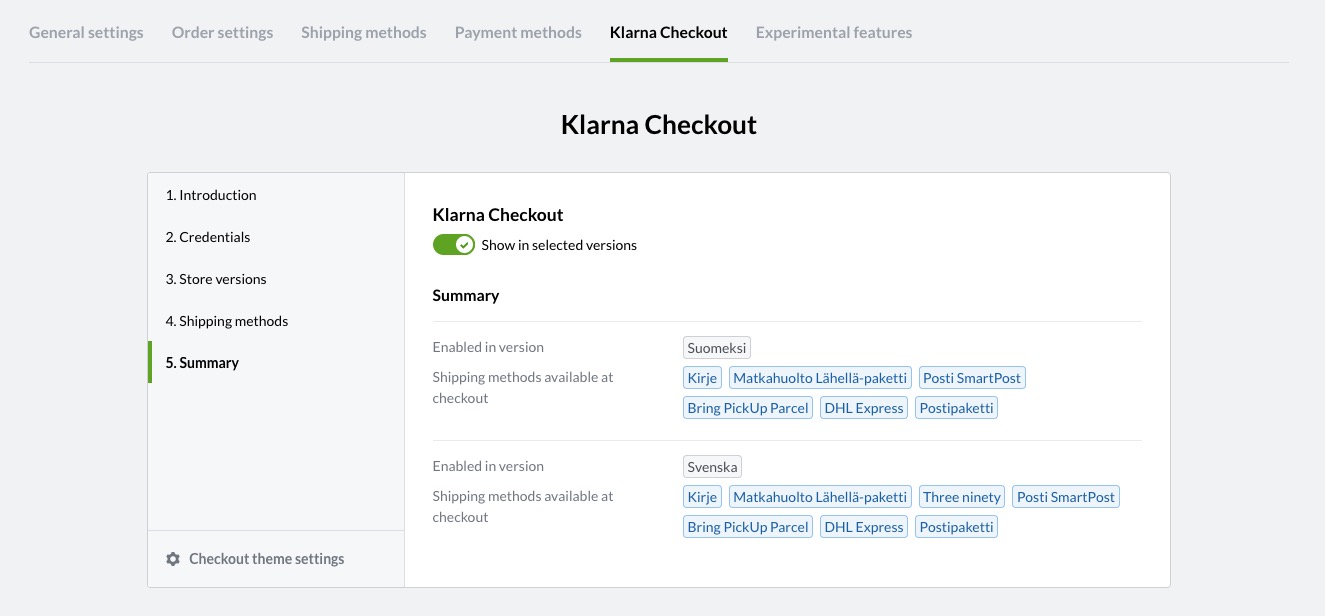
At the checkout provided by Klarna Checkout, customers will see all shipping methods that have been set as visible in the version where Klarna Checkout is used.
For these shipping methods, you can also specify additional information about shipping and shipping times.
Summary
Here you can see a summary of the settings that you've defined.

You can also disable Klarna Checkout in all versions by using the Show in selected versions setting available on the page.
Activating payments
In order for a payment to be transferred to your bank account with Klarna's payment settlement, it must be activated.
Payments must be activated before they expire.
Klarna payments expire after some time. You can check a payment's expiry date in the Payment transactions section on the order page or in Klarna's Merchant Portal, in the order's details on the .
If the payment expires, you won't be able to process the order by using Klarna. In such a case, create a new payment transaction for the order with a different payment method.
When necessary, you can also extend the order expiry date.
After you've opened the desired order on the admin panel's page, you have the following options for activating the payment:
If the order has been paid for in a currency other than the euro, the exchange rate information will be added to order events.
Extending the order expiry date
Checking the status of payments that have not been approved.
If a payment has expired or an order is cancelled, the status of the payment is automatically changed into Cancelled. In certain cases it may be possible to change the status of the payment in Klarna's Merchant Portal.
To verify that the payment status is up to date on the order page of the admin panel, follow the Check payment status link on the payment transaction menu:

The verification takes place in real time and the payment status is updated immediately.
Resending payment instructions
Canceling reservations
If a customer has made an unnecessary payment, you can cancel it in your online store's admin panel even before activation.
To cancel the customer's reservation, go to the right-hand Payment transactions pane on the order page, and select Cancel reservation in the tool menu.
After you have canceled the customer's reservation, the payment status will change to Cancelled. In such a case, the customer won't be charged at all.
Refunds
You can refund payments made with Klarna Checkout to the customer directly via the admin panel's order page.
All Klarna refunds are automatically made using the same payment method that the customer paid with.
Making a full refund
If a customer returns the whole order, but you'd like to e.g. charge the customer a return fee, don't use the option to refund the whole payment.
Here's how to refund the whole payment to the customer:
Klarna will then refund the payment to the customer in full with the original payment method.
Making a partial refund
If the customer returns only some of the order products, you can refund the relevant sum paid with Klarna Checkout directly via the admin panel's order page:
Klarna will then refund the amount you specified to the customer with the original payment method.
Editing order products
- Orders paid for with Klarna's payment methods are subject to certain restrictions, which are discussed below.
- The contents of orders paid for with services external to Klarna can be modified freely.
You can see the payment methods used by the customer in the payment's Payment transactions menu on the order page.
The following changes to the order are possible depending on the customer's country and the selected payment method before :
- modifying product prices, quantities and tax rates
- adding and editing products
- modifying delivery and payment costs
- modifying the order discounts.
In some situations, Klarna will reject changes if they increase the total order amount.
Klarna reviews the changes and approves or rejects them based on the customer's credit data. The review is done instantly and Klarna's system will inform you about its approval/rejection as soon as you've edited the order's products. Once approved, the amount to be paid with Klarna and order details in Klarna's portal will be updated automatically.
After activating the payment, you can edit order products freely (in terms of prices, quantities and VAT rates). Activating payments is possible only if the amounts match in the admin panel and Klarna's portal.
If you add new products to the order, you must create a new payment transaction by using a service other than Klarna to accommodate the new order total. When products are removed from the order or returned by the customer, you can refund payments made with Klarna to the customer directly via the order page.
Editing payments in Klarna's Merchant Portal
You can also edit payment sums in Klarna's portal, and the changes will be automatically updated to your online store's admin panel.
Only the payment amount can be modified in Klarna. Changes made to individual product lines in the Klarna portal will not be updated to the store.
Selling using local currencies and payment methods
You can specify the countries to which you'd like to sell using local currencies and payment methods on the page, in the Checkout settings section.
- Switzerland
- Denmark
- United Kingdom
- Norway
- Sweden
- United States
Selling using local currencies must be covered by your Klarna agreement.
If the currency you've selected in checkout settings isn't covered by your Klarna agreement, after the first attempt to use it at checkout, it will be automatically disabled in the settings, and future payments will be created in euros.
If paying won't work even in euros, ask Klarna's customer service to enable the Global setting for your account.
Selling in local currencies is only possible when using Klarna's own payment methods. MyCashflow's built-in payment methods and PayPal are available at checkout only if the order's currency is the euro.
B2B sales
In addition to the regular checkout intended for consumer customers, Klarna Checkout includes a B2B checkout, whose functions are specifically designed for the needs of business, i.e., B2B sales.

You can enable B2B sales at Klarna Checkout via the page's Checkout settings section.
Klarna Checkout's B2B feature does not support international trade.
If your store sells products to a business operating in a different country, instead of Klarna Checkout, a suitable payment method could be MyCashflow Invoice, with which you can set prices to be displayed excluding VAT, just like in the store version intended for resellers.
Enabling B2B sales results in the following changes at checkout:
- The customer can choose to order as a company or as an individual.
- The B2B checkout is displayed automatically to logged-in business customers.
- Business customers:
- must provide a company name and business ID
- have the option to provide a reference number
- Finnish business customers see a VAT differentiation.
- Only the following payment methods are available at the checkout:
- anticipated payment
- cash-on-delivery
- card
- invoice
- PayPal.
Shipping methods in Klarna Checkout
When using Klarna Checkout, you can specify additional information for shipping methods that are not currently available when using other payment services.
Setting delivery times for shipping methods
In the shipping method form, you can set delivery times for shipping methods used with Klarna Checkout.

You can define the following settings:
- Delivery time: You can define the minimum and maximum delivery time.
- Order before time: You can set the time before which orders should be placed so that they can be delivered within the delivery time estimate.
Setting additional information for shipping methods
In the shipping method form or in a shipping method's details, you can specify additional details that will be displayed for the shipping method at Klarna Checkout.
You can set the following types of additional information for shipping methods in the Shipping features section of the shipping method form:
- Carbon compensated
- Eco-friendly
- Evening delivery
- Express delivery
- Recommended

Shipping methods at Klarna Checkout
In MyCashflow, the checkout provided by Klarna Checkout is equipped with Klarna Shipping Assistant that displays shipping methods in a different way than the default MyCashflow checkout.

Here's an overview of how the checkout differs from the built-in MyCashflow checkout:
- The shipping method menu doesn't display the shipping method's name, but rather just the shipping service it uses (e.g. Posti Postal Parcel is displayed at the checkout as Pickup box).
- If set, additional information and delivery times are displayed for a shipping method.
If your online store has shipping methods of the Pickup type, make sure that individual collection points have been added to a single shipping method's settings, not as separate shipping methods.
Klarna Shipping Assistant is a paid service offered by Klarna that is included in the checkout solution Klarna Checkout in MyCashflow at no additional fee.
Customizing the design of the checkout page
The checkout page for Klarna Checkout is built into the MyCashflow system, which means that it cannot be customized via store theme files, but you can still influence its appearance by specifying the logo and the colors of the elements displayed at the checkout.
Colors
You can specify the colors for the following elements:
- the top bar background
- the top bar text
- buttons' backgrounds
- buttons' texts
- links
You can specify the colors by using the Hex color scheme in the Checkout settings section of the page.
Logo
You can specify which logo – store or version – should be displayed at the checkout. If a version has its own logo, it will be used instead of the store logo.
The store logo can be set in the general settings, whereas version logos can be set in the versions' additional settings.
Using other payment services at Klarna's checkout
- MyCashflow's built-in payment services:
- MyCashflow Invoice
- MyCashflow Advance payment
- MyCashflow Cash-on-delivery
- PayPal
- Ropo One
If you'd like to use any of the above-mentioned services at Klarna Checkout, ask the MyCashflow customer service to add support for them on KCO v3.
- check the visibility of additional payment services on the page and, if necessary, make the desired changes in the payment method settings
- if you'd like to use PayPal, add a new PayPal payment method to your online store. A new PayPal implementation used at Klarna Checkout is automatically enabled when you create a new payment method or make a copy of an old PayPal payment method.
Currently, the new implementation of PayPal works only at Klarna's checkout, so make sure that the payment method isn't visible in any version that uses MyCashflow's checkout.
Using Klarna's on-site messaging banners in the online store
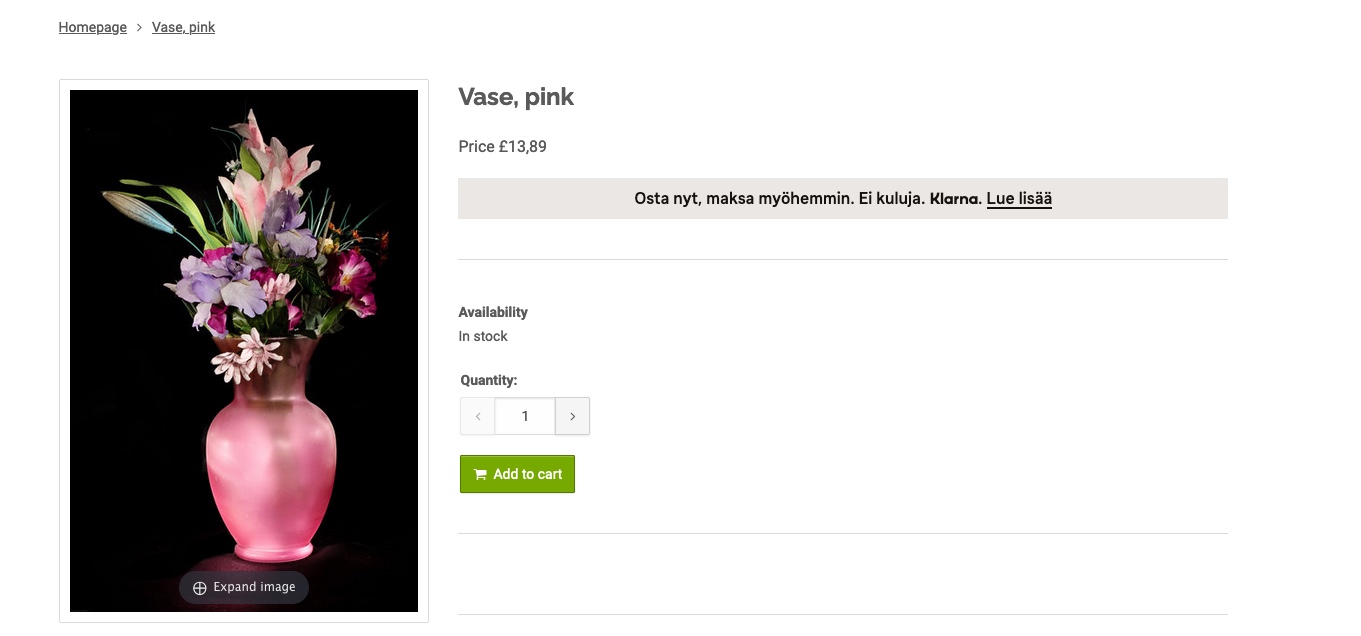
You can use on-site messaging banners to display personalized messages to customers registered with Klarna.

To learn more about on-site messaging banners, see Klarna's website.
The next chapters discuss how to enable, install and manage banners.
Enabling on-site-messaging
You can now install on-site messaging banners at any location in your online store.
Installing on-site messaging banners in your online store
Installing on-site messaging banners requires modifying the theme's HTML files. If you're not familiar with modifying themes, contact the designer of your store theme or the MyCashflow service.
Install Klarna's on-site messaging banners in your online store by adding the <klarna-placement> element to all theme locations, where you'd like the on-site messaging banners to appear.
For instance, the product template (product.html) can be a good place for displaying banners.
You can find placement tags for on-site messaging banners in Klarna's Merchant Portal, on the page .
Managing on-site messaging banners
After enabling on-site messaging banners in your online store, you'll be able to manage them in the Klarna Merchant Portal.


