With the Paytrail payment service, you can enable online payment features provided by the most common Finnish banks as well as credit card payments in your online store.
Features
- Online payment features of the most common banks
- Credit card payments
- Bank transfers
- Payment link, allowing an order to be paid via Paytrail at a later point in time
- Payment method selection page bypass (Paytrail payment options embedded in the checkout page)
- Returning payments directly in your online store's admin panel
When a customer at checkout chooses a payment method that uses Paytrail, they will be able to select one of Paytrail's services.
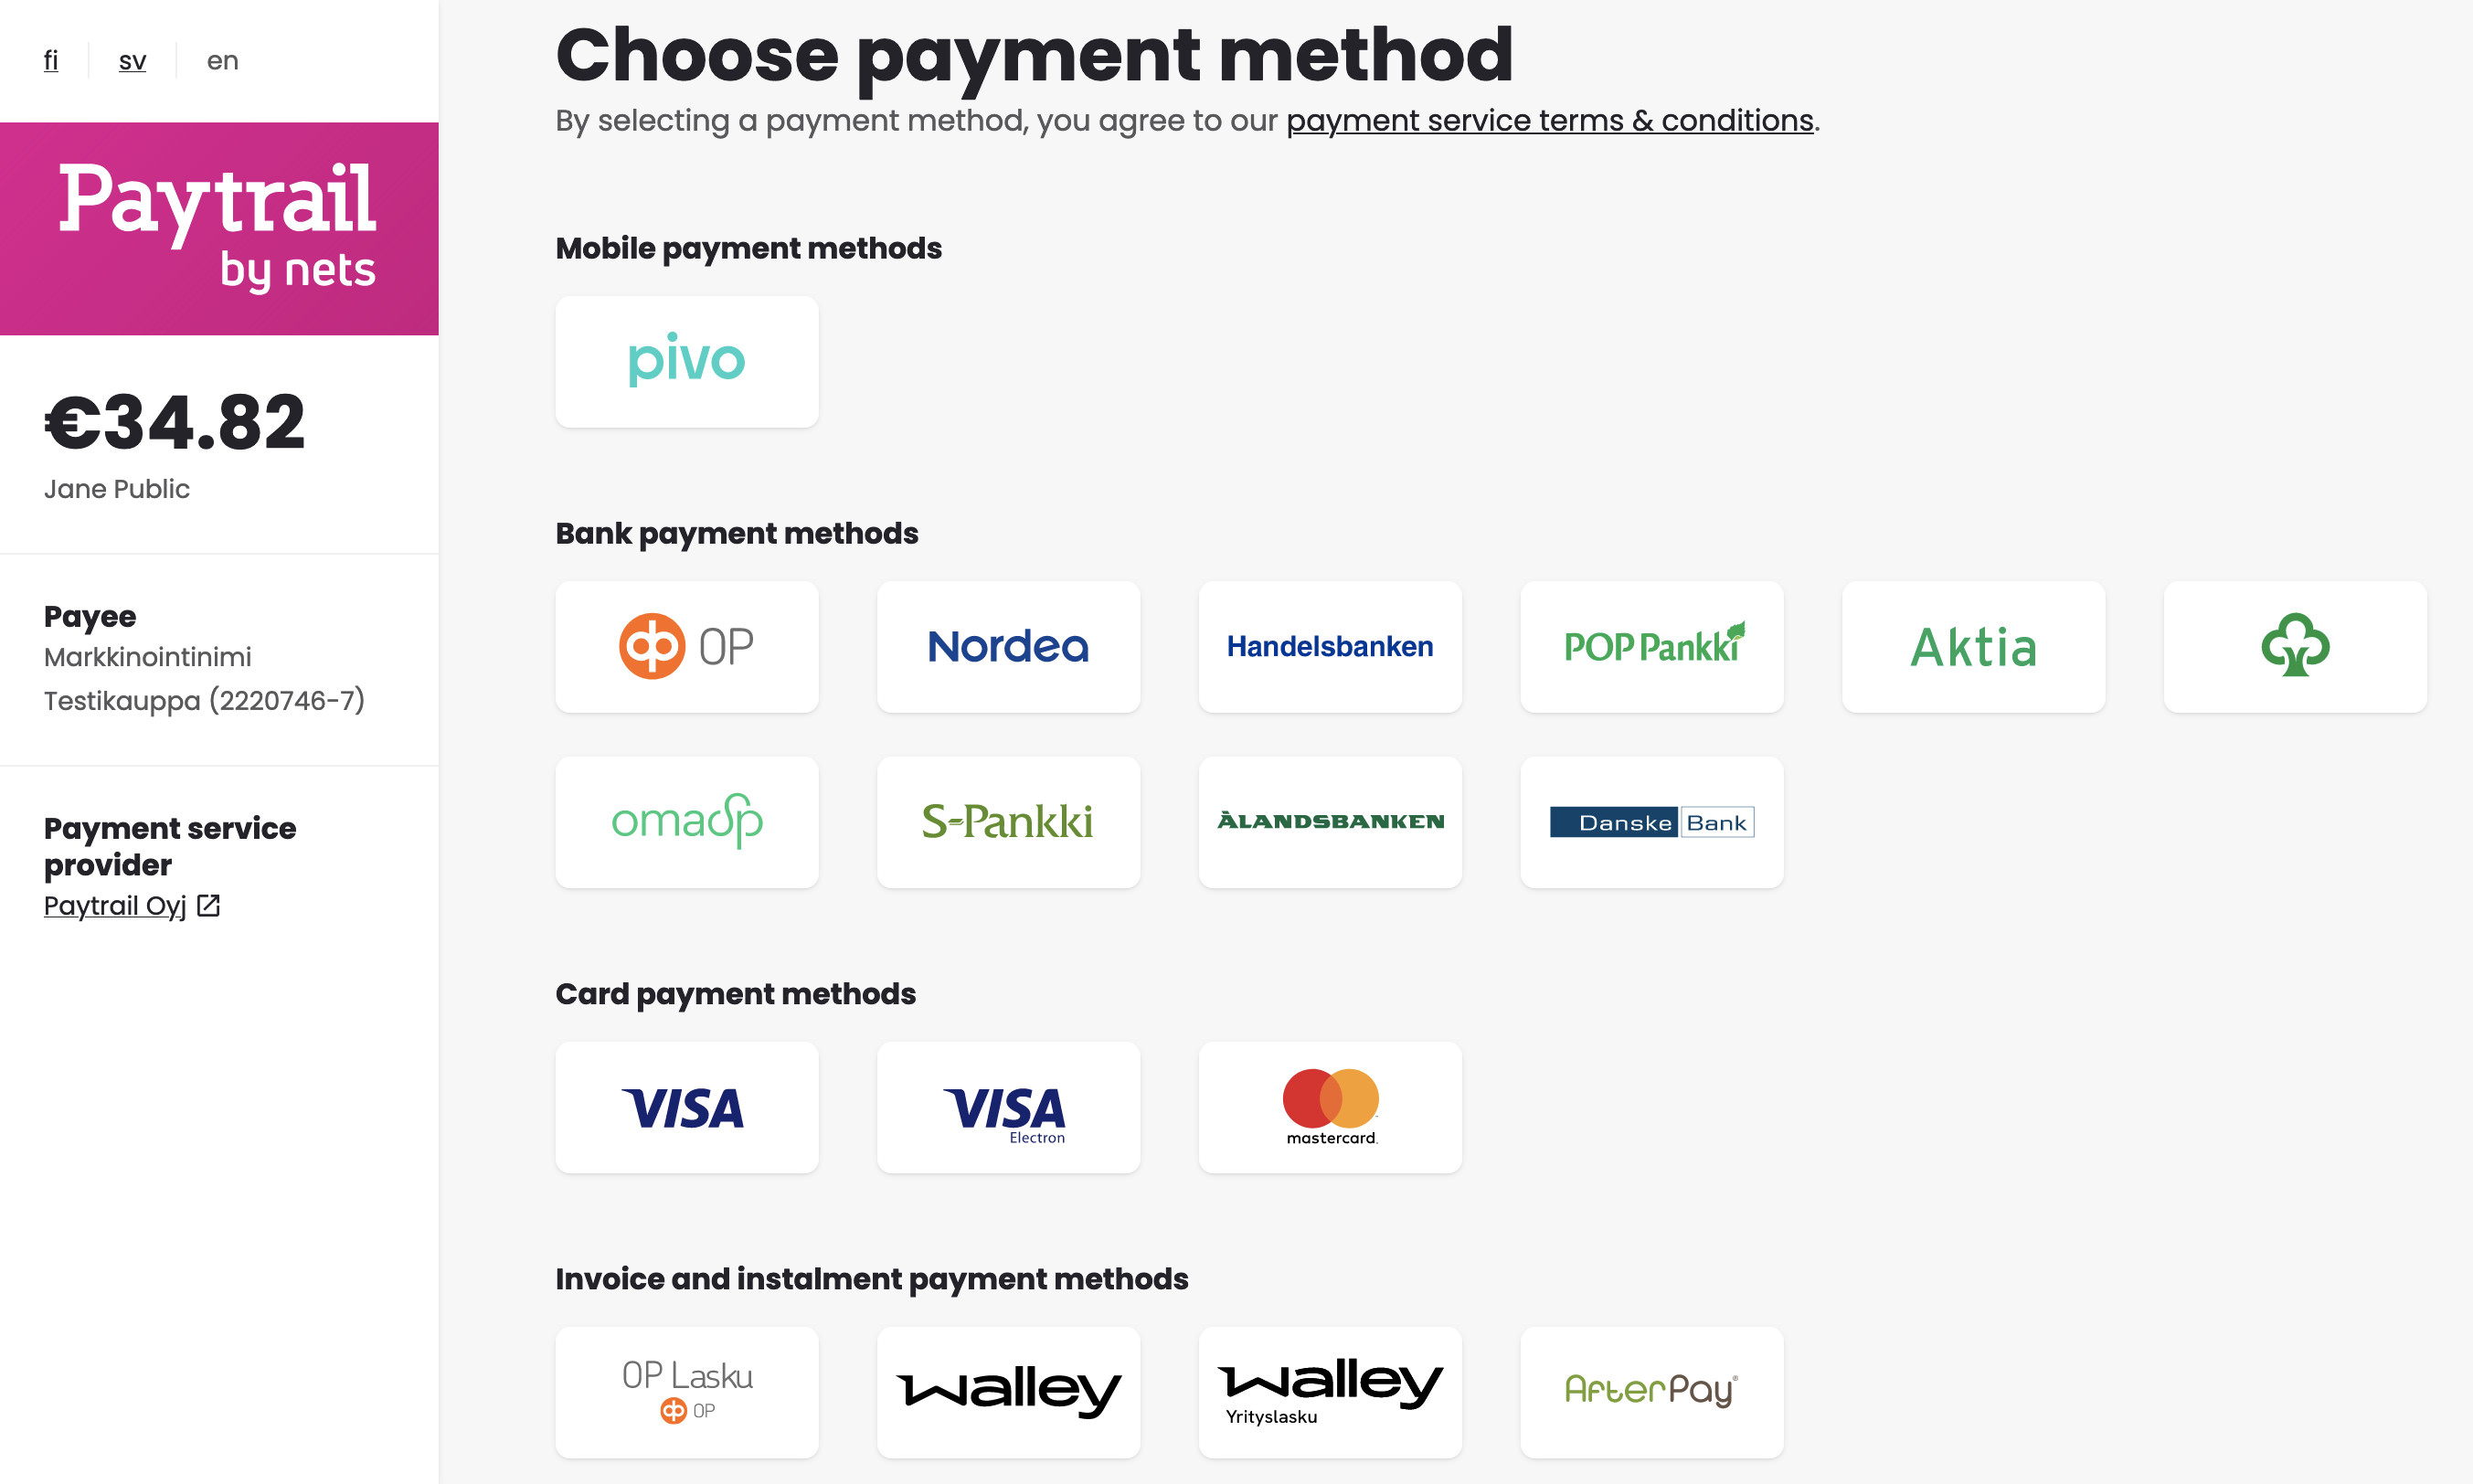
From the payment service view, the customer is transferred to the payment service of their choice, where they can pay for their order. After this, the customer is again redirected to MyCashflow's order confirmation page.
If the customer returns directly from the payment service to the online store, the system marks the payment as completed immediately. If the customer doesn't return to the store, the payment will be displayed as open, but Paytrail will automatically update its status later.
Pricing
MyCashflow offers two Paytrail pricing options designed for stores of different sizes:
- The monthly fee for the S option is small, so it is especially suitable for new and smaller online stores.
- The monthly fee for the M option is higher, but as the sales volume increases, it becomes cheaper in terms of total costs.
Paytrail payment services
The Paytrail payment services available at your online store's checkout can be managed on the page in Paytrail's merchant panel.
Some payment services have restrictions on payment amounts. If the order amount exceeds the payment threshold set for a service, that service will not be visible at checkout at all.
The available payment services are as follows:
- Bank payments: Nordea, OP Bank, Danske Bank, Savings Bank, Oma Savings Bank, POP Bank, Aktia, Handelsbanken, Ålandsbanken and S-Bank
- Invoice and installment plan services: Walley (inc. business invoice), OP Lasku and Jousto
- Card payment: Visa, Mastercard and American Express
Credit card payments need to be enabled separately on the page in Paytrail's merchant panel. The user account must have authority to sign, and the activation will take 2–3 days.
The Click to Pay online payment feature by Mastercard and Visa must also be enabled separately from the Paytrail merchant panel.
- Mobile payments: MobilePay, Siirto, Apple Pay, Google Pay
Credit card payments need to be activated in order to have mobile payments available in the online store.
Installation and setup
If you are not yet a customer of Paytrail, start by registering in the service:
- Open the Paytrail subscription form on the left-hand column.

Next, you can create a new payment method that uses Paytrail:
- Select Paytrail as the payment service.

Paytrail payment method settings
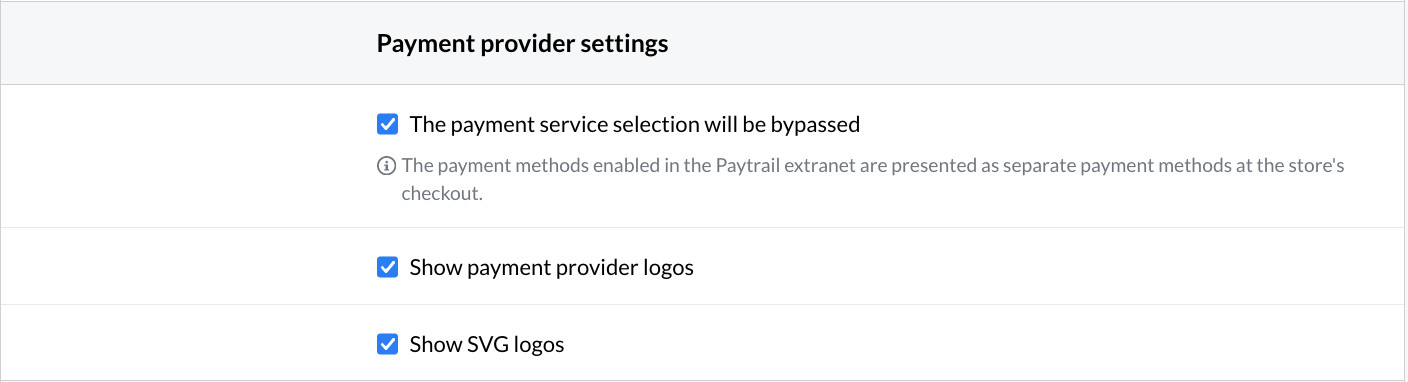
- The payment service selection will be bypassed: Embeds Paytrail's payment service menu on the online store's checkout page and bypasses the separate payment service selection page.
Learn more about bypassing the payment service selection page
- Show payment provider logos: Makes the payment service logos visible in the payment service menu at the checkout.
The payment service selection will be bypassed must also be selected.
- Show SVG logos: Displays the logos in the payment service menu in the SVG format (the PNG format is used by default).
Both of the aforementioned settings must also be selected.
SVG is a scalable image format that keeps images sharp regardless of which size they are displayed in.
- Select payment classes: You can specify the types of payment options that a customer sees at checkout:
- Bank payments
- Mobile payments
- Card payments
- Credit payments
This allows you to create several Paytrail payment methods of different types, which you can organize in your online store's admin panel.
If the payment method is based on credit or another form of deferred payment, it must be presented in the online store as a last resort payment option. The Finnish Consumer Protection Act sets out the order of presentation of payment methods according to a three-level classification:- payment methods that do not involve credit or deferred payment
- payment methods which may include the possibility of credit or deferred payment
- payment methods that require the use of credit or deferred payment.
Payment tracking and payment method management
You can manage the functioning of the service and the payment transactions in the Paytrail merchant panel at https://merchant.paytrail.com/login.
The merchant panel is where you can, among other things,
- manage and modify payment services used in your online store
- check payment balances and payments that have not been accounted for.
Additionally, you will receive an accounting report from Paytrail twice a month.
Using the payment link
All payment transactions in Paytrail are linked to a payment page, where customers can make the payment. A payment link comes in handy, for instance, in the following cases:
- Corrective payment transactions: If products need to be added to an order afterwards, you can create a new Paytrail payment for the order and send the payment link to the customer.
- Orders created on behalf of the customer: When you create an order on behalf of the customer in the admin panel, it is convenient to charge the customer by means of a Paytrail payment link.
Using payment links in orders created on behalf of customers
Here's how to get a payment link for an order that you created yourself in the admin panel:
- Once you've created the order, open it in the admin panel, and add the desired products to it.
Once you're done adding products, you'll see a notification for creating a payment transaction for the order on the page.

Refreshing the payment status
If the customer has selected a payment service that does not require the payment to be made at the same time as placing an order (e.g., it is possible to pay by invoice), you can refresh the payment status by using the Refresh payment status functionality available via the Payment transactions menu on the order page.
If the payment has been made, its status will automatically be updated on the Payment transactions menu pane.

Refunds
Paytrail enables you to refund your customers directly from your online store's admin panel.
If an order has been paid with Paytrail, you can refund the payment via the right-hand Payment transactions menu on the order page.

Payment service selection page bypassing
You can set your online store to bypass Paytrail's payment method selection page and embed Paytrail's payment method options on the checkout page. In this case, all payment services selected on the page in Paytrail's merchant panel will appear as separate payment methods at your online store's checkout, and your customers will be able to review them easily even before confirming the order.
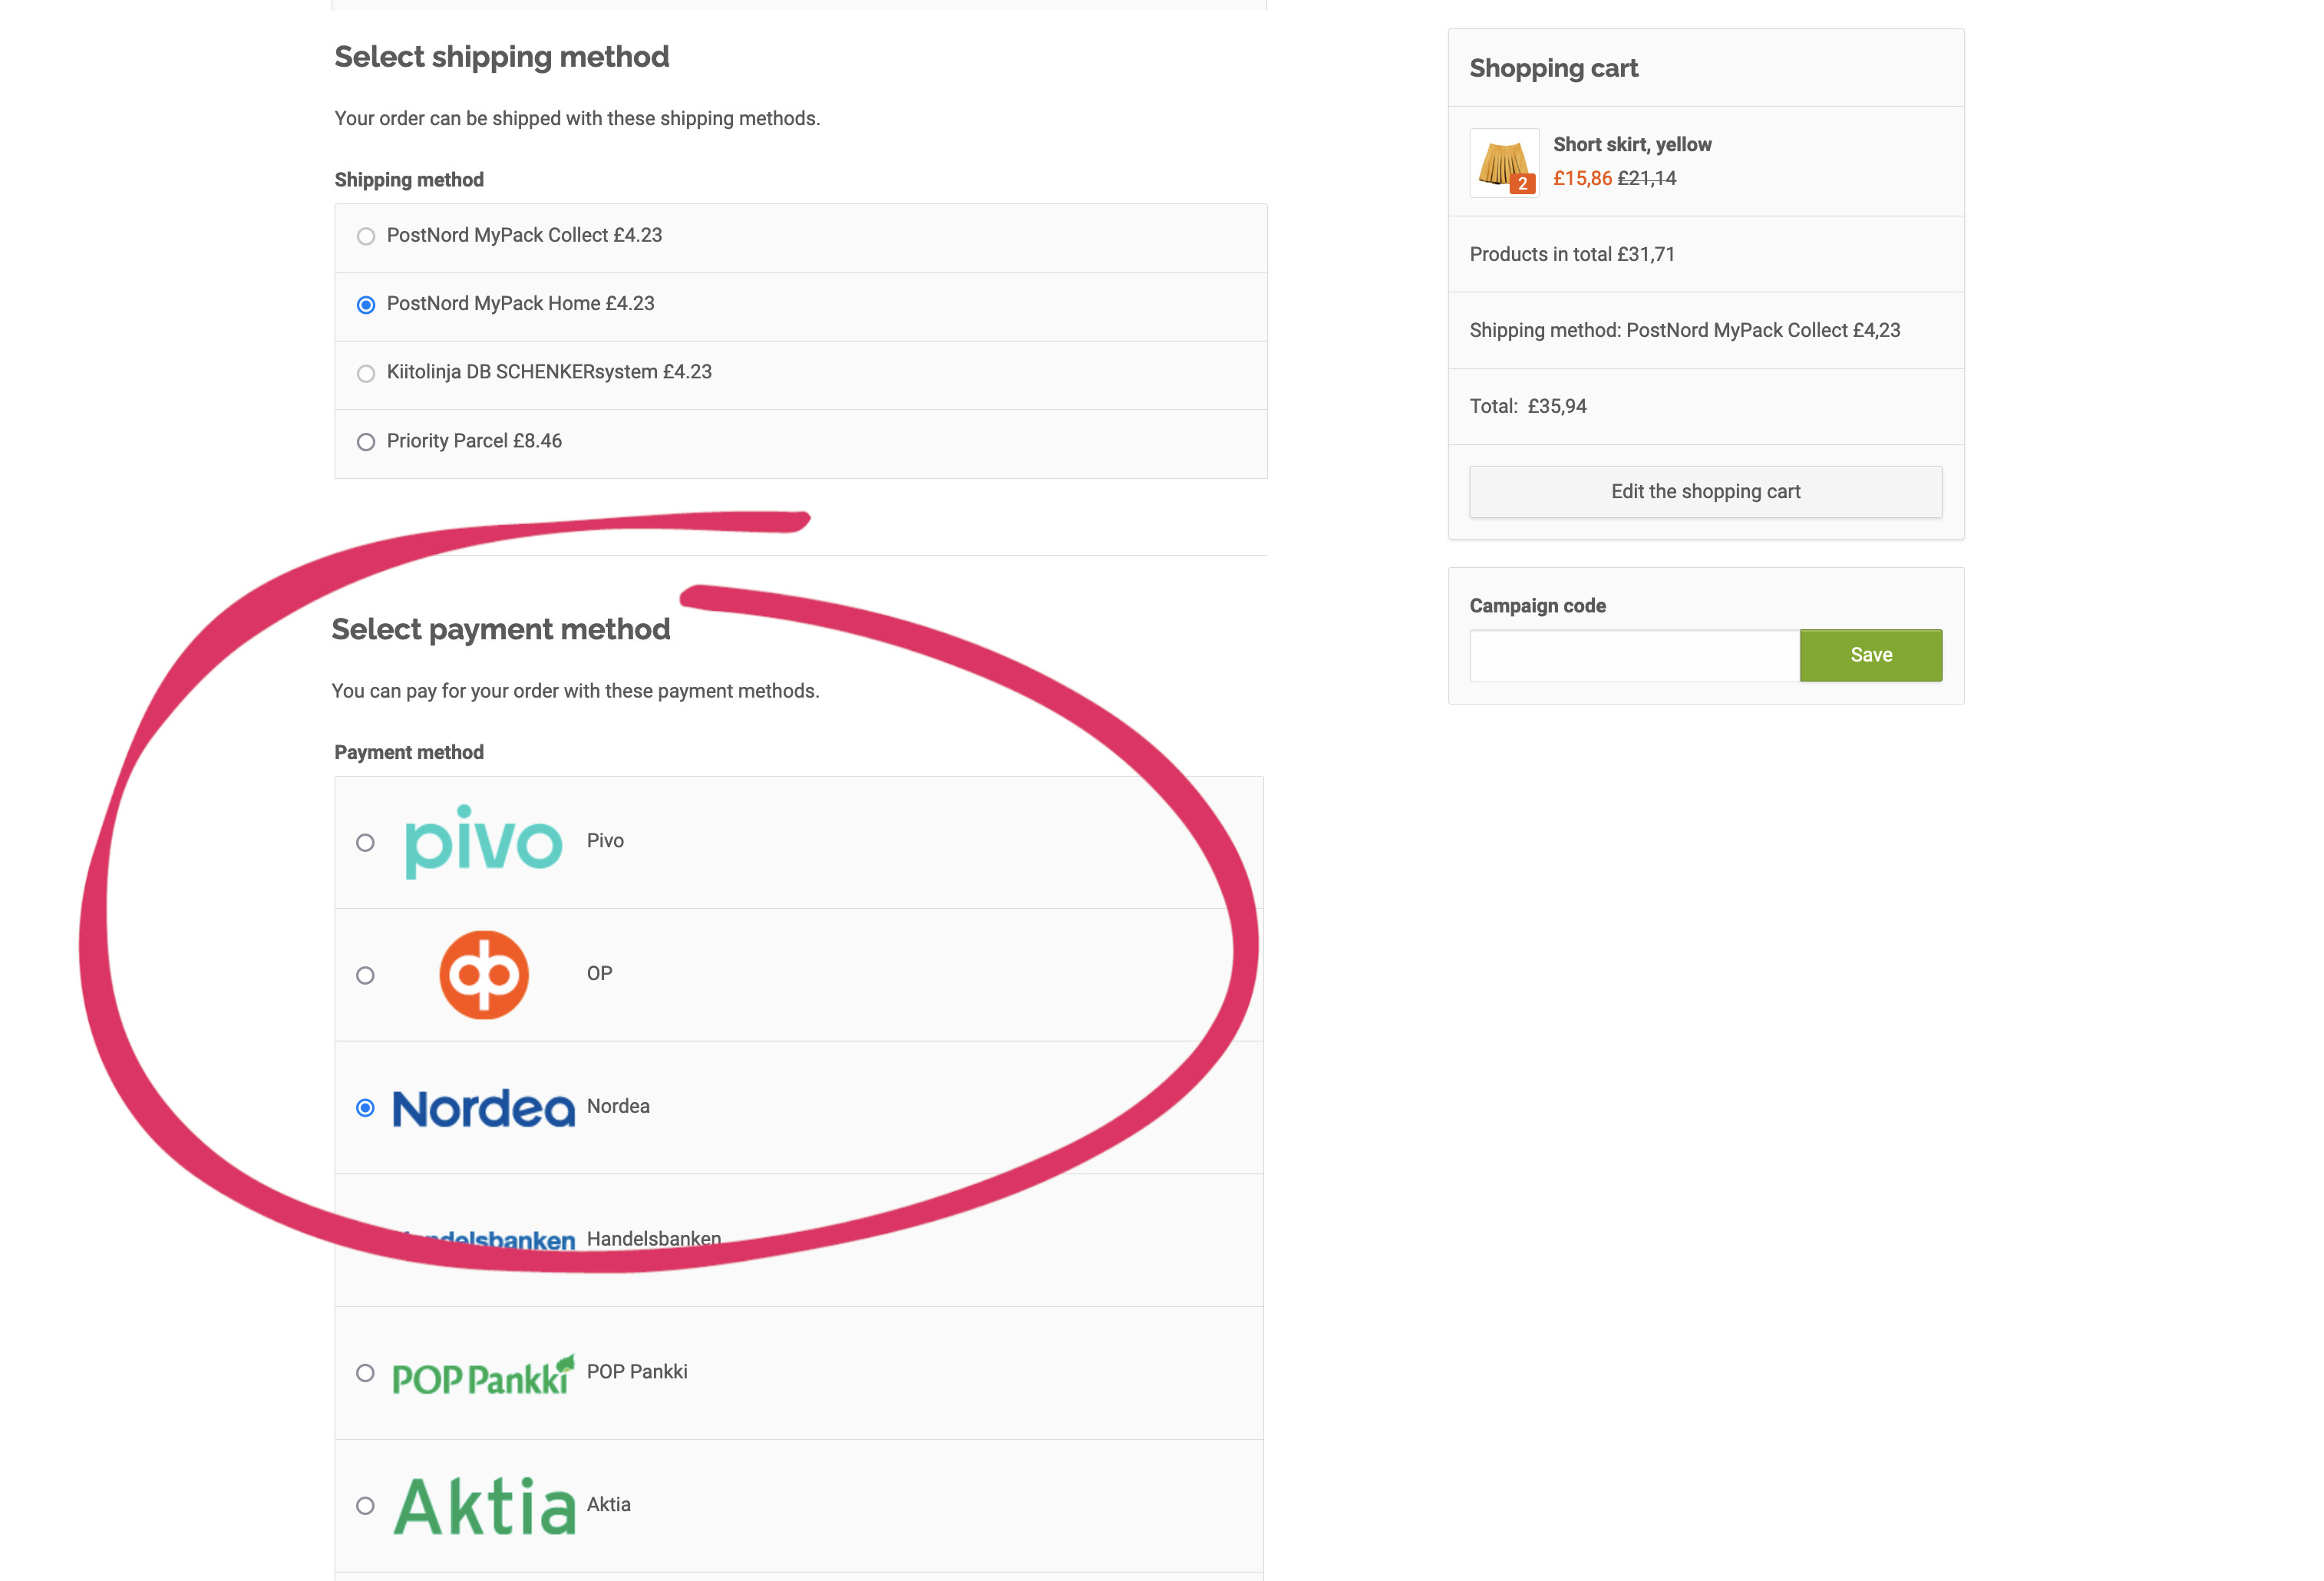
Enabling the payment service selection page bypass
After ordering the service, you can enable it by selecting The payment service selection will be bypassed in the settings of a payment method that uses Paytrail.
Save the settings after enabling bypassing the payment service selection page and defining payment options.
Processing Walley payments
In this section, we will go over the usage of the Walley payment service through the Paytrail integration.
Activating payments
If the customer has selected Walley installment plan or invoice as the order's payment method, the payment transaction will initially be displayed as Pending activation. No invoice for the order will be sent to the customer until the payment transaction has been activated.
- run quick processing for the order
- mark the shipment as delivered
- activate the payment manually by clicking the payment transaction link Activate payment.
After the payment has been activated for the order, the status of the payment transaction is automatically updated into Activated and Walley sends an invoice for the order to the customer.
When the customer makes the payment, the status of the payment transaction is updated into Paid.
If necessary, you can update the status of the payment manually by selecting Check payment status.
Refunding payments
It is not possible to make refunds for the order total if the payment status is Pending activation. To make a refund, first you need to do one of the following:
- activate the payment in the payment transaction section and make a refund
- activate the payment in the payment transaction section, but cancel the payment after the activation and send the customer a payment link for a new amount.
Canceling payments
If necessary, you can cancel payments in the Pending activation stage by selecting Cancel reservation in the payment tool menu located in the Payment transactions section on the right side of the order page.
When you cancel a payment, its status will change to Cancelled. In such a case, the payment won't be charged to the customer at all nor will it be included in the accounting report.
The payment status changes only in the online store's admin panel. It is not possible to cancel payments in Paytrail's merchant panel via MyCashflow.
Modifying the contents of invoices
The content of Walley invoices cannot be edited after invoice creation, so changes made to orders will not be reflected in the invoices.
To edit order contents, first activate the payment and, if it has already been paid, refund the sum of the original invoice to the customer. After this, you can modify the order and create a new Walley invoice.
Using Paytrail's accounting reports
The VAT details of the products included in orders placed in your online store are transmitted to Paytrail's accounting reports. You may want to use these reports in the accounting of your online store together with MyCashflow's accounting report.
How do MyCashflow and Paytrail reports differ?
The MyCashflow accounting report includes:
- sales details
- VAT breakdown
- payment breakdown (all payment services as well as information on discounts and gift cards)
- open order breakdown.
The Paytrail report, in addition to order and price information, includes the share of Paytrail's payment commissions, unlike the MyCashflow report.
When do I use Paytrail and MyCashflow reports?
When accounting for your online store, you should use both Paytrail and MyCashflow reports, but for different purposes.
- Use Paytrail reports only to inform the accountant about the share of Paytrail payments and their commission fees in online store sales.
Paytrail reports only include payment transactions for orders paid with Paytrail.
- Use MyCashflow's accounting report for example in the company's financial statements and whenever you need the exact row details for orders paid for through any payment services.