This quick guide chapter provides instructions on how to process customer orders and product returns.
When an online store customer places an order, you must process it. Processing the order updates the online store's shipment and payment information and stock balances, which form the basis for sales and accounting reports. Similarly, you must process any product returns.
In these instructions, processing orders means managing and updating the information of the online store. Excluded from the review are logistical practical actions, such as picking products from the warehouse, as well as packing and shipping to the customer.
- verifying payments made by the customer
- marking the order's shipments as shipped
- printing order documents
- creating gift cards if the order includes gift card products.
Order quick processing
If you deliver all the order's products in one shipment, you can use quick processing, allowing most routine tasks to be completed with the press of a button.
In Chapter 9 of this quick guide, you placed a test order in the online store, which you can now process:
- Check payment status
The payment method for the order determines whether the payment must be completed before the order is shipped.
If the order is paid using a payment service integration, the payment status is automatically updated in the online store. When using advance payment or invoice, you must check the payment transactions on your online store's bank account yourself and then acknowledge the payment as received from the tool menu in the Payment transactions section on the right side of the order page.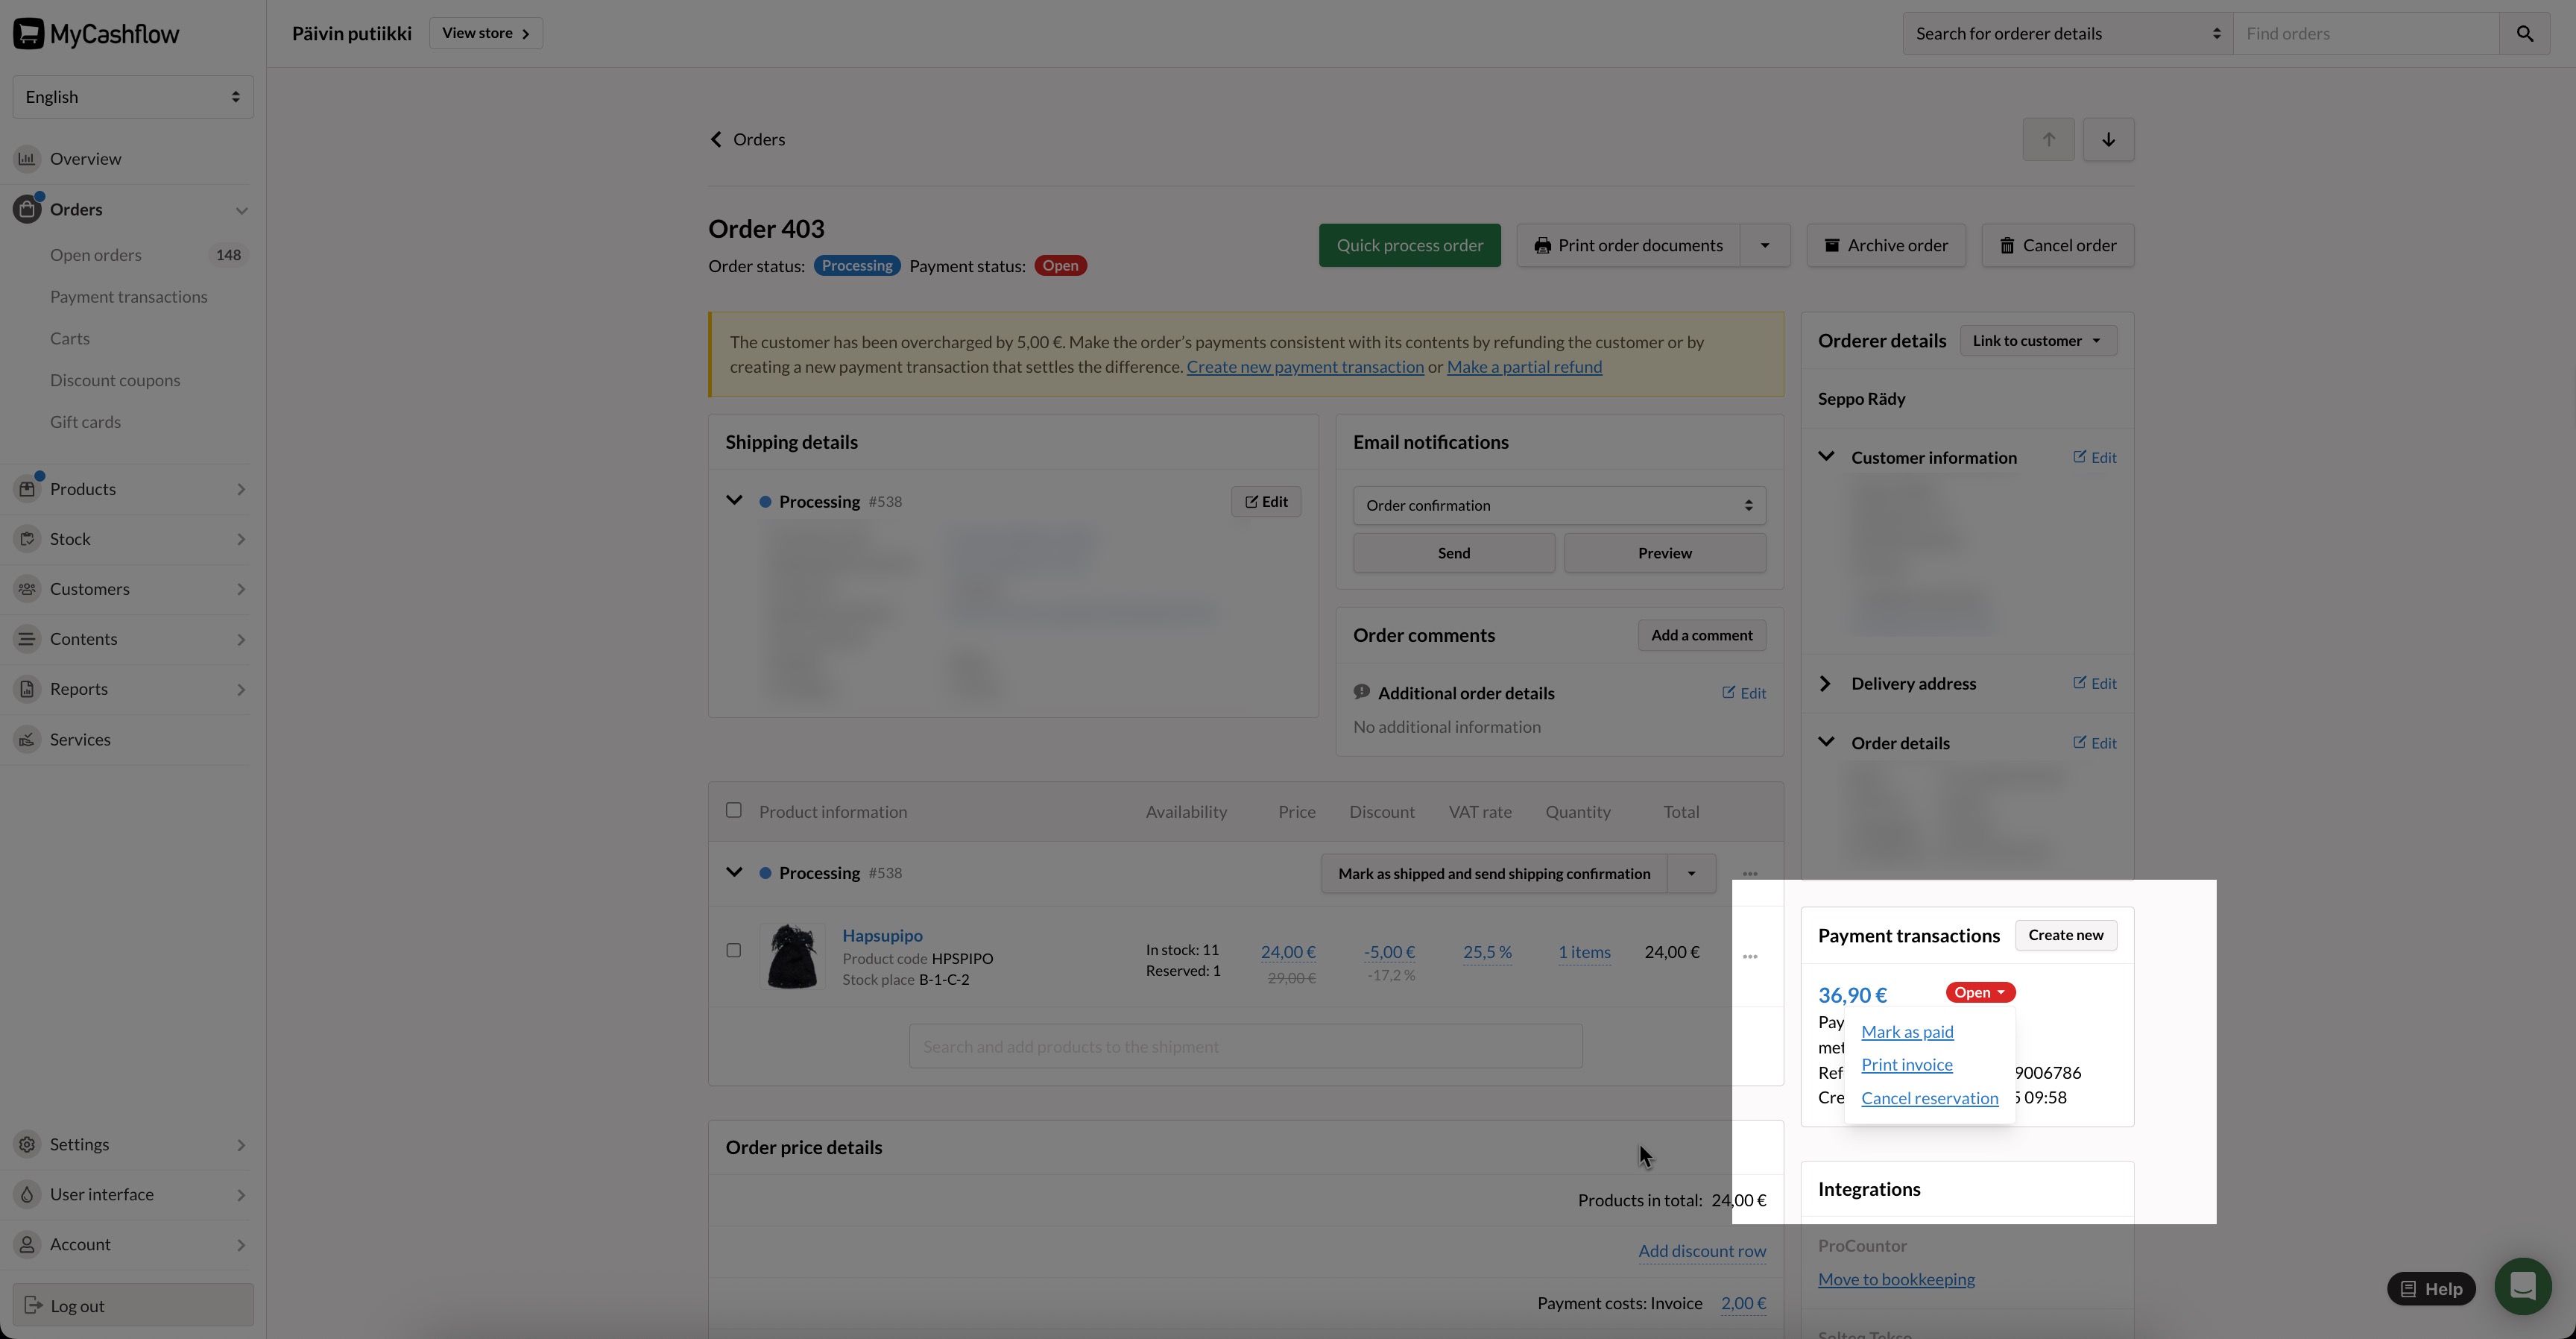
Since in this example you are dealing with only a test order you created yourself, you can leave the payment open. The order can be processed regardless of the payment status.
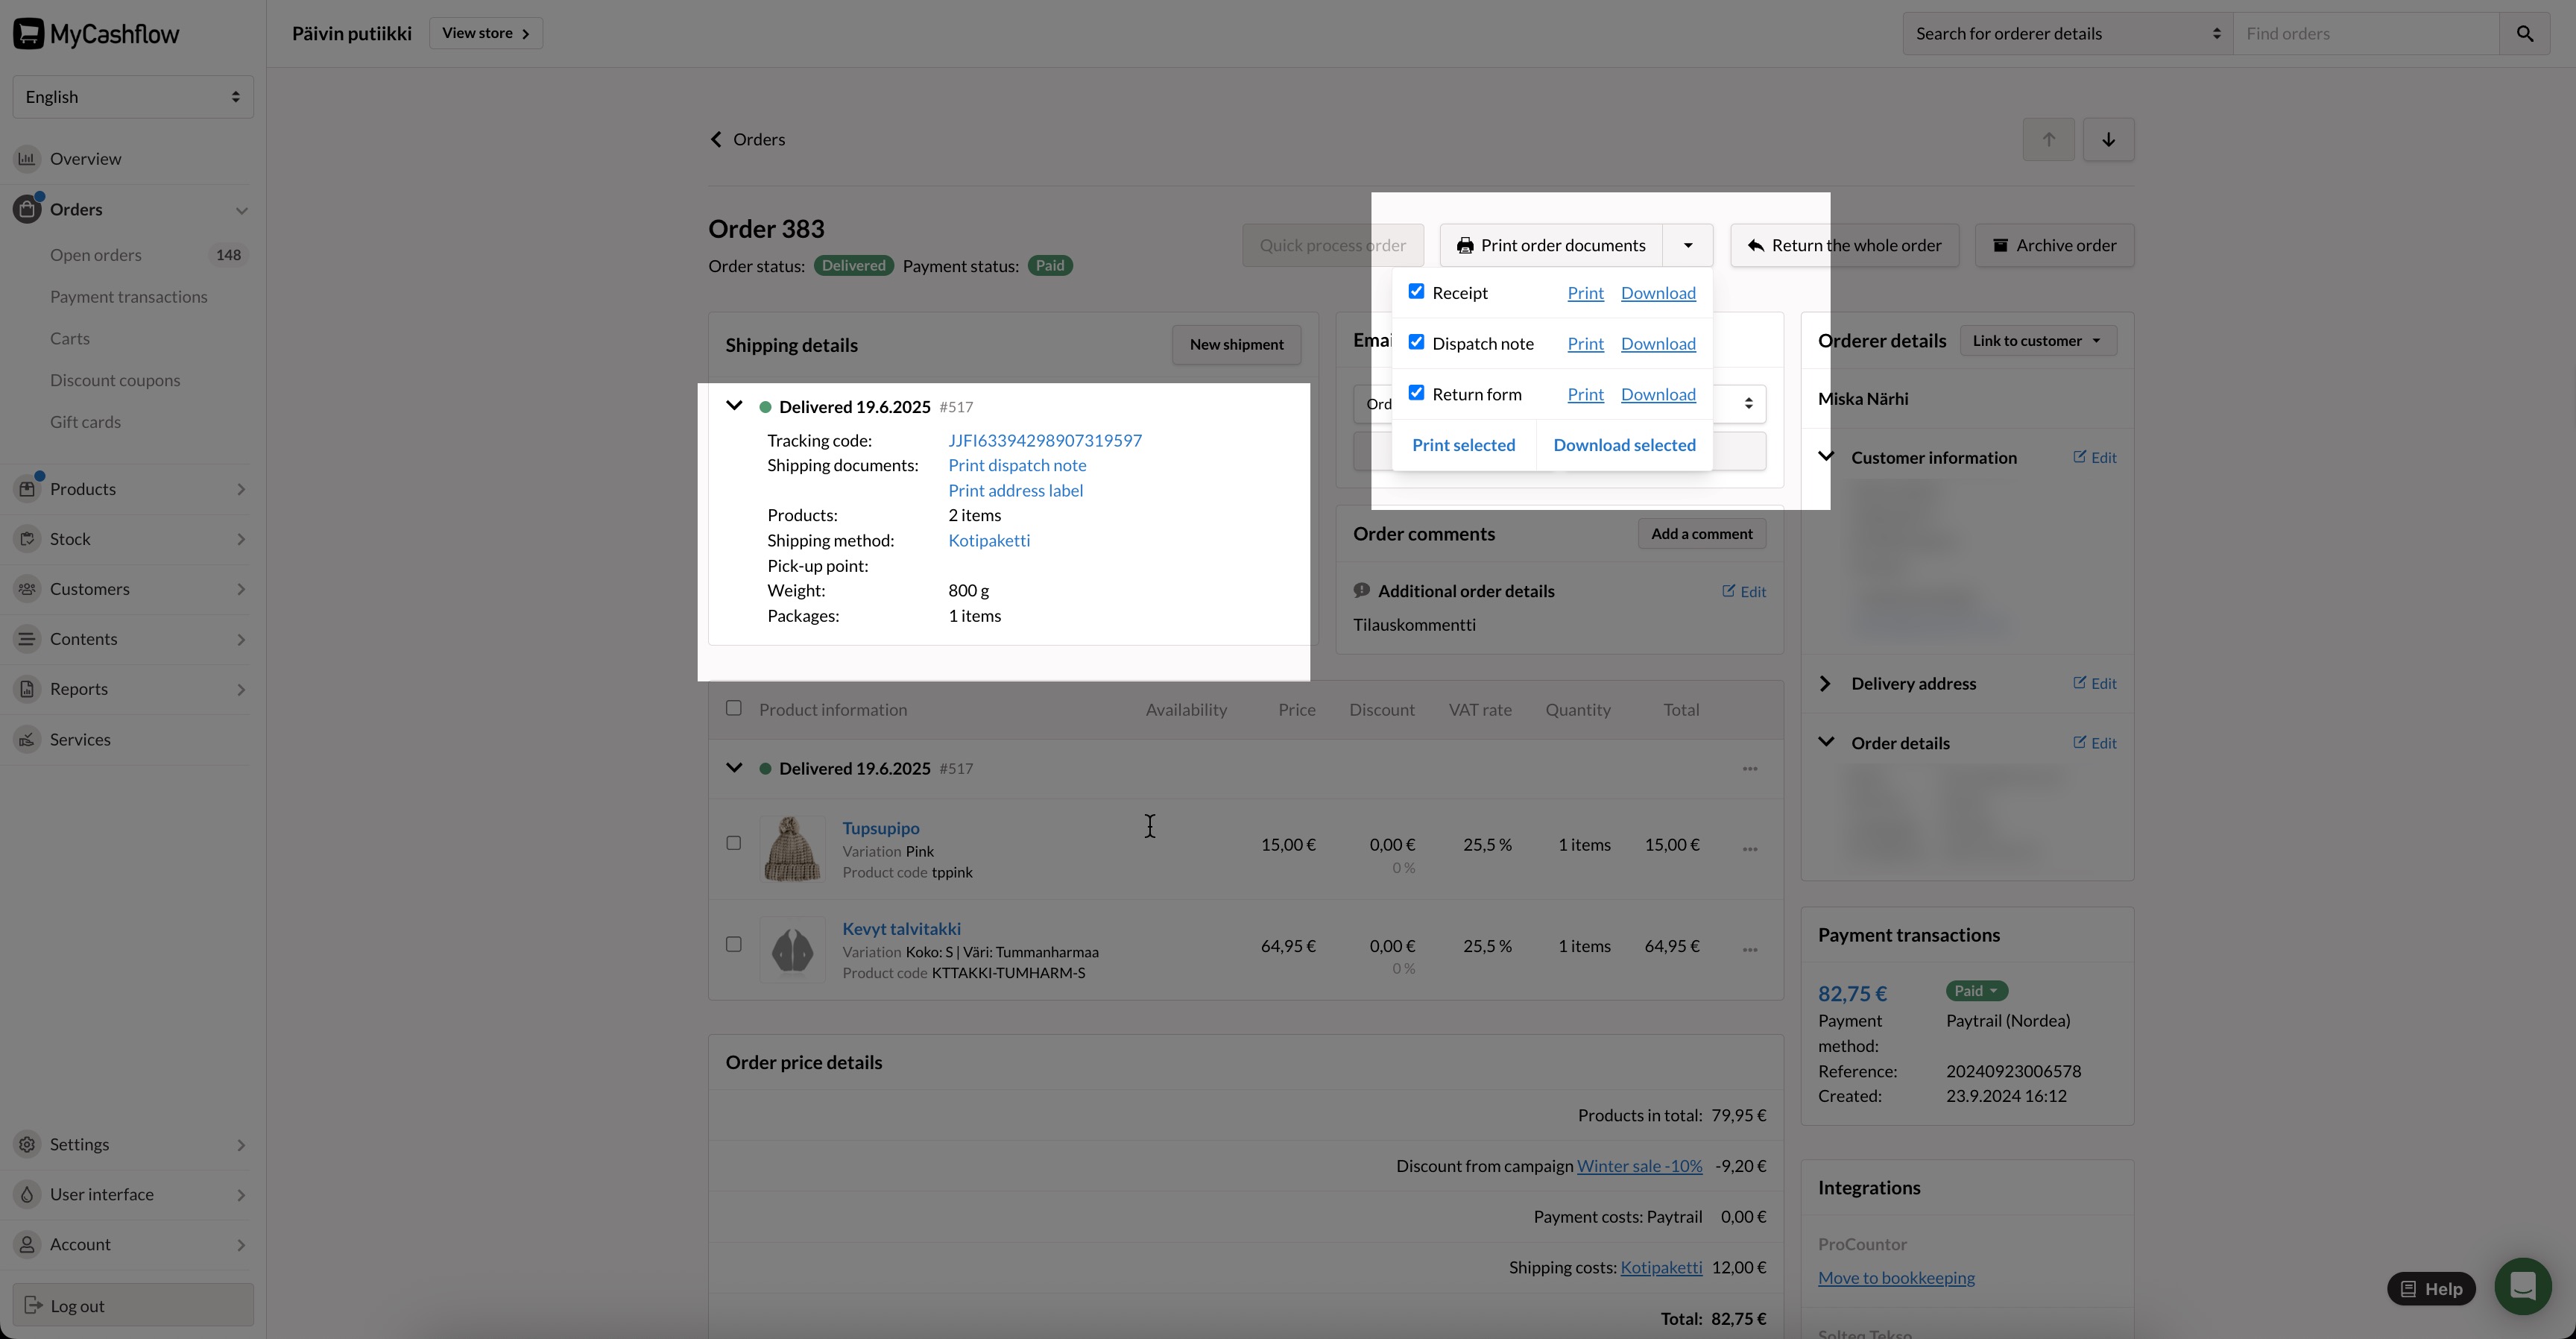
- Print the necessary order and shipping documents.
You can print the address label and the shipment-specific dispatch note, as well as any necessary customs documents, from the order page's Shipping details section. The documents related to the entire order (receipt, return form, and comprehensive dispatch note) can be selected for printing from the Print order documents menu at the top of the order page.
If you split the order into multiple shipments, you cannot use quick processing; instead, each shipment must be processed separately and in stages. Read more in the user manual about step-by-step order processing and partial shipments and backorders.
Processing a return of an order
If a customer returns an order, you must process the return to update the online store's information.
First, you need to find the order details:
- Select the option Delivered from the filter menu's Order status section and close the filter menu by pressing the cross on the left side of the menu.
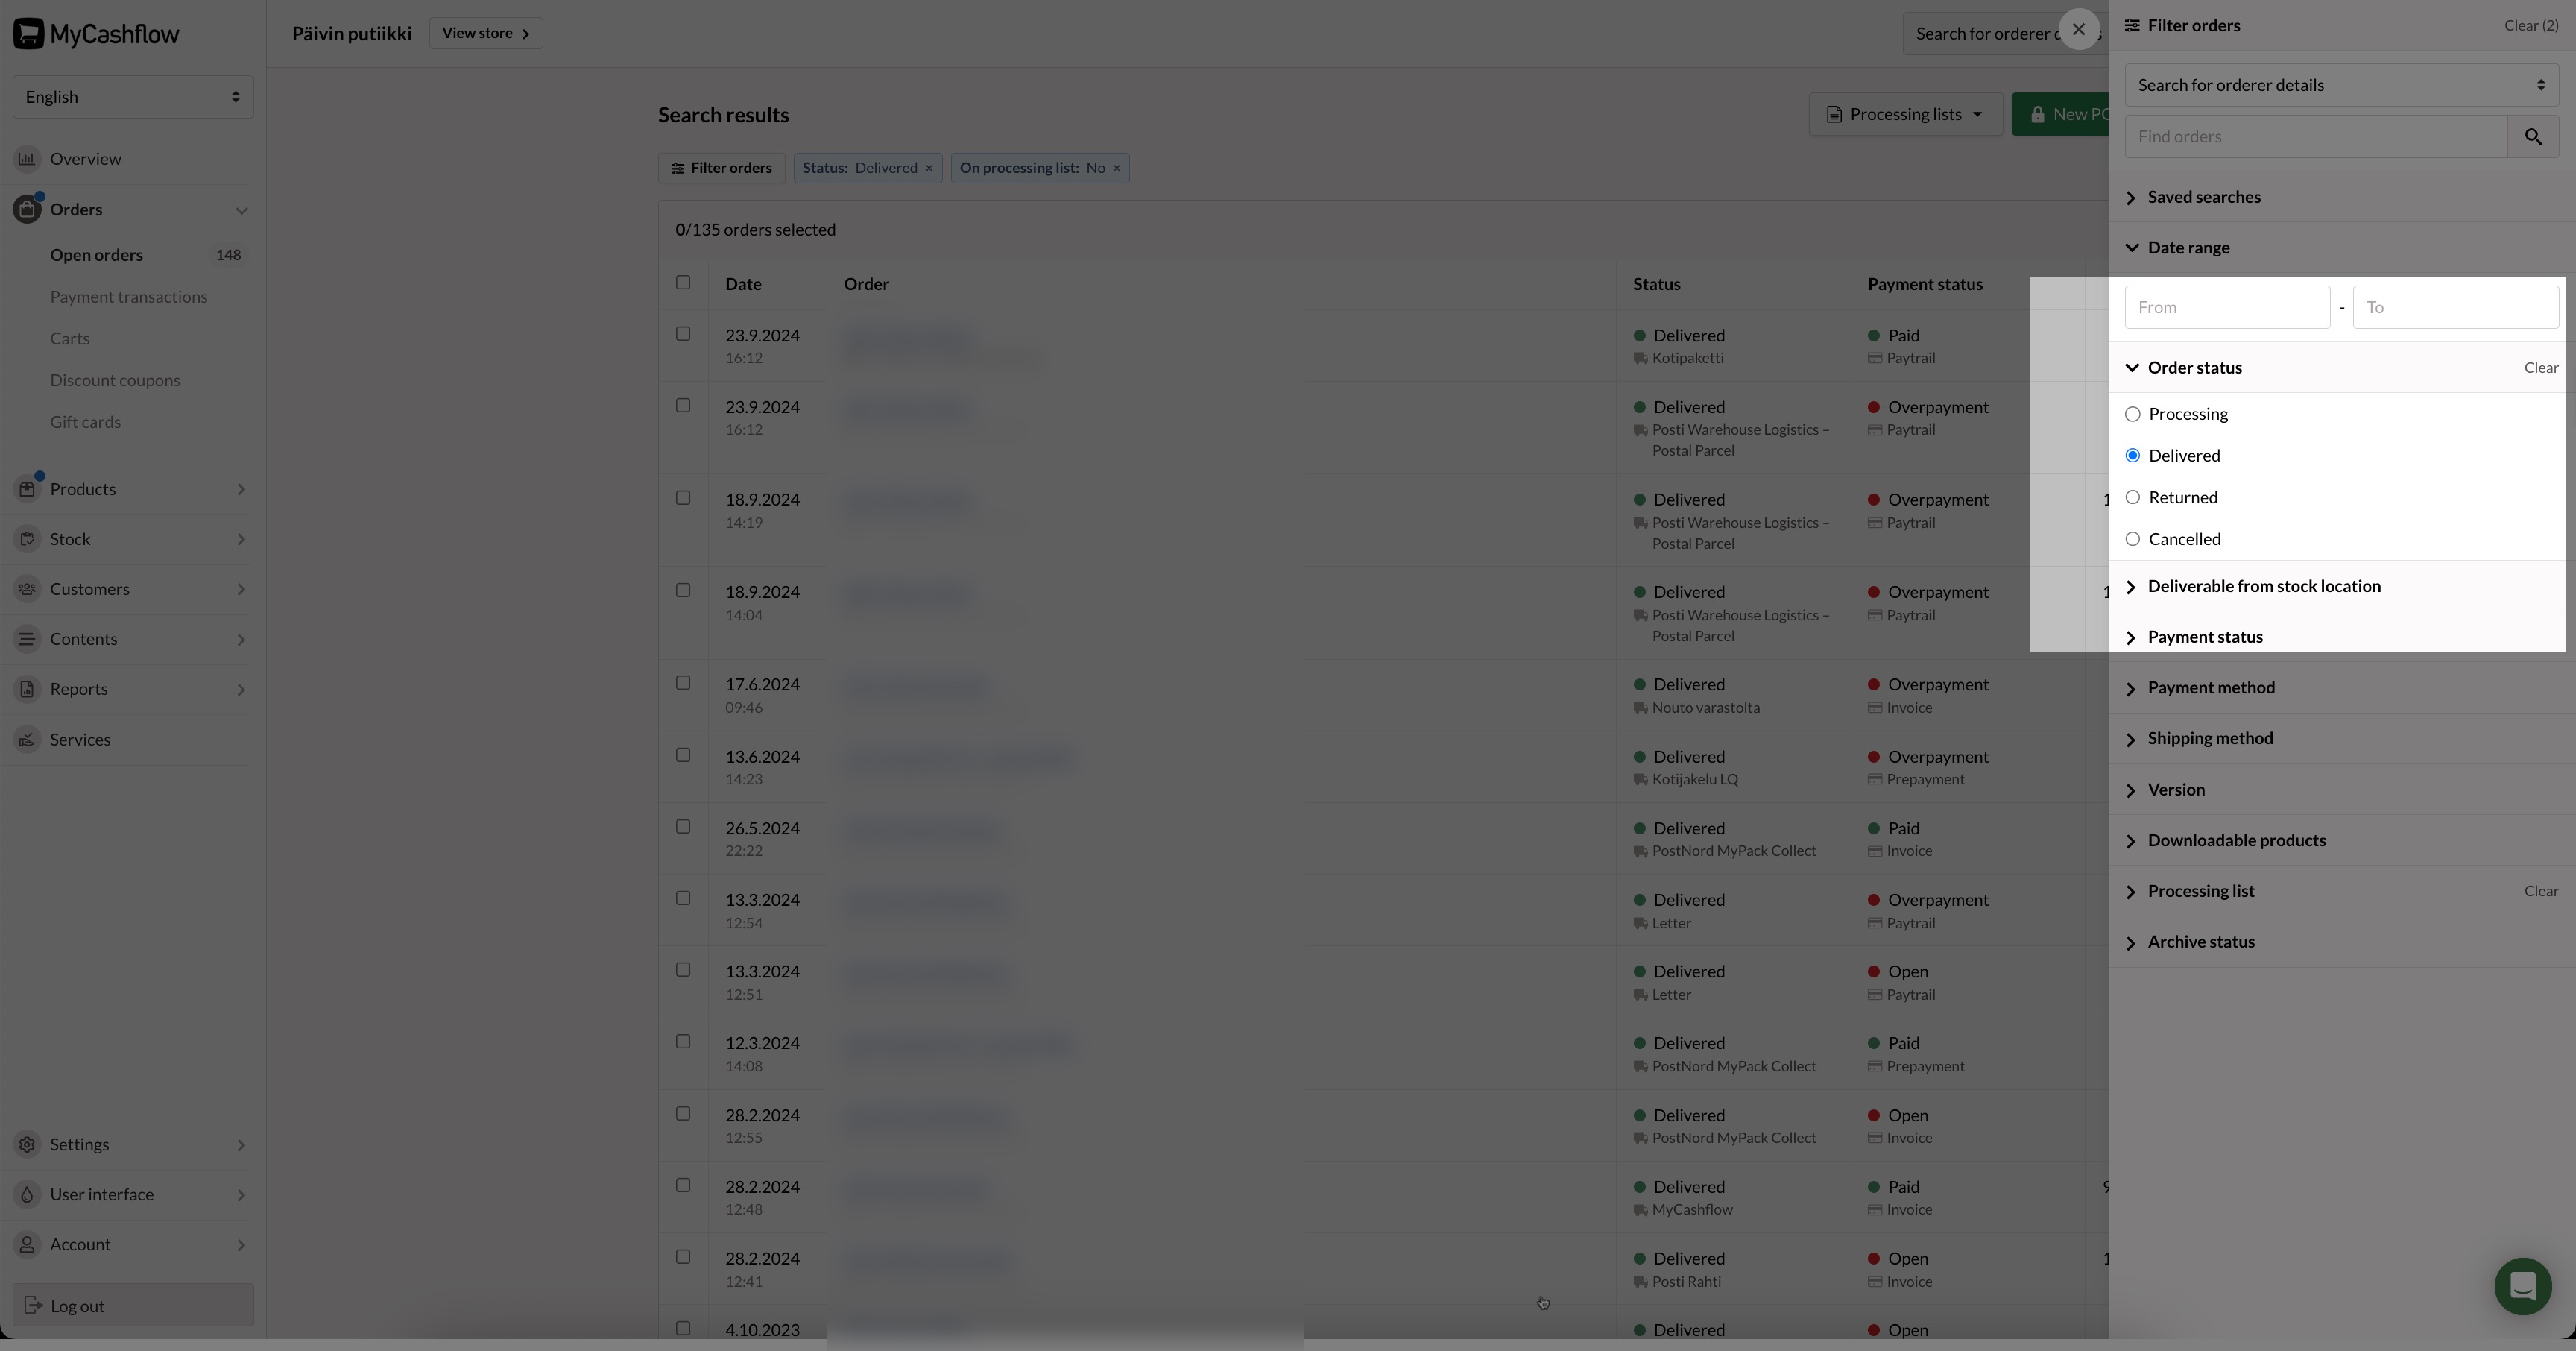
Now the page displays orders that are marked as delivered.
You've just processed the return. The order has a new return row that has been marked as returned. Thanks to the new payment transaction that you created, you can be sure that the order total matches the payments made.
If a customer has returned only some of an order's products or wants to exchange a product, you cannot process the return as if it applies to the entire order. Instead, you must select the products relevant to the processing from the shipping table on the order page. Read more in the user manual about returning individual products and processing product exchanges.