

The appearance of all MyCashflow online stores can be customized using handy graphic tools without any coding skills. This article covers the basics of editing the appearance and provides some examples of commonly editable elements.
The appearance of the MyCashflow online store is called a theme. MyCashflow offers several free pre-made themes that you can choose from to provide a suitable basic appearance for your online store, and then customize the theme to match your own style.
Installing and preparing the theme for customization
In this part of the quick guide you will
- create a hidden development version for your online store, where you can edit the theme without the changes being visible to the store's customers
- install a pre-made the in the development version
- start editing the theme.
- publish the theme when it is ready.
1/4: Creating a development version
It is advisable to always edit the theme in the hidden development version of the online store, so you can complete the changes at your own pace before publishing them to the online store's customers.
With versions, you can also create online stores in different languages, an online store for B2B customers, or other online stores operating at different URLs, each of which can have separate designs, product selections, contact information, etc.
See below for an interactive example and step-by-step instructions for creating a development version.
2/4: Installing the editable default theme in the development version
MyCashflow offers several pre-made themes suitable for different types of online stores. All of them can be customized using an easy-to-use graphical tool. You can modify, for example, the theme's colors, fonts, and menu structures, and add your own banner images to them.
Start customizing the appearance by enabling the desired pre-made theme:
- Select the development version you previously created from the version menu in the upper left corner.
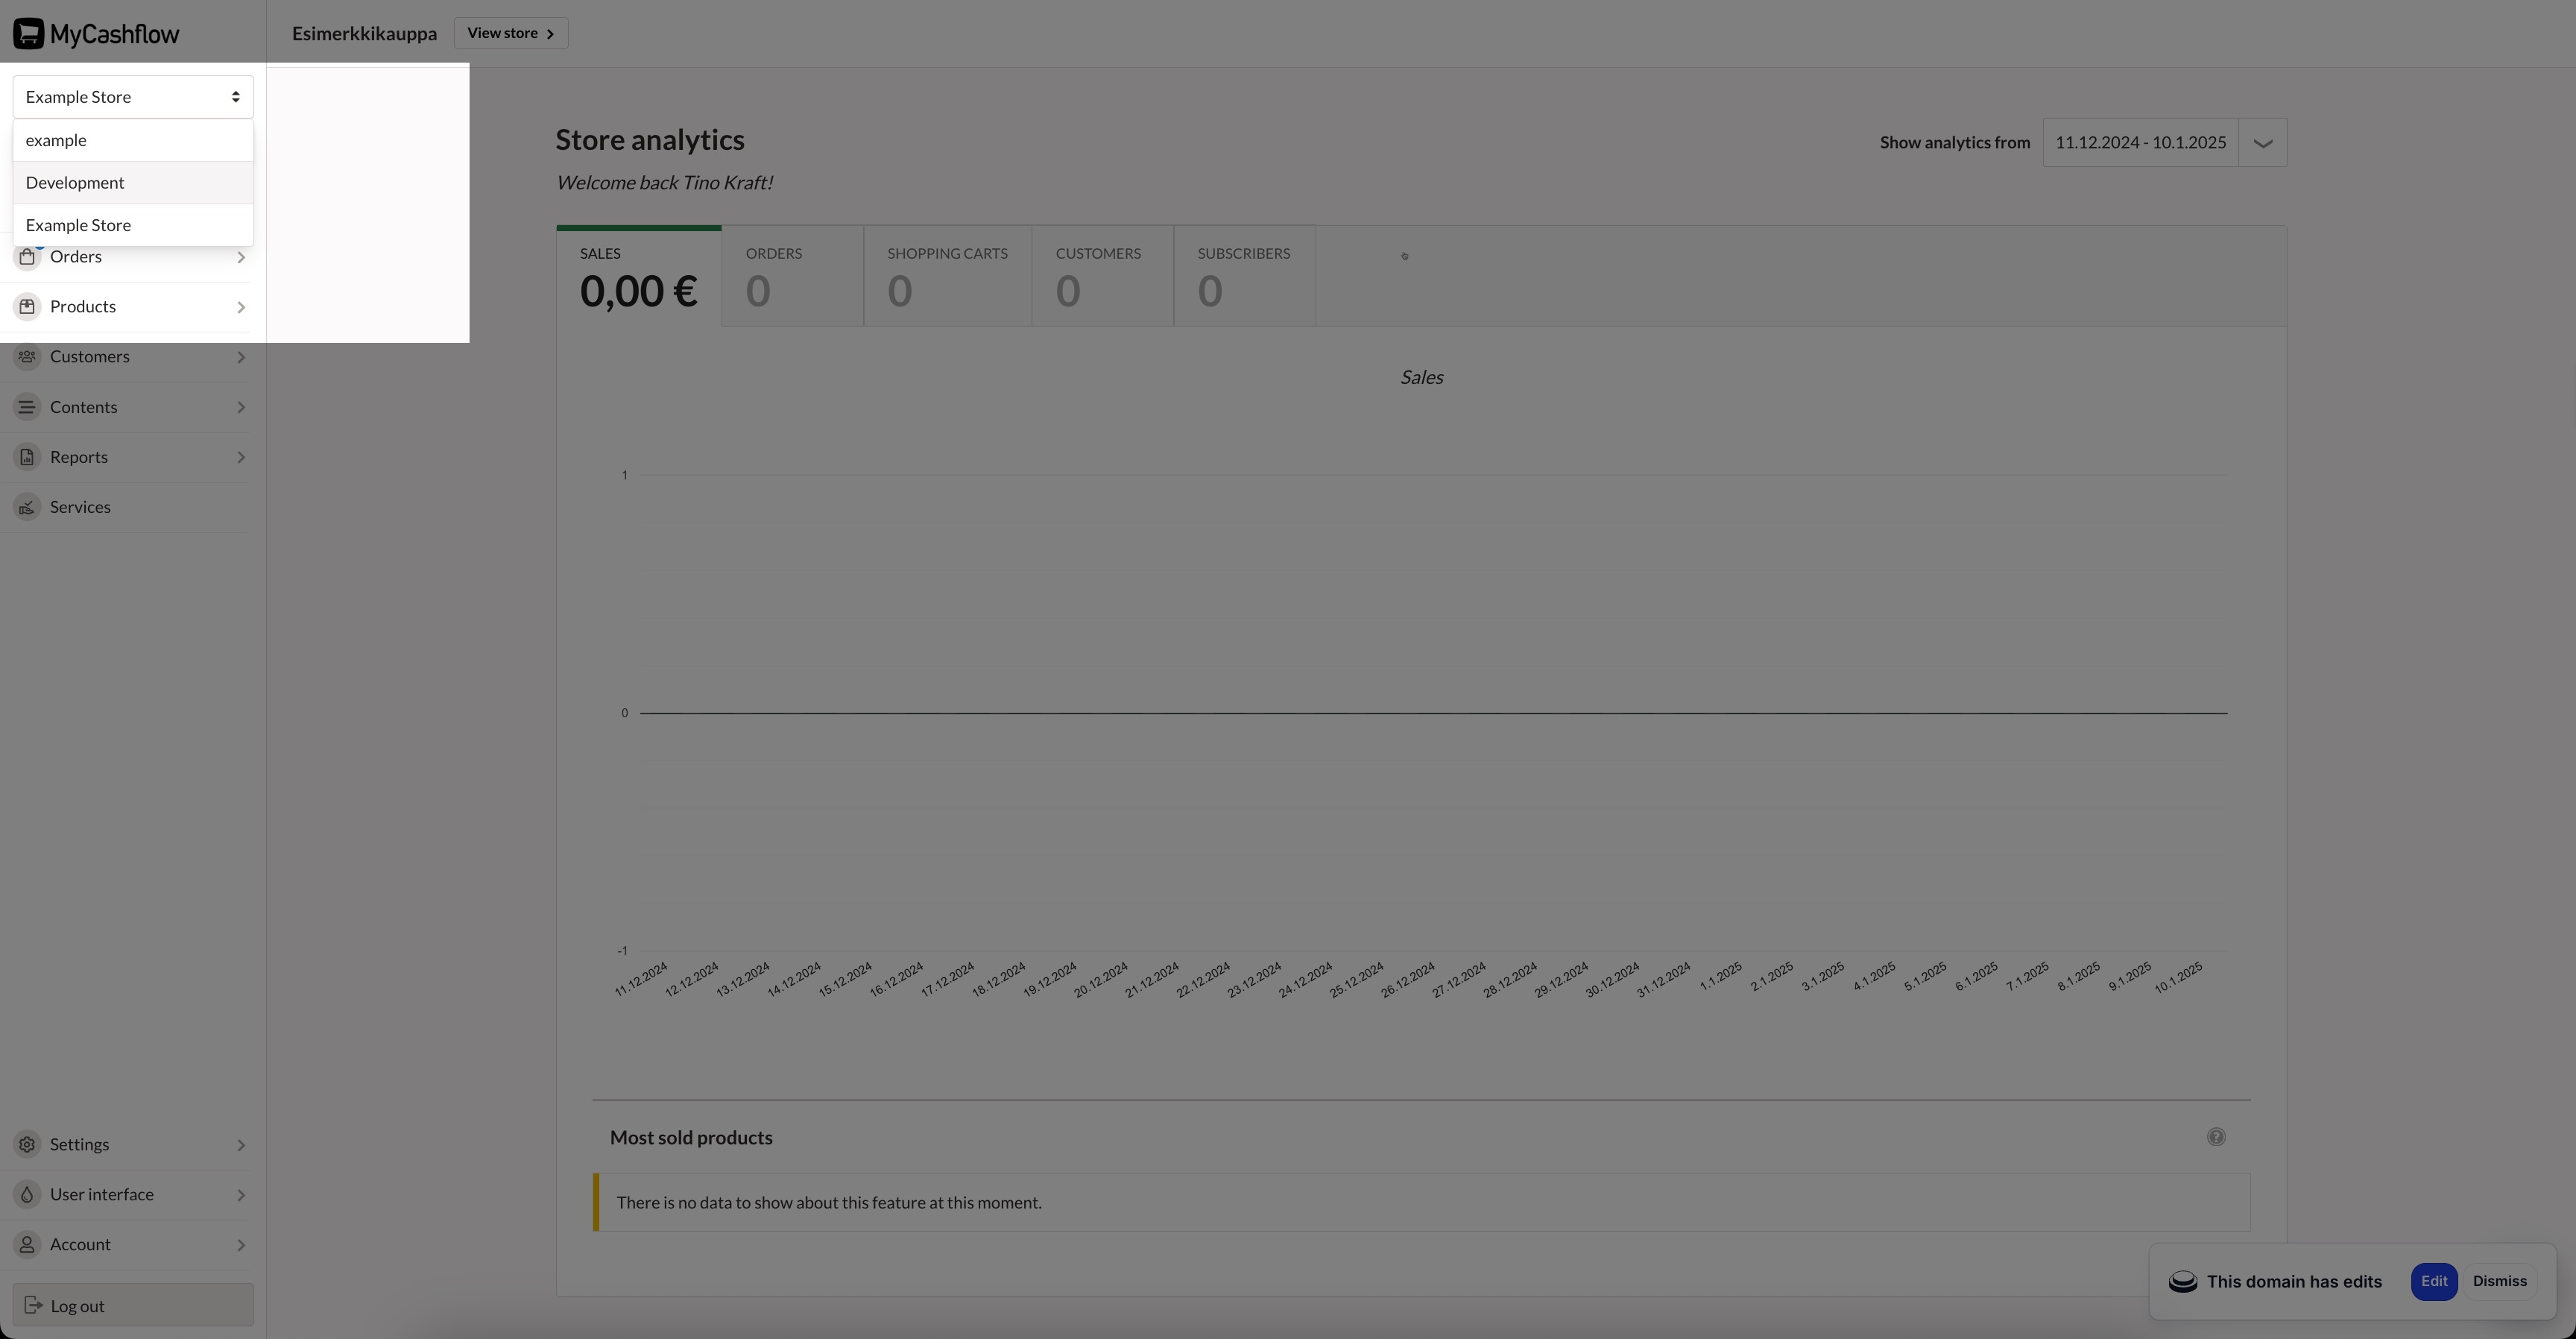
- Press the button in the upper right corner .
The function activates the theme you selected in the online store.
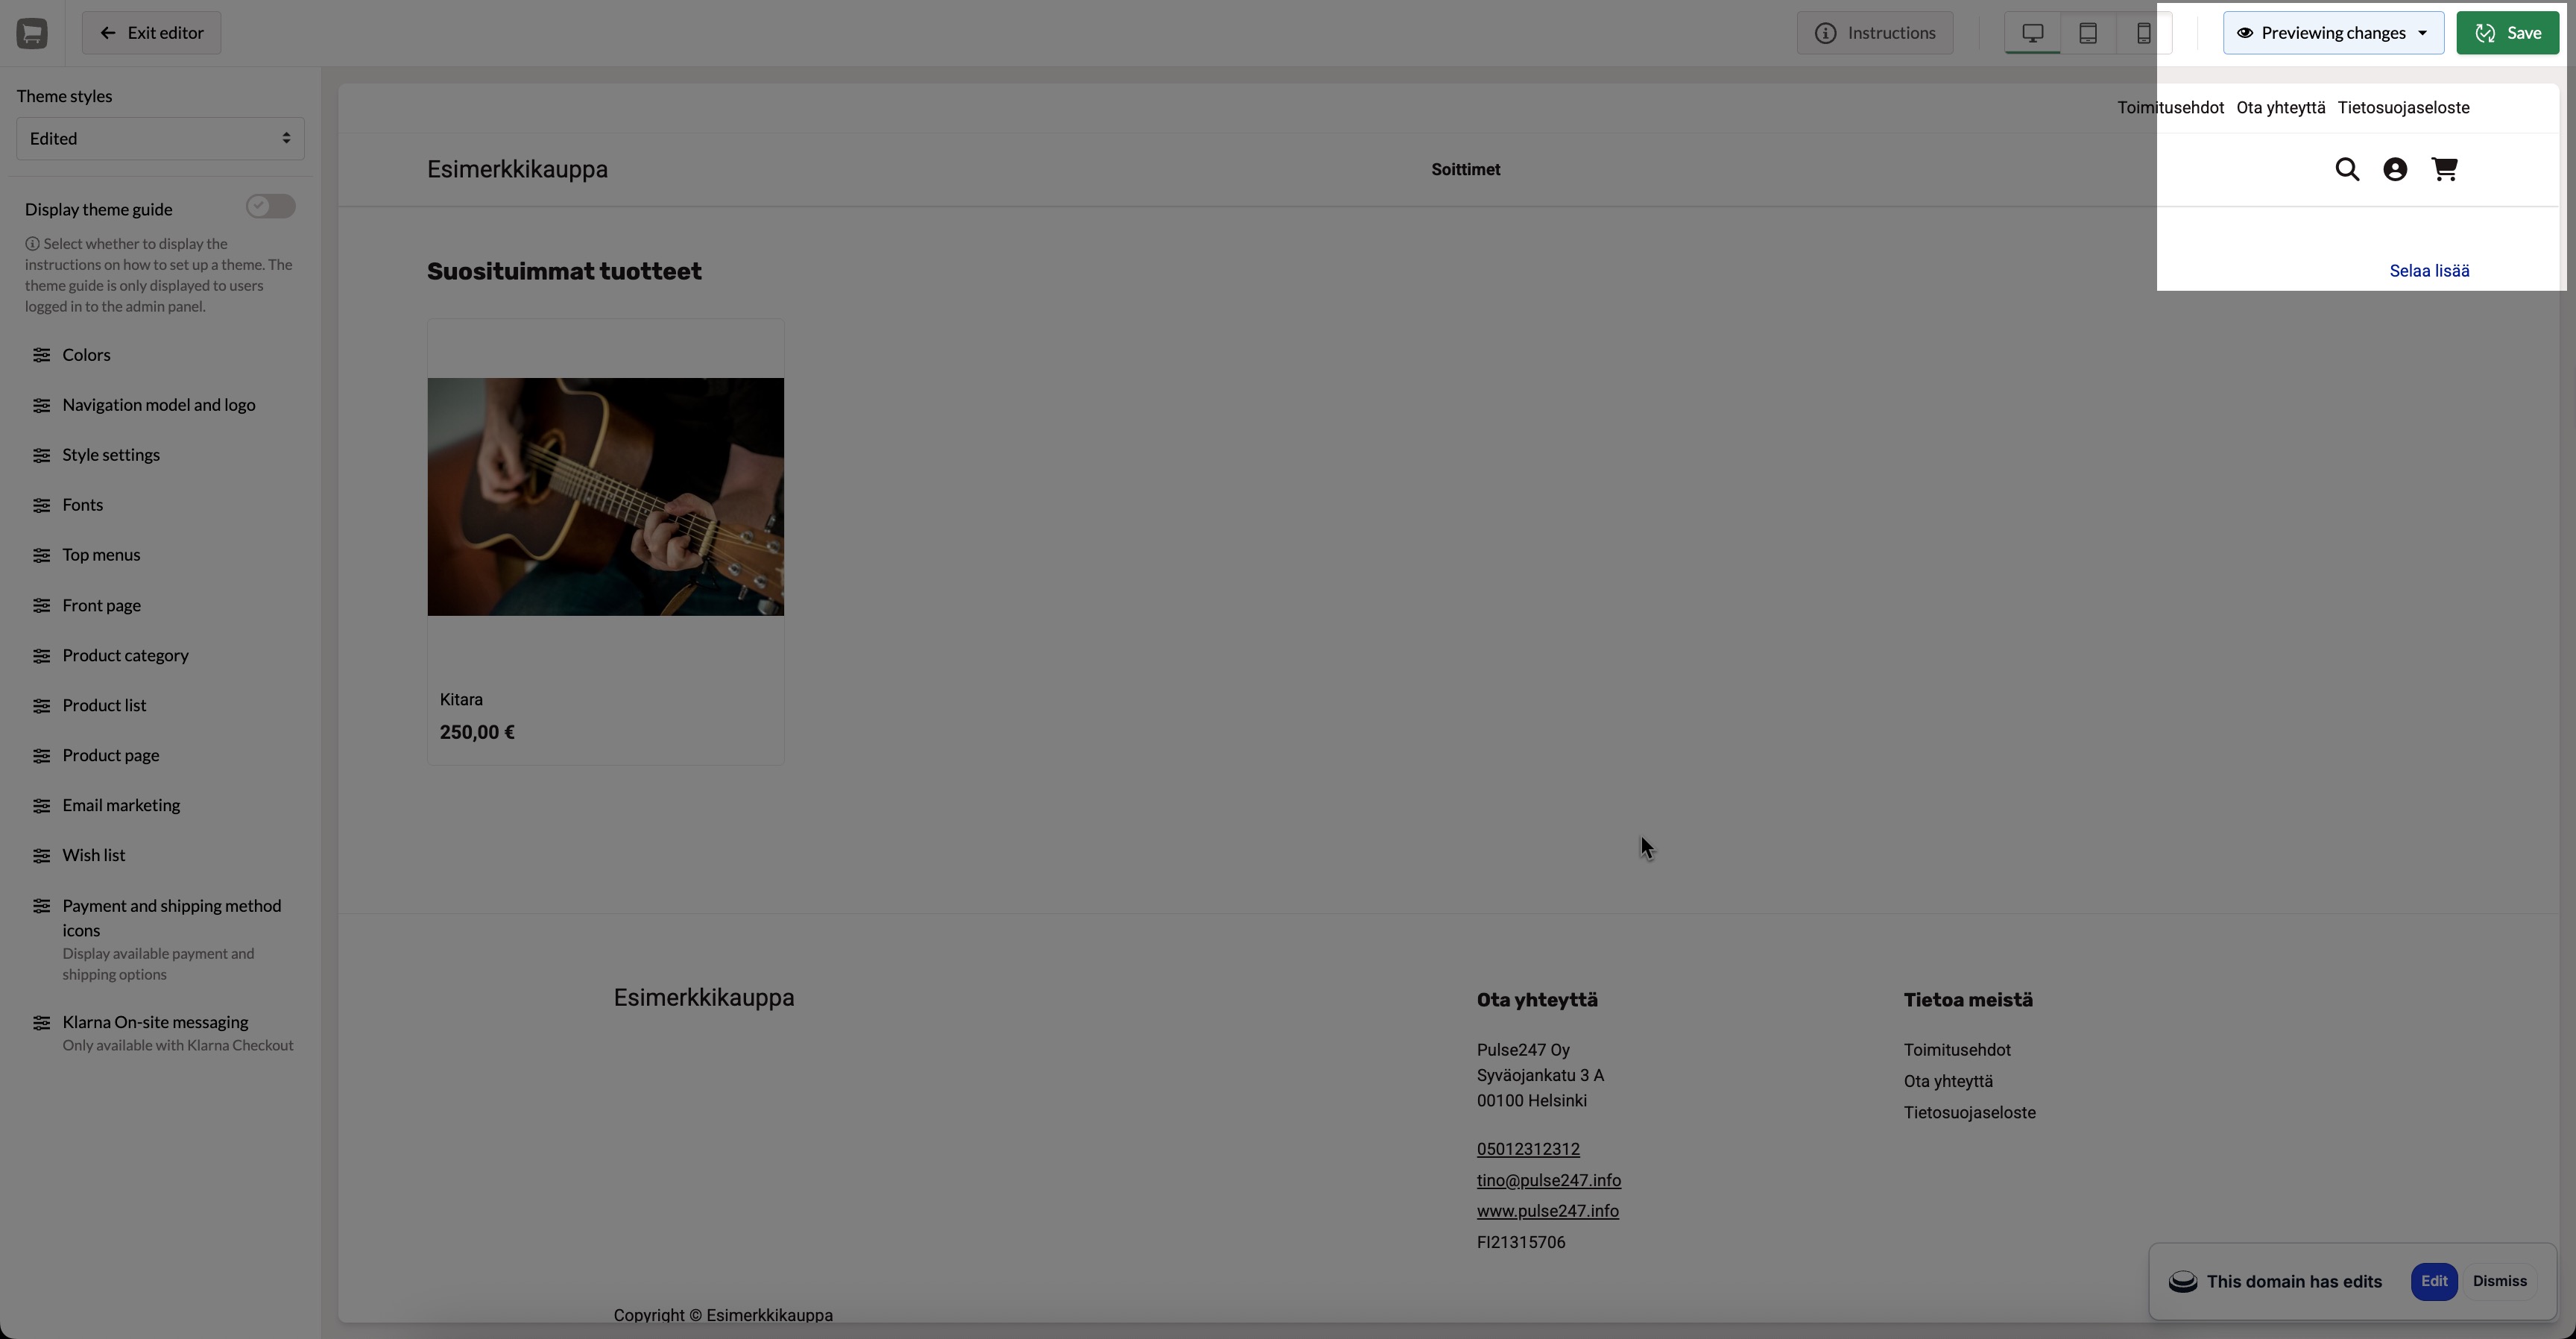
Now that the theme is in use in the online store, see below for instructions on how to start editing the theme.
3/4: Editing the theme
Once you have selected the pre-made theme you want to use, you can start customizing it:
You are now ready to use the theme editor, which allows you to customize the installed pre-made theme.
In the left sidebar of the editor, you will find the available theme settings.
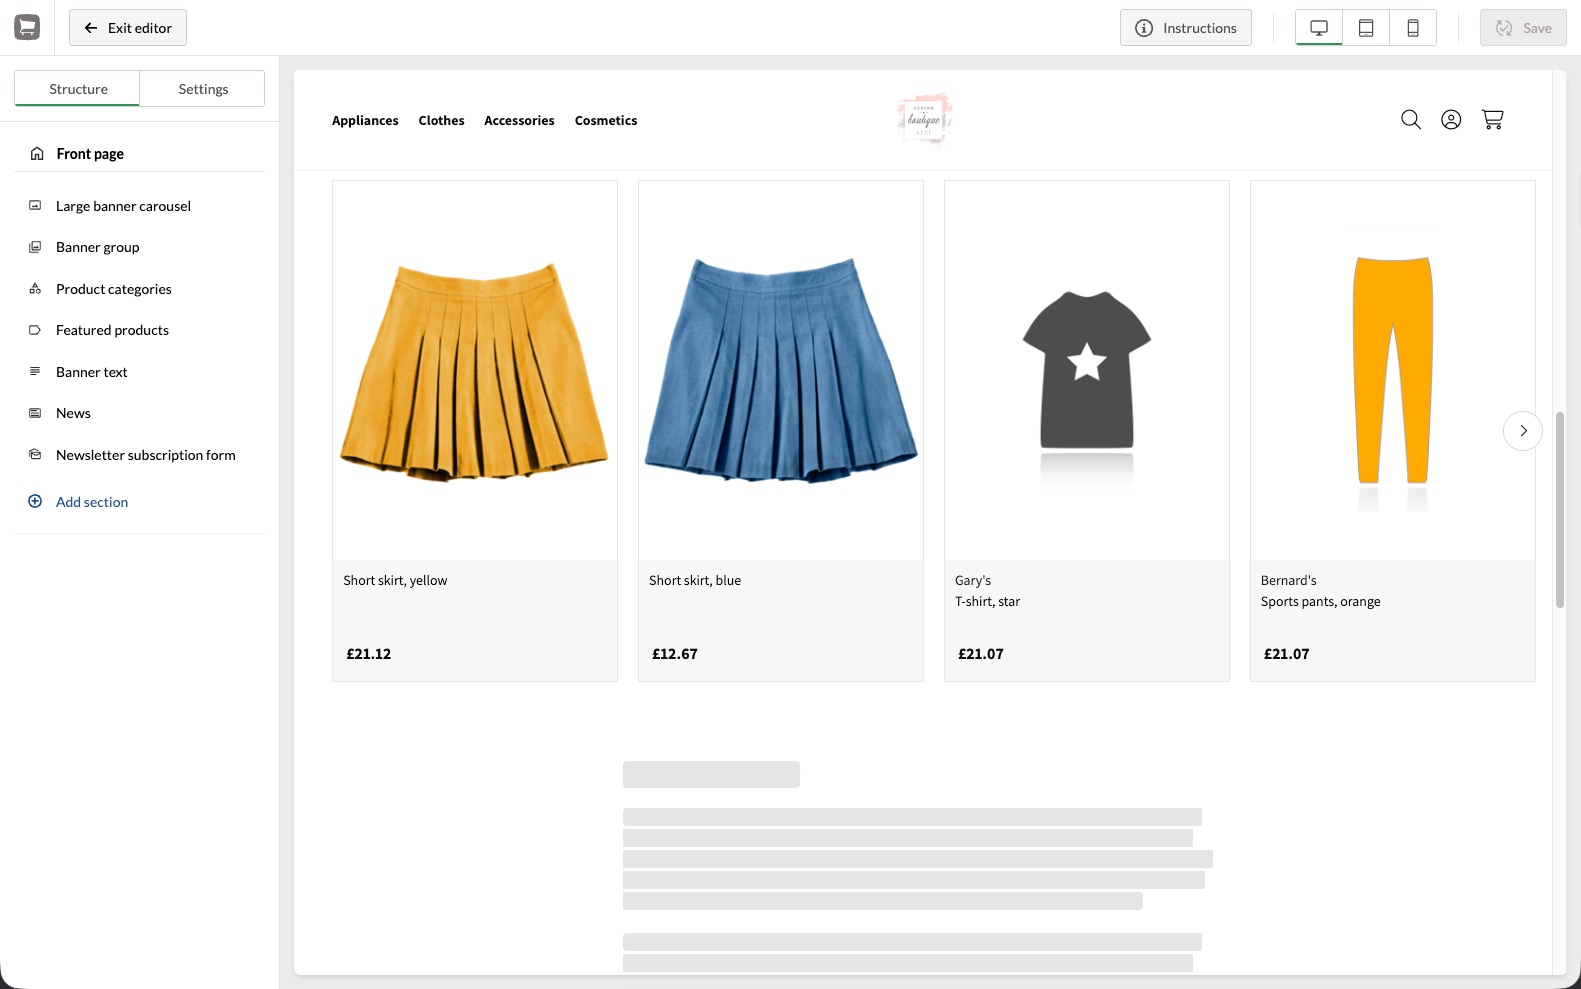
The theme editor automatically saves all the changes you make as drafts, which are not directly visible to the visitors of the online store. The changes will remain in memory even if you temporarily exit the theme editor.
The button in the upper right corner makes the changes public. It is possible to modify all theme settings even after publishing.
With the theme editor, you can customize the appearance of your online store in many ways. Familiarize yourself with the examples below, which you can use to customize the pre-made theme to suit your online store.
4/4: Publishing the theme
Once you have developed the theme in the hidden development version, you can publish the changes by copying the theme settings to a public version.
The changes you made are now public in the online store.
Configuring the navigation
From the Navigation model section of the theme editor, you can select the type of product category menu:
- Top navigation: The product category menu is located as a horizontal bar in the header. This works best when there are so few main-level product categories in the store that they fit on one row in desktop size.
There are a few variations available for the top navigation, which slightly alter the layout and content of the navigation bar.
- Side navigation: The product category menu is located in the left sidebar in desktop size. This is often the most suitable for online stores with a large number of product categories.
In the Top menus section of the editor, you can define whether it is visible in the site's header.
- language menu (if the online store has multiple language versions)
- currency menu (if the Currency Converter extension is installed in the online store)
- content page menu (content pages are visible in any case in the website footer).
Editing the homepage
The homepage of the online store is the top-level product category of the store (product categories were discussed in the chapter 2 of the quick guide). This means that you can edit the homepage content through the admin panel's product category form.
The layout of the front page is defined in the theme editor, where you can add the following elements to the front page using the settings in the Front page section:
- A banner carousel that displays image banners for the customer to browse at the top of the homepage. You can also set the banners to change automatically every few seconds.
See below for instructions on using banners.
- Front page introduction text and product category image.
- Lists of products and/or product categories to be featured.
You can mark product categories and products as featured in the admin panel on their management forms (see quick guide Chapter 2) by using the Featured product/category option.
- List of the most popular (i.e., best-selling) products in the online store.
- List of the latest products in the online store.
Editing fonts
In the Fonts section of the theme editor, you can select the font and text size for headings and body text. A predetermined list of common font families from the Google Fonts service is available for selection.
Try different fonts and publish the changes once you have found good settings.
It is often good to choose different but compatible fonts for the headline and body text.
Also pay attention to the size of the text: choose a font size that is large enough to be easy to read, but does not take up unnecessary space on the page.
Editing colors
In the theme editor's Colors menu, you can set the accent and background colors for different elements of the online store.
The accent color determines, among other things, the color of buttons, the notification bar, and the footer.
The text color is automatically determined based on the accent or background color.
E.g. The text on buttons is black if the highlight color is light, and conversely, the text is white if the highlight color is dark.
Default theme responsiveness
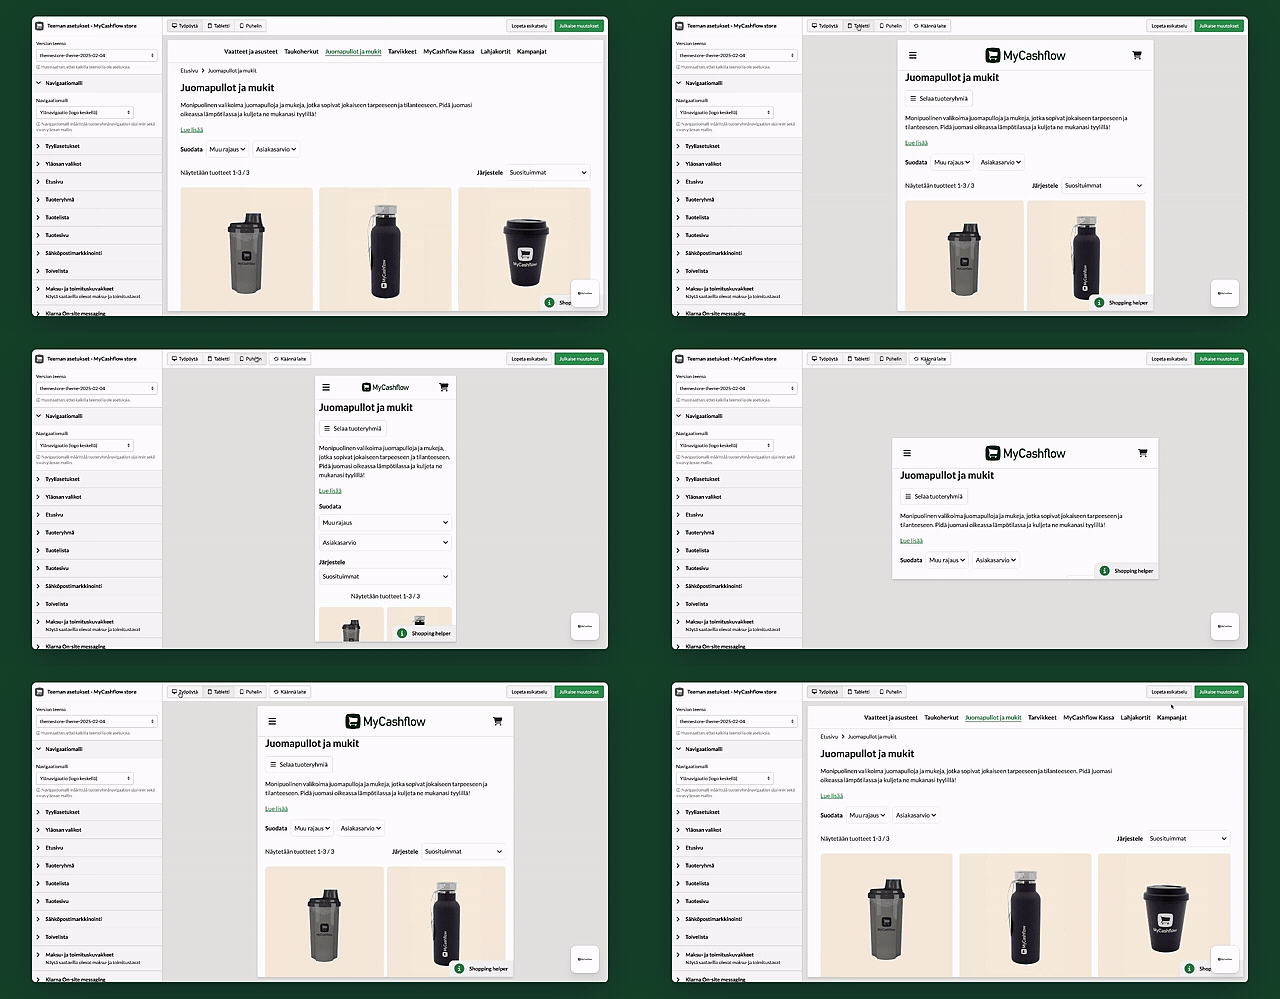
The default theme is optimized to work on both mobile and desktop devices. The layout automatically adapts to the available space. For example, navigation moves to a hamburger menu, and the number of products displayed side by side on product lists changes.
You can test responsiveness with the device options in the theme editor's top bar.
Additional information
This chapter of the quick guide covered the basics of managing the store's appearance. The default theme of MyCashflow offers many other customization options, which you can explore in more detail in the default theme user guide.
