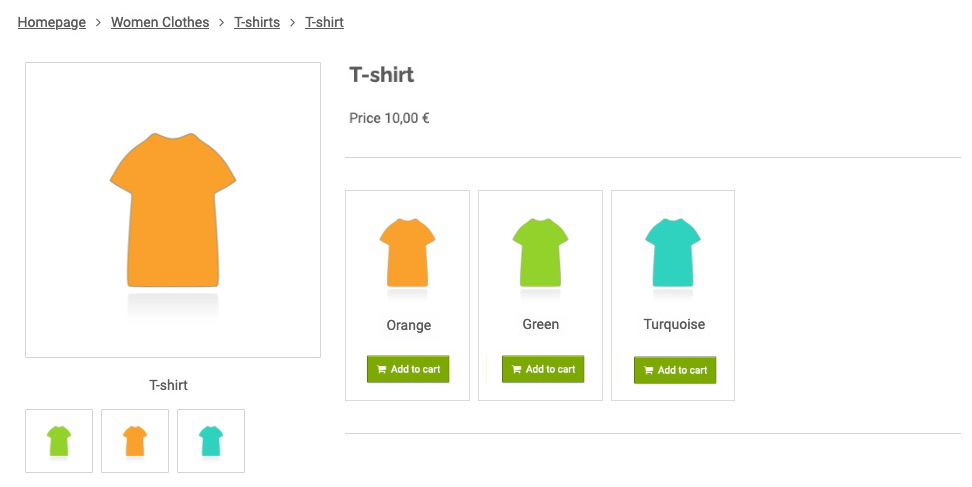
Here you will find information about the product variation tools included in MyCashflow's theme system and examples of different theme implementations.
{ProductBuy} tag that prints the purchase form, it is also possible to implement additional variation-related features on the product page.Implementing variation images on product pages
Images can be attached to variations in two different ways, and there are three tools that make it possible to implement them in a theme:
- The variation image tool on the product card: on the admin panel's product card, you can select an image for a variation, which calls for using variation images' Interface tags in the theme.
- The product image caption that matches the variation name: you can also attach a product image to a variation by using the variation name as the caption of the image.
MyCashflow's default theme supports both of the aforementioned methods.
Theme support for the product card's variation image tool
If your online store uses variation images attached to variations via the product card's variation image tool, you can implement them on the product page.
The example below illustrates how to implement variation images on the product page (themes/shop/THEME/product.html) by using variations' Interface tags:
{ProductVariations(
	before: '<div>',
	after: '</div>',
	helper: {{
		<a href="{ProductUrl}?variation_id={VariationID}">
			{VariationImage(link: false)}
			<div>{VariationName}</div>
		</a>
	}}
)}
{ProductBuy}- The
{ProductVariations}tag is used to create a custom variation listing. By default, the tag does not output anything. Itshelperattribute specifies which variation information is to be displayed. - For each variation, a link to the product page is created by using the
{ProductURL}and{VariationID}tags.The final link is in the form /product/2?variation_id=3. The variation_id parameter included in the end part sets the variation selected by the customer as selected on the purchase form and in the product image gallery.
- Variations are represented by their images and names printed by using the
{VariationImage}and{VariationName}tags. - The purchase form is added after the list of variations by using the
{ProductBuy}tag. The variation selected by the customer from the above variation list is also displayed as selected on the purchase form.
Implementing a custom purchase form for product variations
Product variation selection is included in the default purchase form printed by the {ProductBuy} tag, but you can also implement a separate purchase form for product variations in the theme by using variations' Interface tags.
The customized purchase form doesn't support customizable products
The variation purchase form implemented according to the instructions in this section doesn't display on the product page product customizations, which can normally be applied to product variations.
If your products include customization options, implementing a custom purchase form isn't recommended.
Below you can see a sample implementation of the variation purchase form:
{ProductVariations(
	before: '<div',
	after: '</div>',
	helper: {{
		<div>
			<a href="{ProductUrl}?variation_id={VariationID}">
				{VariationImage(link: false)}
				<div>{VariationName}</div>
			</a>
			{ProductAddToCart(
				before: '<div>',
				after: '</div>'
			)}
		</div>
	}},
	or: {ProductBuy(variations: 'radio')}
)}- The
{ProductVariations}tag is used to create a custom variation listing. By default, the tag does not output anything. Itshelperattribute specifies which variation information is to be displayed. - Variation images are displayed on the list by using variation image tags (see a more detailed description of the variation image implementation).
- For each variation, a purchase button is displayed by using the
{ProductAddToCart}tag. - If a product doesn't have any variations, the regular purchase form is displayed via the list's
orattribute.
The example below illustrates how the purchase form can be implemented on the product page:


