In this chapter of our quick guide, we describe the settings that are defined when you set up MyCashflow.
If you don't define the settings presented in this chapter, you will most likely experience errors later, when you use the system.
In MyCashflow settings, you define important details that affect the use of the system. While opening an online store, you should do following:
- Define your store's contact information
- Define the email address for sending and receiving notifications
- Temporarily prevent visitors from entering the store
- Define your MyCashflow account's billing preferences
This article explains how to define these settings. You will be able to change them at any time.
Store's contact information and email
In the admin panel's top menu, go to . On this page, you can define the store's contact information, email and other important settings.
Define the store's settings in the following way:
- First, define your store's name.

- At the end, add your store's contact information.
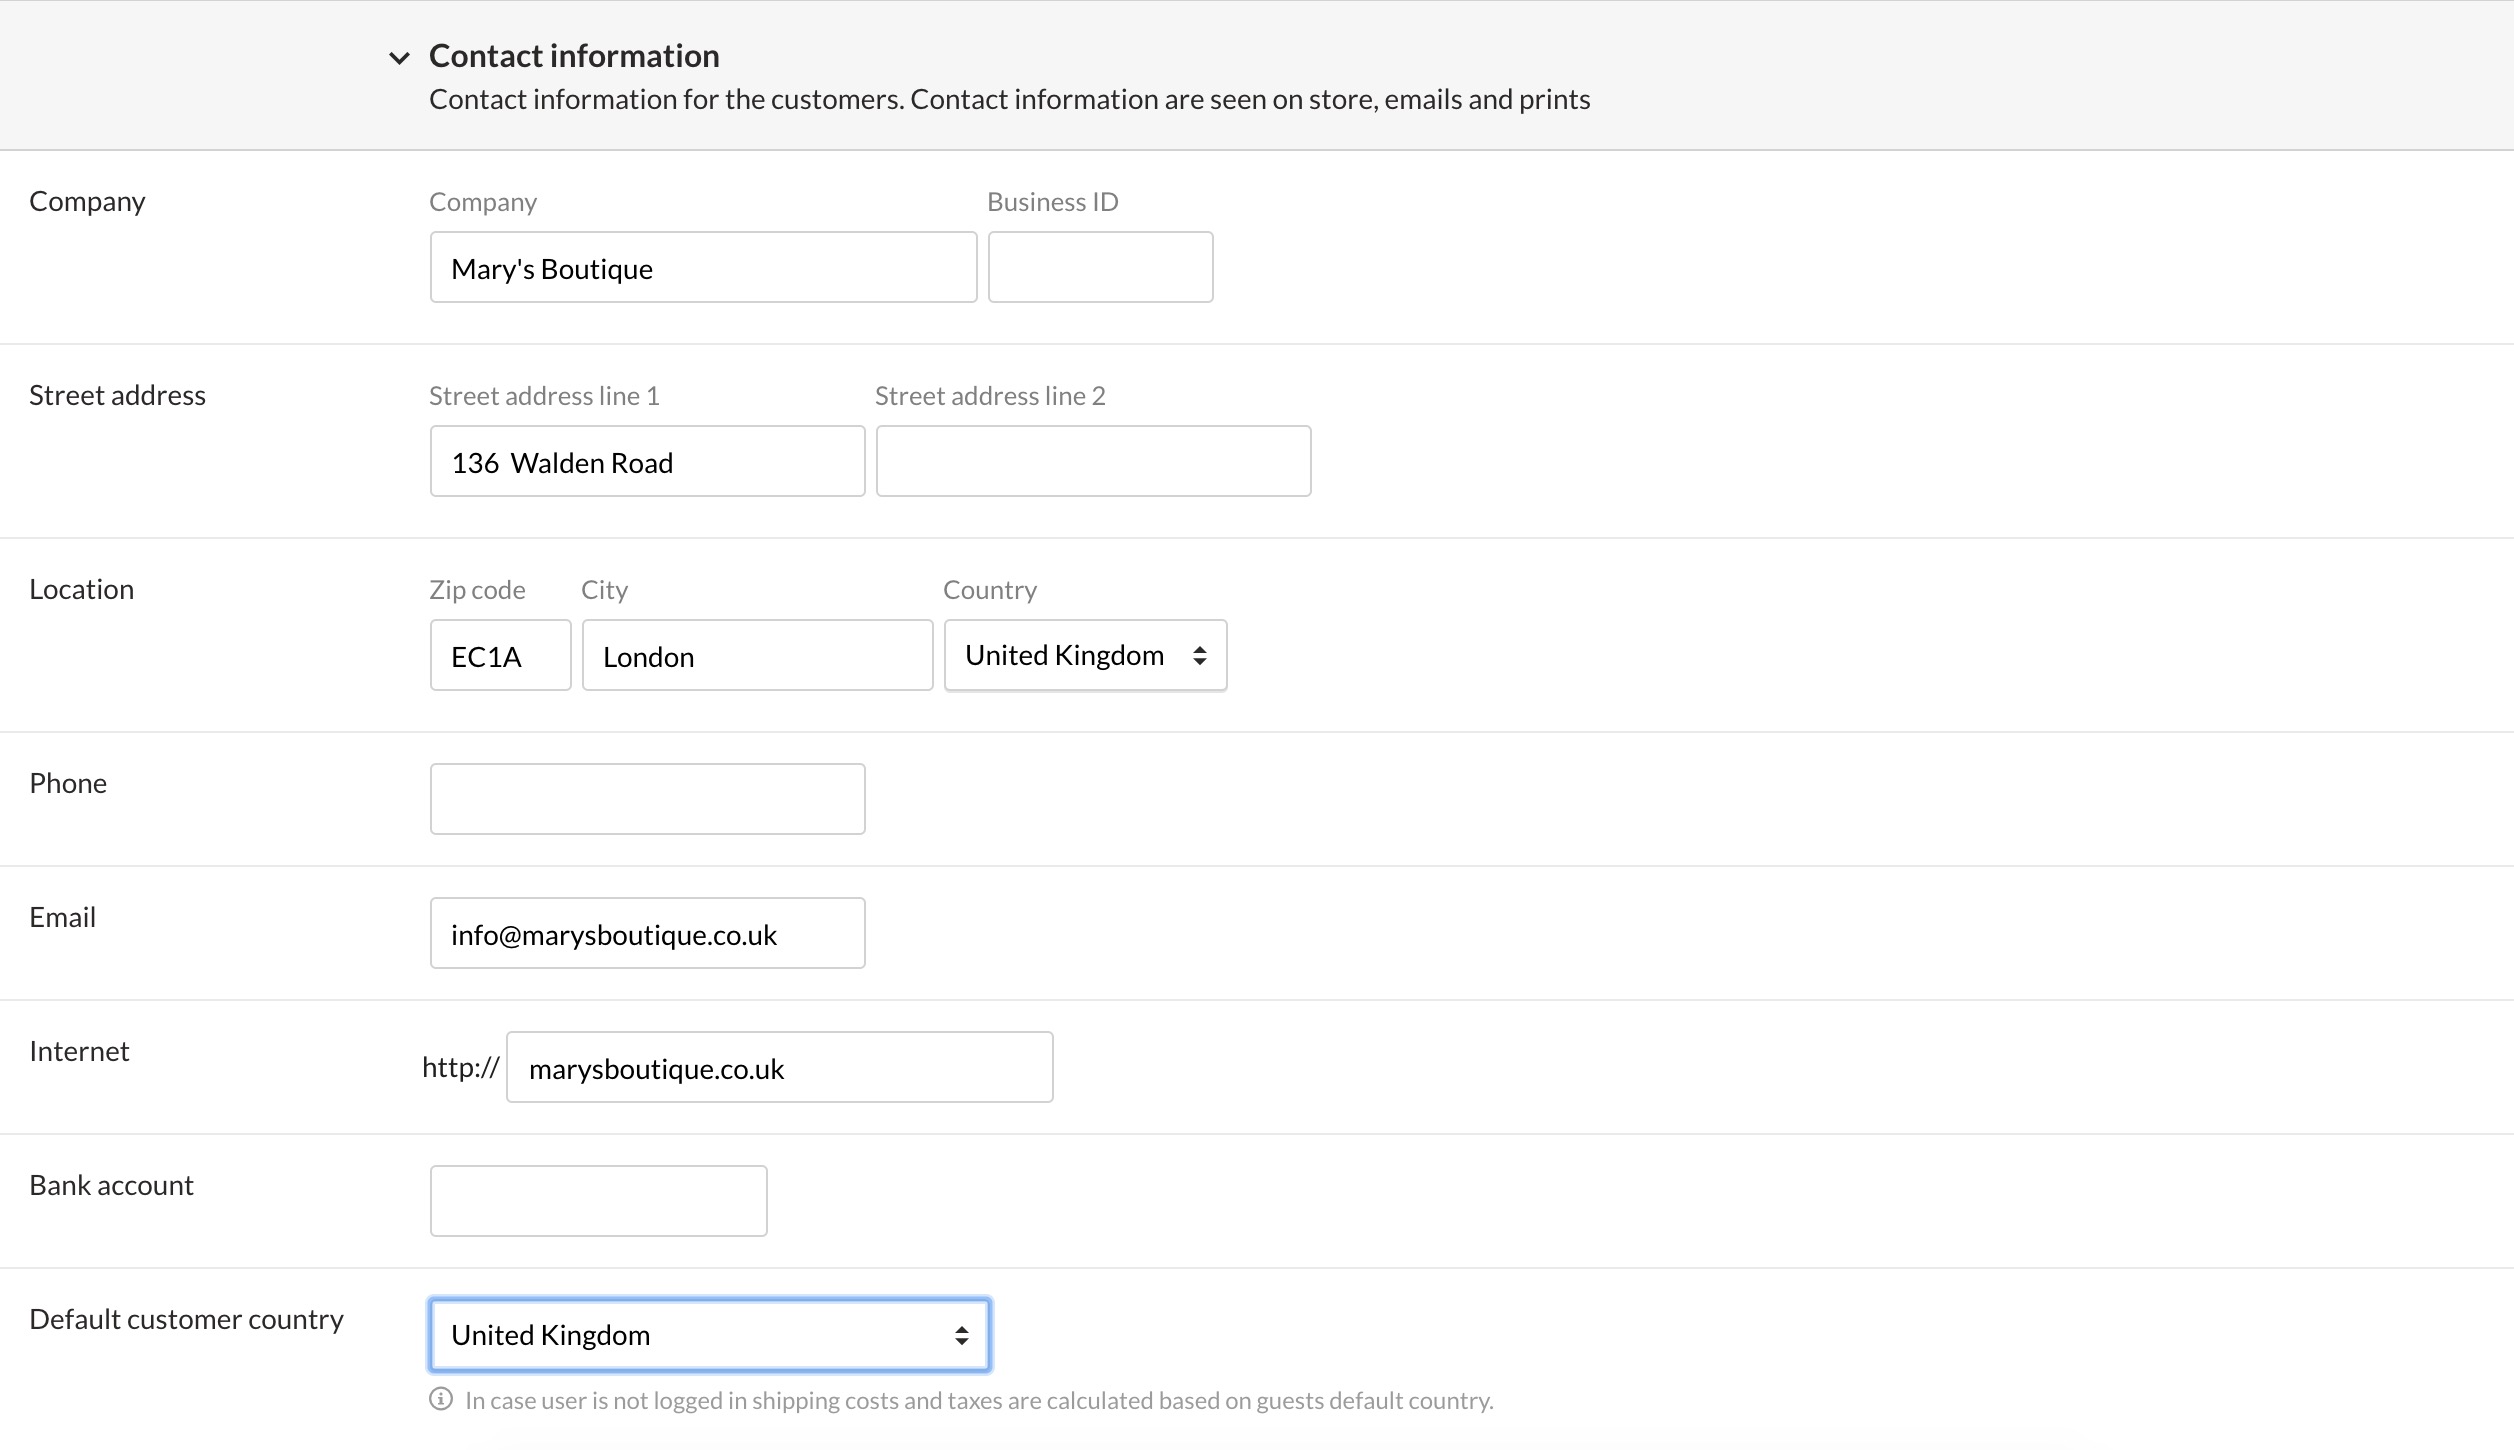
The email address you enter in the contact information does not send or receive notifications, so it does not have to be the same as the one you added earlier.
You can ignore other settings on this page at this time.On this page, you can also define shipping conditions, which are discussed in more detail in chapter 5. Defining shipping methods.
Your MyCashflow account's billing preferences
You can choose a billing period and method for paying your MyCashflow fees.
In the admin panel's top menu, go to Account. Here you can manage your MyCashflow account and plan. In the page overview, you can see the summary of your online store's plan and billing information.
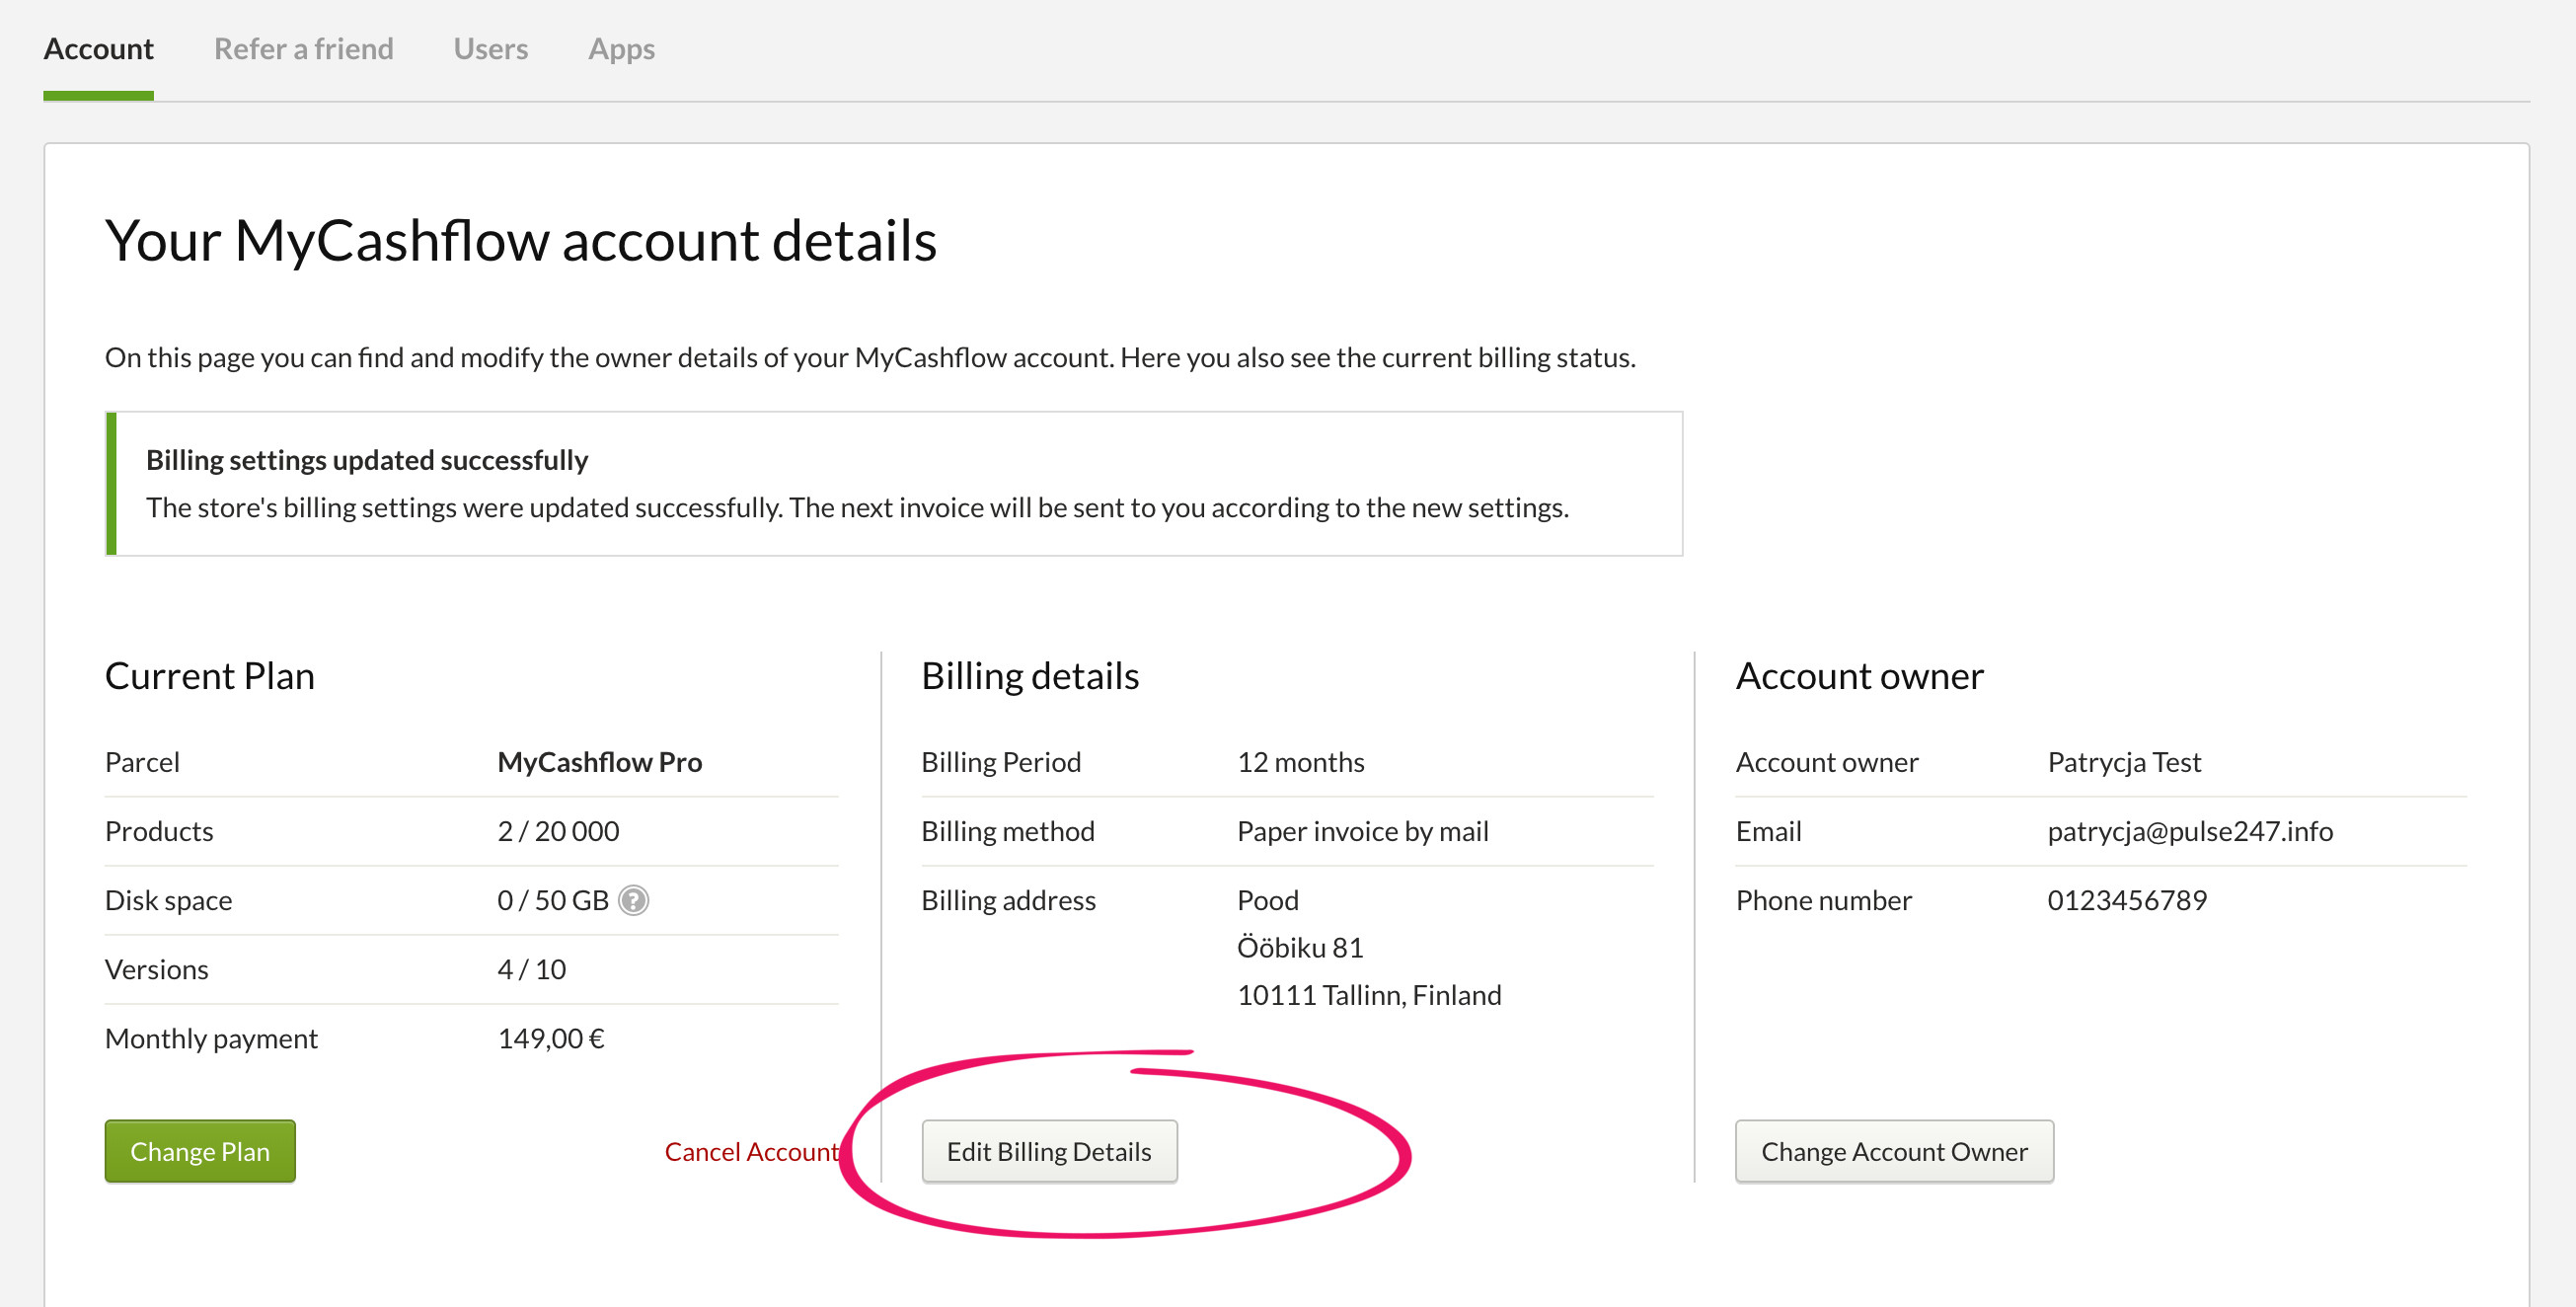
Press the button to add billing information. Enter your company's details, and choose the shipping method and billing period that suits you. Save the form.